Stay Connected

Thursday, May 12, 2022

Shopping and Meals for the Past Week

I haven't done any grocery shopping since April 23, unless you count the road trip candy we bought last week along the way to Arizona. In case you're interested, I bought some black licorice, 2 Snickers bars (King-size), and Reeses Peanut Butter Cups (4-pack) to share. As I mentioned earlier this week, my total for the sharing candy was under $15. I made these purchases as little surprises when I'd go in to pay for gas. We did all cash for gas to get the better prices, so I always went inside to pay. With the first candy purchase, my family was somewhat astonished. Mom doesn't usually make impulse purchases. I like to keep my family guessing about me.

A couple of meals on the road:

The first night away: hotdogs and buns that I grabbed from the freezer, with sliced cabbage drizzled with slaw dressing (packed separately so the cabbage wouldn't wilt), canned green beans, applesauce. Yes, we brought paper plates, small paper cups (for the applesauce), and plastic forks (we washed the forks each night to reuse). I also packed small packets of the condiments we had in the fridge -- ketchup, mustard, hot sauce.

Another night: bean and cheese burritos (frozen homemade refried beans, thawed in 2 days), carrot sticks, canned green beans, raisins, applesauce. I didn't shop for anything new for the trip, instead grabbing foods from our pantry, fridge, and freezer.

At one point we found ourselves driving along historic Route 66 for about a mile. Kinda fun. We decided that if we make this trip again, we'll stay in one of the fun motor inns along 66.


I came home to a full pantry and freezer. I had milk in the freezer and milk is a driving ingredient in my need for grocery shopping.

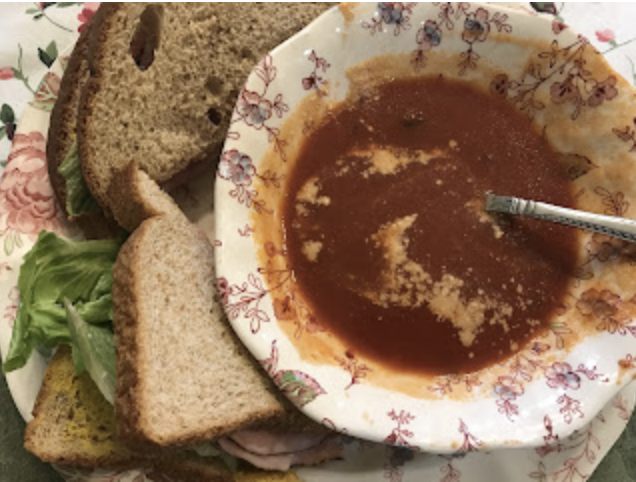
When we walked in the door last Sunday, the first thing I did after unloading the car was grab a partial gallon of milk, loaf of homemade bread, and a quart of cooked pinto beans from the freezer. After starting the laundry I made an easy soup, using the cooked pinto beans, a large can of Italian-seasoned diced tomatoes, some beef bouillon, and olive oil. I let it simmer until the beans began to fall apart and thicken the soup. I served bread and butter with this simple meal. 

Here are the rest of this past week's suppers:
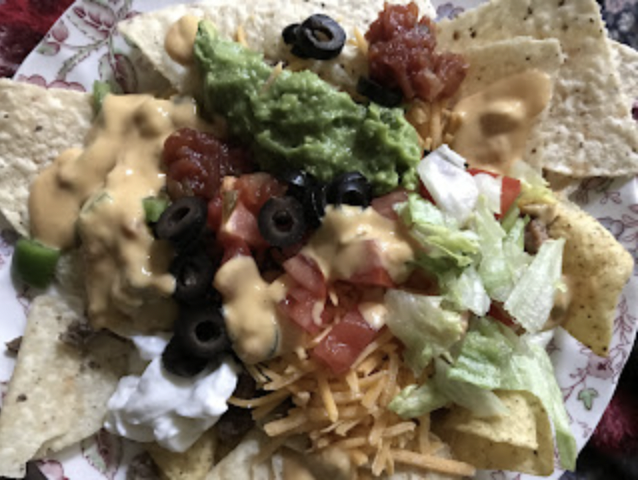

Monday

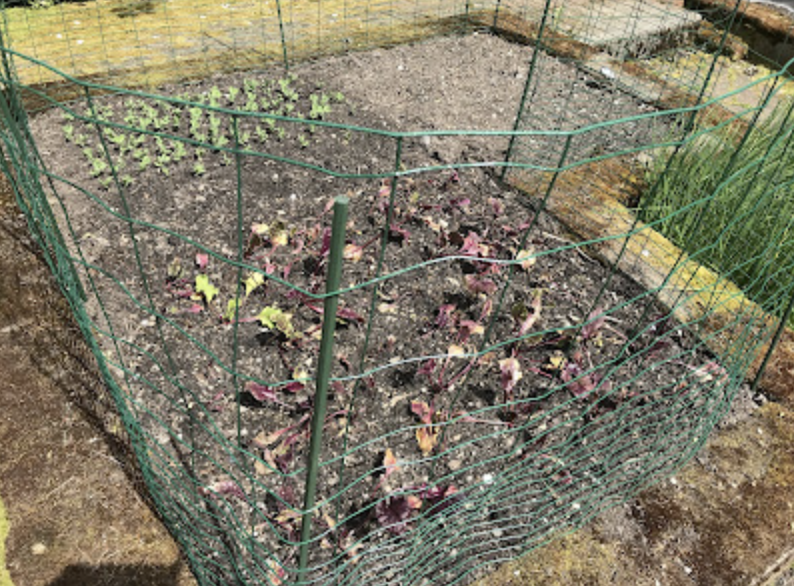
taco meat on cooked rice with refried beans and cheese, topped with salsa and bottom-of-the-bag tortilla chips, plus garden kale bulked up with frozen broccoli


Tuesday

chicken breast cooked in leftover pasta sauce (from my daughters' cooking in April) topped with the last slices of provolone cheese from my daughters' birthday picnic in the park in March, stuffed grape leaves, toast, and rhubarb sauce
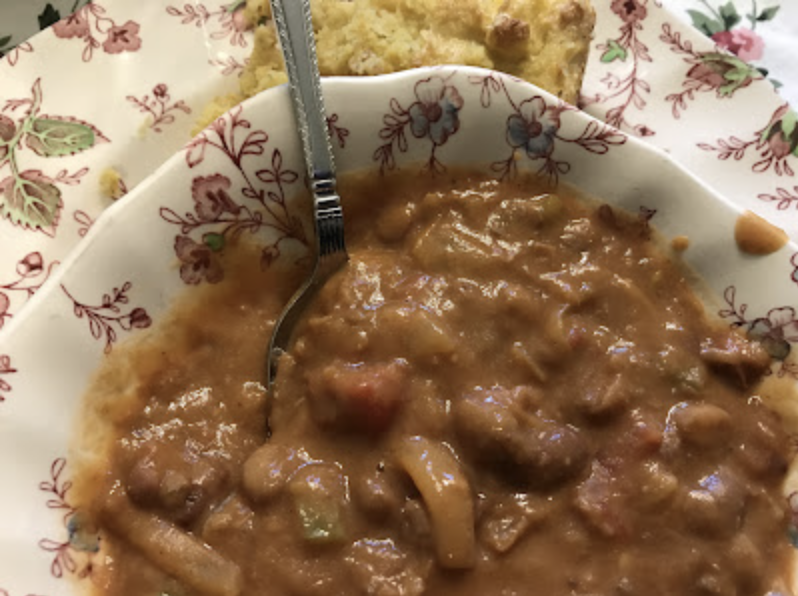

Wednesday

bean burger patties, canned carrots, radish green-peanut noodles


Thursday

eggs, breakfast sausage, canned pineapple chunks, colcannon (using radish greens instead of kale in the potatoes), canned green beans


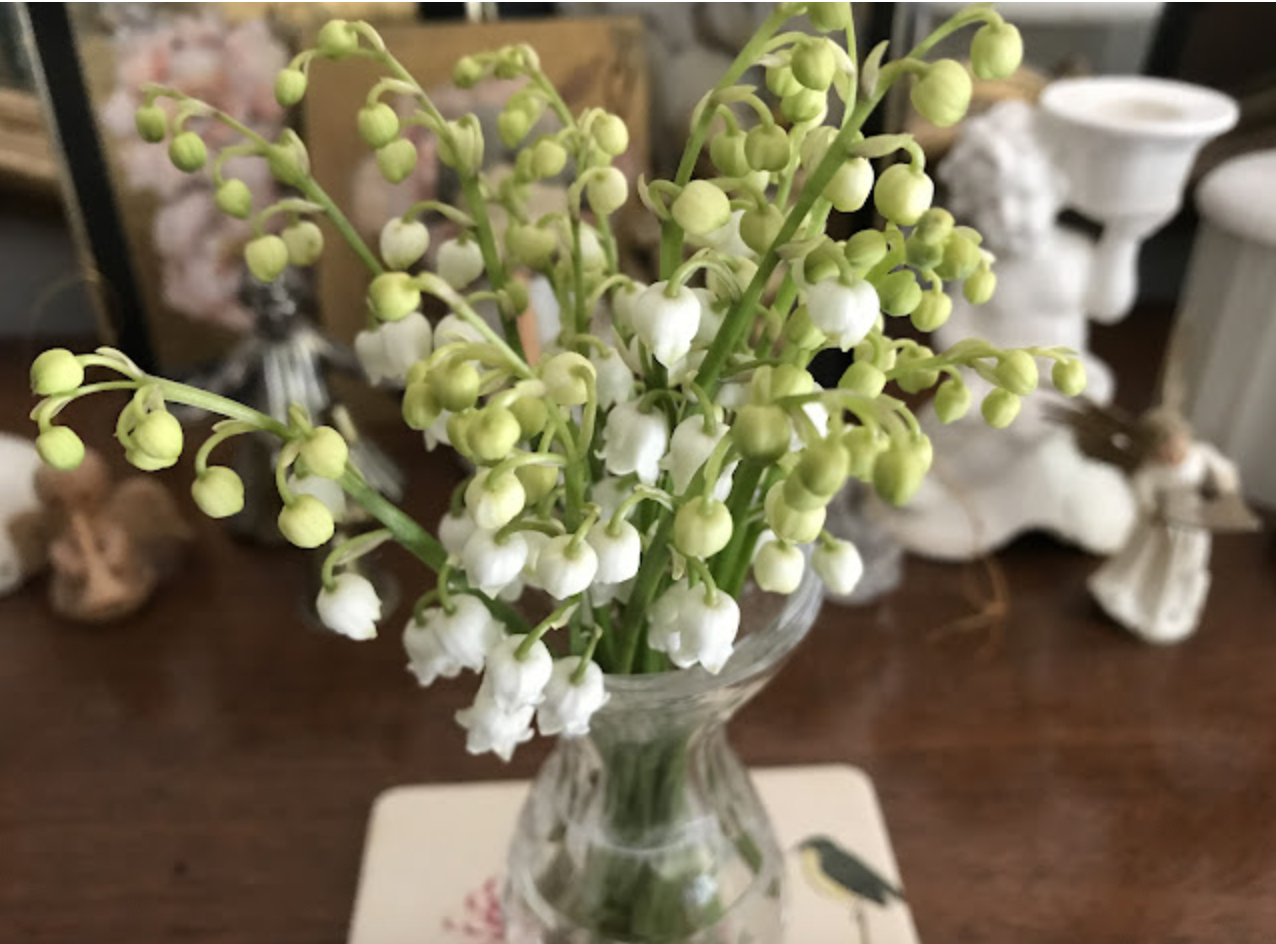
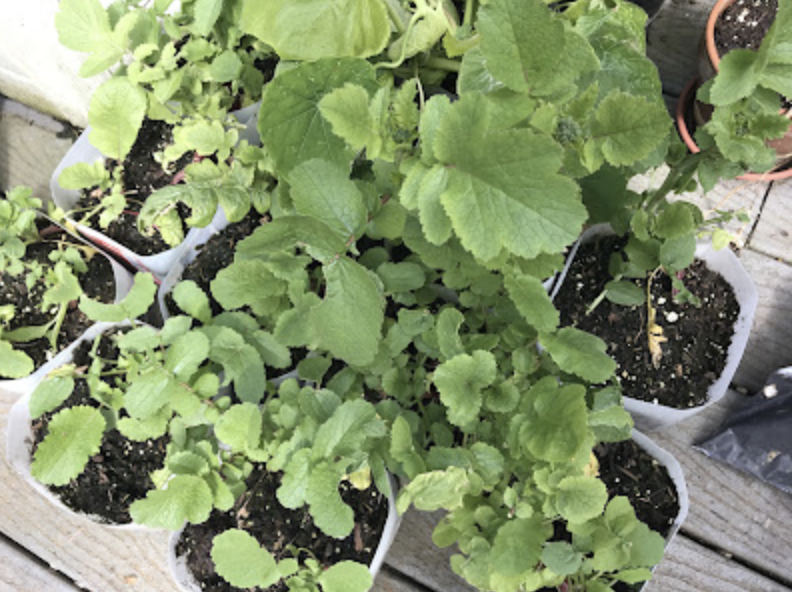
It rained a lot while we were gone. And we're still stuck in a wet pattern. I'm hoping this next week things turn around. But one of the blessings to a cool week is the Lilies of the Valley didn't all bloom at once during our week away. I picked a handful on Wednesday to enjoy indoors. Mmmm, so fragrant.

How was your week? What was on your menu? Any surprises at your grocery store this week?


Wednesday, May 11, 2022

Using the Green Leaves from a Bundle of Radishes, Grocery Store or Home-Grown

Do you grow radishes? Do you buy radishes with the greens still on? Those greens, even if they're semi-wilted, can be used in meals. No sense throwing them out.


You've read about me using the tender and young radish greens to add texture and zing to salads. But those mature ones (like on bundles of radishes from the store) are edible, too -- cooked and added to sides and main dishes. The trick is to blanch and puree them, then moderate the bitterness with other ingredients. My favorite extra ingredients to tame these greens include onions, garlic, bacon/sausage/ham (or their rendered fats), peanut butter, pinch sugar, and/or salt. In addition, tossing with cooked starchy foods, such as mashed potatoes, cooked pasta, or cooked rice, will also subdue that bitter bite. 


These are aging radish plants from this past winter that I grew indoors. I moved them outdoors when I needed my lights for starting seeds. The ones in these buckets never produced nice roots. But the mature greens still have food value.

I picked a bowl full to use in Wednesday's dinner. After washing, I microwaved the greens for a minute to quick steam them. I minced a clove of garlic, then pureed both greens and garlic together with some water, using my immersion blender.


I added a large spoonful of peanut butter to the greens-garlic puree in the skillet. I also added some chopped peanuts, onion powder, soy sauce, red pepper flakes and water enough to make a sauce, heating through over Med-Low. 


Meanwhile, I cooked pasta according to package directions. 


Once the pasta was cooked and drained, I tossed it with the radish green sauce. I adjusted for taste with another splash of soy sauce and this side dish was complete. 


I have enough radish greens growing in those buckets to make this dish one or two more times. As greens go, these might be too bitter on their own. But pureed, then combined with garlic and peanut butter (plus a couple other ingredients), not only are the greens palatable, but they made a dish that my family really enjoyed.

Just sharing in case you're like me, and you don't want to waste a single food right now.

Tuesday, May 10, 2022

Cheap Eats: Rice-Stuffed (Edible) Leaves

We all know that rice is a cheap food. The trick is to vary how it's served to both satisfy the palate and bring in additional nutrients. 

I like to use edible leaves as wrappers for a rice and herb mixture. The edible leaves are free to us, as are the herbs and seasonings. My only cost is the rice, salt, pepper, a bit of olive oil, and fuel for the stove. I use homemade chicken bone stock for the cooking liquid. But you could use water or chicken bouillon. In any case, this is a super economical and flavorful way to serve rice. If you have a small amount of cooked meat to use up, stuffed leaves are also a great way to stretch that small amount for more servings.

No grape leaves? Do you throw away the outer, not as crisp leaves from a head of cabbage? They are perfect candidates for stuffing.


Here I'm using some grape leaves that I froze at the end of last summer. I blanched them before freezing, so that step is taken care of for this meal. Other possibilities for leaves include fig leaves, large nasturtium leaves, sorrel, Swiss chard, and cabbage (especially the outer, sometimes wilted cabbage leaves). Squash blossoms from summer or winter squash plants or pumpkins are also candidates for stuffing. The leaves all require blanching before stuffing, so they roll up more easily. But the squash/pumpkin blossoms are flexible enough when fresh-picked. To blanch leaves, I wash, then microwave them briefly (10 seconds for the most tender leaves up to a minute for individual cabbage leaves) to soften.


If you can roll up a burrito, you can roll filled leaves. I first lay out all of the leaves on the kitchen counter. This ensures I have enough filling for each leaf. I then put a spoonful of the seasoned rice onto each leaf.


Beginning at the lower edge of a leaf, I fold up the bottom, fold in the sides, then roll up.


When all leaves are rolled, I place 2 or 3 large leaves on the bottom of a Dutch oven. 


These bottom leaves prevent sticking of the filled leaves.

Next, I place all the rolls onto the liner leaves.


I lay 2 or 3 large leaves on top of the rolls to help hold the rolls together. Some cooks place a small plate on top of these leaves, but I haven't found that to be necessary.

I pour the liquid gently over all, bring to a gentle simmer, cover and simmer on LOW for 1 hour to 1 hour 15 minutes (time will depend on your stove and the pot used). 

After 1 hour, if it looks like the rice isn't fully cooked, I add a couple of tablespoons of water and steam for 10-15 more minutes. This usually does the trick. To see if the rice is thoroughly cooked, I check an opening or tear on one of the leaves and pick out a single grain of rice with the tip of a knife and sample.

Leaving the lid on, I allow the cooked rolls to stand for one hour off the heat. This standing time helps the rolls solidify.


Stuffed leaves can be made ahead and reheated in the microwave. Leftovers are always gobbled up in my house.


Here's the seasoned rice recipe I use for stuffed grape leaves. The seasonings can be changed up according to taste and availability. For example, dried oregano can be subbed for the allspice and dill weed if stuffing cabbage or Swiss chard leaves.  A little cooked ground beef or Italian sausage can be added to this filling, then the cooked rice rolls can be topped with some marinara sauce. Sage (1 teaspoon rubbed or minced fresh) along with some broken up cooked breakfast sausage has nice flavor for squash blossoms.

For about 20 small grape leaves (serves 4):

filling (mix together ion a bowl)
1/2 cup uncooked white rice
1/2 teaspoon salt
dash black pepper
1 clove garlic, minced
1/4 teaspoon allspice
1 tablespoon minced dill weed
1 tablespoon minced parsley
1/4 cup minced onions, chives, shallots, or about 1/2 teaspoon onion powder
1 tablespoon olive oil

cooking liquid
1  1/4 cups chicken stock, water, or bouillon

Extra minced vegetables can be added to the rice filling, up to about 1/4 cup, minced. Up to 1/2 cup of finely chopped cooked meat can also be added.

Do you make stuffed leaves or blossoms? What do you like to use for a filling?


Monday, May 9, 2022

Road Trip


I was on the road all last week. I tried to keep up with my blog, but after a couple of days I just didn't have time. My family of 6 drove to Arizona to see my stepmom (my kids' grandma). Four of us took 3 days to drive there then 3 days back, while my son and daughter-in-law made the drive down in 2 days then 2 days back. Neither my husband nor I can see well enough for night driving on highways without streetlights, hence the 3 days each way. It was a good trip.

We did what we could to keep our costs down. For example, we chose to drive instead of fly. I booked places to stay that had free breakfasts plus a microwave and fridge in the room. In addition, we packed food for the rest of our meals on all traveling days. I brought bread, tortillas, crackers, pretzels, peanut butter, cheese, nuts, raisins, prunes, dried apples, dried cherries, canned vegetables, homemade refried beans, frozen hotdogs and buns, carrot sticks, sliced cabbage and slaw dressing, cookies, muffins, applesauce, juice, and instant coffee. There was a lot of repetition in our meals -- peanut butter sandwiches on either bread or crackers just about every day for lunch. Our dinners were only slightly more varied. one night we microwaved hotdogs to have with applesauce, Cole slaw, and canned green beans. Another night I made bean and cheese burritos in the microwave, served with carrot sticks, canned green beans, and dried fruit. And on yet another night, we used the last of the tortillas and some cheese to make quesadillas to serve with canned carrots, applesauce, and nuts. The final night we set out all of the remaining foods for us all to help ourselves to a snacky dinner. Whatever works, right? This trip was planned at the last minute, so I didn't have time to put together a more complex road trip menu. 

Every morning, before hitting the road, I made a large thermos of coffee and a smaller thermos of decaf. In addition, I handed out a 64-oz repurposed plastic juice bottle (the kind apple juice is packaged in) to each of the 4 of us filled with water. These became our personal water supply bottles for the drives. We each filled our own in the mornings before driving. 

As a result of packing so much food and drinks, we didn't need to buy any meals on the drive down or the drive back. We did buy a few candy items to share here and there when stopping for gas, spending about $15 total on candy. These small purchases perked us up when we needed it. By not spending much on food for the drives, we were able to splurge on a couple of meals with my stepmom. I guess that's how our frugality tends to work. We are careful in some areas so we can splurge in others.

We got home Sunday afternoon. I immediately started in on the laundry then grabbed a couple of items from the freezer to throw together a simple dinner -- a bean and canned tomato soup topped with cheese and homemade bread with butter. We were all so tried that this easy meal was all we really wanted before hitting the sack.

Being away from the vegetable garden for a week took its toll on some of my plants. I lost a couple, but am hopeful that the rest will recover. This morning I had to make up for lost gardening time. I leveled and raked the new pumpkin, corn, bean, and pepper patch. It's now ready and waiting for our weather to warm.  I pulled out the tail end of last fall's kale, plucking off the edible leaves to use in Monday's dinner, readying a spot for new seeds -- more kale, lettuce, and beets. My garden did have a happy surprise for me -- the carrot seeds sprouted while I was away.

Like I said, it was a good trip. But I'm happy to be home, sleeping in my own bed, and getting back to the work I have here on the old homestead.


Wednesday, May 4, 2022

Helping Myself Take Smaller Servings -- Better for My Health & Finances

This is an old dieter's trick, but it's also something I'm doing to save money on groceries. Serving myself portions in smaller containers.


I started this with coffee a while ago. I switched from the 12-oz mug on the left to the 8-oz cup on the right. I originally began this for health reasons. As it turns out, I'm also saving money. I drink far less coffee now that I'm using the smaller cup. Yes, I do get more refills in a day, but not enough to equal what I'd been drinking using a 12-oz mug. 


Another change for health reasons -- my morning yogurt. I'm lactose intolerant. Too much yogurt can be too much for me. I switched from a 6-oz custard cup (on the right) to a 4-oz canning container (on the left). I also now do this with pudding and ice cream. Smaller portions made simple. I'm eating slightly less, but not so much less that I feel deprived. 

Did you know that for many years in the USA a portion of ice cream was only a 1/2-cup or 4 ounces? It's been recently updated to reflect how much Americans actually consider a serving -- 2/3 cup. Meanwhile, commercial yogurt portions have been shrinking. Do you remember the days when individual portions of yogurt were sold in 8-oz containers? Then they went to 6 ounces, and most recently I've seen several 5-ounce containers of yogurt at the store. Using a 4-oz squat canning jar helps me portion my food better, whether it's ice cream, yogurt, pudding or anything else of which I should probably eat a smaller amount.


At lunch I've been choosing to use a salad plate instead of a dinner plate many days. This forces me to put less on my plate. So, if I'm having something like chips with soup or a sandwich, I automatically put fewer chips on my plate. I don't always use a salad plate, however. Sometimes I want to use the larger dinner plate so that I will eat more of something, like salad or fresh garden fruit or vegetables. But for the days that we are having some chips with lunch, we can get by with a smaller bag of chips by using smaller plates.

I'm doing something good for my health and saving money.


Tuesday, May 3, 2022

Recent Shopping

Nothing to do with shopping -- just my neighbor's spectacular front yard.
They chose to install a gorgeous garden instead of a traditional lawn.

This is not news to any of us at this point, but prices are almost everywhere. I've been shocked at times over some of these prices. Perhaps I've been out of the spending loop for a while, so I didn't realize some price increases had occurred before now. Or perhaps these increases are part of the recent inflation explosion. Here's my recent shopping experience.

On my husband's birthday I went to McDonald's to bring back a lunch just for him. My husband has always loved 1/4-pounders. So I got him a 1/4-pounder with cheese and a small order for French fries, no drink. My cost for this lunch was just under $9. This price for 1 sandwich and a small order of fries was shocking to me. I could have found a deal, but I was looking for his favorites. I will say, this made my husband very happy.

At Fred Meyer (Kroger affiliate) the price on a gallon of milk went up 10 cents per gallon in just one week. The price on milk there is now 80 cents more per gallon than it was 1 year ago. For my husband's and my joint birthday celebration, I wanted to pick up deli salads from Fred Meyer, so I didn't have as much cooking work to do for that gathering. Again I was shocked by the prices on various salads from the deli. The potato salad was the only reasonably-priced salad at $3.50/lb. (And I think that's too much for basically potatoes and mayo.) The rest of the deli salads were between $5 and $8 per pound, with the majority in the $7 and $8 range. I bought some of the potato salad then turned and shopped the produce section for easy to prepare produce items to use as sides. I bought grape tomatoes for $2.99 ($4.78/lb), strawberries for $2.97 ($1.49/lb), and 23-oz stir-fry kit that made 8 servings, marked down to $2.49 ($1.73/lb pre-cooked).

The exception to all these price increases was a sale on 80/20 ground beef, at $2.77/lb in 3-lb chubs. I bought the limit of 15 pounds. While this was a sale price and for the time being a one-off price event, I wanted to mention something that I've seen happen in the past (most recent not quite a decade ago) when livestock feed prices have gone way up. In this situation, ranchers have a tough choice to make: do they pay more for feed for their large animals and then hope to get a high price per head down the road, or do they decide it's better to shrink the herd now (sell of cattle to be butchered) and avoid the down the road possibilities? What I've seen happen is the second of the two scenarios, where ranchers sell off a lot of their cattle and the market sees a glut in beef, temporarily reducing the price per pound. Unfortunately, this is very temporary, as when ranchers sell off part of their herd to save on feed costs, it means that in several months there will be far less beef on the market, and prices will go way high, staying that way until feed prices come down again.. So, when you see a low price on beef (if your household has beef eaters), buy what you find and freeze it. Don't assume that beef prices will be immune to any of this inflation. Just a heads' up. Okay, back to the post.

My last price observation is the cost of gas. In my area, the price of a gallon of the cheapest unleaded is bumping the $5/gallon mark. Gas was $4.99 9/10 a gallon near me the other day. This is the highest we've ever seen gas in my area. Even in 2008 and 2009, the highest only hit $4.18/gallon.

What price increases have you noticed in the last week or so?

Monday, May 2, 2022

Dairy Queen Ice Cream Cake Vs. Homemade Ice Cream Cake

homemade ice cream cake before fudge topping

In my weekly meal post on Friday, I mentioned the ice cream cake that we had for our joint birthday celebration (husband and self). I know that Dairy Queen cakes are a popular item for many families. And they are quite good I think. However, as we were trying to keep our food costs down for our little party, and as I did have homemade ice cream waiting in the freezer, making our own ice cream cake seemed like a good use of our supplies and budget.

A note, our ice cream cake wasn't a replica of a DQ one. Dairy Queen cakes have a cake layer, some sort of mid-layer like cookie crumbs, an ice cream layer and frosting or whipped topping (I'm not sure). Our homemade cake had a cake layer bottom, ice cream layer top, and a hot fudge sauce topping served on each slice. I opted for a hot fudge topping instead of icing or whipped topping as it was easier and we had everything we needed on hand. Our homemade version was definitely a simplified ice cream cake. But simple meant it was more do-able.

To make this cake even less daunting to prepare, my steps were both spread out and helped along by other family members. I had made a chocolate fudge brownie ice cream in late February, using whipping cream, cocoa powder, sugar, vanilla, and a 1/4 batch of homemade brownies cut into dices. I kept this ice cream in the deep freeze for these weeks, waiting for our birthdays. My daughters baked the cake layer in a springform pan the day before our celebration. After taking the cake out of the pan to cool, I washed and dried the pan, readying it for assembling the ice cream cake. Later that day (when the single cake layer was cooled), I put the cake back into the springform pan and spread the ice cream (softened up in the microwave briefly) onto the cake. I wrapped the base of the spring form pan in plastic as the ice cream was leaking a bit. I popped the cake back into the deep freeze overnight. The next morning I made a hot fudge topping (sugar, water, cocoa powder, salt — bring to boil, stir in slurry of corn starch/water, bring back to boil, cook 2-3 minutes, stirring. Remove from heat, stir in half-cup of chocolate chips — improves the texture IMO). I scooped the topping into a pitcher, reheating it in the microwave just before pouring onto individual servings of ice cream cake. The whole cake was very do-able, perhaps not as "fancy" as a DQ cake, but do-able and economical. It was a help that my daughters baked the cake layer. However, if I had to do all of the cake on my own, I could have baked the cake layer a week or so in advance and kept it in the freezer until I was ready to assemble the cake.

A cost comparison

As far as being frugal, I estimated our homemade ice cream cake, including the hot fudge topping, cost between $3.50 and $4.00 and had 7-8 servings at about 50 cents per serving. A Dairy Queen cake runs about $35 and serves 8-10 at about $3.50 per serving. When I did the math on serving cost of the DQ cake I was shocked. I know these cakes are very popular. I just couldn't imagine paying that much per serving for a birthday cake.

The ice cream cake wow-ed my family. And truly, this was easier than baking a traditional frosted cake and having ice cream on the side.

Thursday, April 28, 2022

Cheap & Cheerful Suppers: One Last Week of Meals Prepared by My Daughters


Friday (my husband's birthday)

Nacho bar with tortilla chips, ground beef, refried beans, cheese, peppers, lettuce, tomatoes, olives, sour cream, nacho cheese sauce, guacamole, plus scratch spongecake with lemon glaze

Saturday cookout (joint birthday celebration with our son and daughter-in-law)
hot dogs, kielbasa, buns, potato salad, grape tomatoes, fresh strawberries, stir-fried vegetables and rice, blackberry lemonade, scratch ice cream cake


Sunday

ham and cheese sandwiches and tomato soup, leftover desserts


Monday

Pasta Tina (cannellini beans, garlic, olive oil, chicken soup base, pureed and served on cooked pasta), garden salad, first-of-the-season rhubarb sauce


Tuesday

chili (canned chili enhanced with canned tomatoes, additional cooked beans, bell pepper, and cheese), blueberry muffins (packaged mix)


Wednesday

meatball subs (frozen meatballs, canned pasta sauce, hot dog buns, topped with cheese then broiled), honey-mustard carrots, canned green beans


Thursday
homemade chive and garbanzo hummus, crackers, raw vegetables, Cole slaw


Since my husband and my birthdays are 6 days apart, we have our bigger celebration (with our son and daughter-in-law and exchange gifts) on a single day somewhere near both birthdays (sometimes between the two or sometimes much later). We chose the Saturday after my husband's birthday this year. I told my daughters I would handle most of the food for this day, as they've been doing so much this month. But I also promised myself I would choose the easy way out for everything. I bought a deli potato salad, fresh produce to serve plain, and a stir-fry "kit" that was marked down as the sides. I bought hot dog buns instead of making them. For the dessert, my daughters baked the cake portion of the ice cream cake and I used the ice cream I'd made in late February for the ice cream layer. This was more expensive than a usual dinner for us, but far cheaper than a restaurant meal. My thinking is almost always "use what you have." With a fire ring and plenty of wood, a cookout makes sense for us. I have a simple ice cream maker, so back in February when I had a glut of whipping cream, I made a batch of ice cream to be used for this birthday celebration.And I have the right kind of cake pan (a springform) for making an ice cream cake. I do try to use the tools we already have.

This past month has been such a treat to not have to cook dinners. I think I've learned a few tricks from my daughters. Will I return to my all-from-scratch cooking, or will I adopt some of their shortcuts? Time will tell. On Sunday, we return to our regular meal cooking schedule. All good things must end.

How were your meals this past week? Any stand-outs?

Wednesday, April 27, 2022

Follow-up on Collecting Flower Seeds from Purchased Annuals

Last week in the comments, Teresa was interested in photos of the seeds I'd saved from some annual flowers I'd purchased. I have to admit I goofed in that post and kept calling my marigolds, geraniums. My apologies. I've since fixed that mistake and now will provide some photos and information on petunia and marigold seed collecting. 

In spring of 2021 I bought some petunia and marigold plants for the pots around my house. I wanted to save some of the seeds from both of these plants. I had mentioned that I didn't know what I'd be looking for with the seeds when it was time to collect them, so I had to go online and search for images of what I'd be wanting.


The marigold seeds didn't really look like seeds to me. But it turns out that they are. 

photo source: 
https://www.thespruce.com/how-to-save-marigold-seeds-1388591

After the blooms had ended for the summer, I was left with what looked like dead flowers on the stems. I didn't cut the fading flowers off earlier because I wanted them to set seeds.  When I pulled these dead "blooms" apart, they broke into bunches of long narrow seeds. Each little narrow whole piece is a seed.

To plant the marigold seeds this spring, I covered them in a light layer of soil in a pot indoors (under lights), then kept them watered. The seeds took a couple of weeks to sprout. I don't remember exactly, but about 2 weeks. 


Within a month of sprouting, I had a mass of small plants growing in this one pot. 


Today, I now have blooms forming on several of the small plants. I'll be planting them out in pots in early May for blooms all summer.


With the petunia plants, again I wasn't sure what the seeds would look like, so I searched online for photos. 

photo source:
https://www.gardenstew.com/threads/any-one-else-have-polka-dot-petunias.25755/

Petunias set seed pods at the base of where the petals had been attached to each bloom. At first, the seed pod is just a green protrusion, growing right out of that part of the flower, getting larger with each passing week. 

photo source:
https://indiahomegardening.blogspot.com/2014/04/collecting-seeds-petunia.html

When the pods are ready to harvest, they look like small, pointed paper-like balls. Each ball contains dozens of incredibly tiny seeds. If you don't physically harvest these seeds, the pods will burst open on their own and spread seeds themselves. 

the outer husks that once held petunia seeds

As I was transplanting some of the petunias I'd grown with collected seeds, I came across some parts of exploded seed pods.


I also came across this little guy poking his head out from under the pot.

To plant petunia seeds, I began indoors and under lights in March. I sprayed the top of soil-filled containers with water then pressed the seeds gently into the soil. I didn't add any soil on top of the seeds. I kept the seeds and soil damp until the seeds germinated, then began a regular watering schedule. 


You can also begin petunias outdoors after danger of frost has passed by pressing the seeds into the soil and keeping watered. With my pot of new petunias, I also added some seeds to the top of the soil after transplanting the seedlings. I did this to ensure I have a mix of colors that I want for blooming. Later in the season I'll thin these new seedlings to the best 3 or 4 plants per pot. We're still in our rainy season, so I expect these seeds will stay damp long enough to germinate.

I hope this gave you the information and visuals you were hoping for, Teresa.

Tuesday, April 26, 2022

I'm Working With a New Garden Fencing Material


Last year I showed you a rudimentary rabbit fence we made from sticks and wire. This actually worked well to keep the rabbits and squirrels out of the strawberry beds. However, it was time-consuming to install. 

Pros to the stick fence: free and if you place the sticks close enough, a good barrier against small animals. If you have an abundant supply of small branches, this can be made on the spur of the moment -- no need to order supplies or visit the hardware store.

Cons to the stick fence: it's time consuming to break all of the sticks and poke them into the ground. I spent a couple of hours making just one fence.

Hard to see -- there is a fence of chicken wire around the near bed.

We also have 2 beds enclosed with chicken wire fencing. While this is very effective at keeping critters out of beds, it rusts.

Pros to chicken wire fence: very effective at keeping all of the small critters that do damage out of the bed. Chicken wire is thin and easy to bend to fit a bed. Compared to other fencing materials, chicken wire is fairly inexpensive.

Cons to chicken wire fencing: it rusts, as I said above. It can bend out of shape and not look as tidy.


I wanted something more lasting for garden bed fencing for the remaining beds, so I ordered some coated, heavier wire animal fencing (about 28 inches high) and plastic-coated stakes. I've surrounded 2 of our garden beds so far with these new supplies. It's a hard job for one person (I did one by myself), but more do-able with a partner (got help on this other one). The wire is stiff, which is hopefully a sign that it will be durable and lasting. But the wire fencing comes on a roll that does not want to unroll, hence the need for a partner. The spaces between wires are close together near ground level, meaning animals can't crawl through near the ground. The spaces get larger toward the top. In theory, one could r4each through these wider spaces to pick something. But I think it's just as easy to bend over the top of the fence, as it's not that tall, (but tall enough to keep most animals out). The fencing was mostly easy to cut with wire cutters to make my fencing to size with the bed. The top and bottom wires are thicker and more difficult to snip. I'm pleased with how it looks so far. We'll see how it holds up over the season.

Pros of the heavier wire critter fencing: it's very sturdy and is coated in plastic, so it will hopefully last a long while. While I prefer a "no fence" look, as far as garden fencing goes, this one is fairly attractive, at least it's tidy looking.

Cons of heavier wire fencing: it doesn't want to stay unrolled while working with it. You really need a second person to hold the fencing at one end while the first person unrolls and works the stakes in. It's also more expensive than chicken wire.


We're working harder at keeping the critters out of our vegetables and berries. It's so frustrating to plan on a harvest only to have half of it devoured by the animals. Hence more beds fenced in this season.


I also thought I'd show you what a water-permeable insect barrier cloth looks like. Unless you spray these plants, cabbage family vegetables are plagued with cabbage worms year after year. I can rub these small green worms off of kale and turnips, but they get into cabbages, Brussel sprouts, broccoli, and cauliflower. Right now I've got a piece of the fabric over the cabbage and Brussel sprout seedlings. Some folks use earth staples to hold this cloth in place. I've anchored the edges down with stones instead (I don't want to poke holes into it) and pleated the center of the cloth by folding it at the ends and placing stones over the folds. This will allow for growth of the plants for a few weeks. For the time being, insect cloth is keeping both the rabbits and cabbage moths off of these plants. This bed has a chicken wire fence that I'll put up after I redo the insect barrier cloth. As the plants grow, I'll need to adjust the fabric to fit taller plants, turning the lengths sideways and adding additional panels. If you're careful with insect cloth, it will last a few seasons. I've used these pieces on a few different patches over the last 2 years. This year I noticed a couple of small holes, but overall I think it will do an adequate job.


I'm also using the top 2/3 of plastic milk jugs to protect some plants from the bunnies. I saved these homemade cloches from last year's garden, so they were not only free, money-wise, but time-wise as well this year. Right now I have them over the celery transplants until I can get some fencing around this bed, hopefully in a couple of weeks.

Our garden is comprised of 15 raised beds. We have wet springs and soggy soils. The raised beds mean I can plant earlier than if our garden was at ground level. But 15 beds is a lot to try and enclose. Up until the bunnies arrived 3 years ago, our critter problems were not overwhelming. Squirrels weren't interested in most of what I grow. Raccoons only occasionally got into the veggies. They're mostly interested in the fruit trees and corn plants. And the birds limit themselves to the cherries and blueberries. With the addition of rabbits, it seems that all of our garden is now at risk. 

If, as the saying goes, that good fences make good neighbors, how do you suppose the critters will feel about the people of this garden?

Monday, April 25, 2022

If Only Mishaps Didn't Happen


I'm sure something similar has happened to you. A favorite top. You're doing what you can to take good care of it. Gentle wash, cold water, line dry. And then that fateful day when an edge gets caught on something sharp. Rats! A hole. My morning took a bit of a nose dive. 

I thought for several hours what I wanted to do about this. I love this top because it looks good on and the colors and print are so springlike. It just slaps a smile on my face when I put it on. What perhaps makes this shirt even more of a favorite is I bought it with a gift card at, wait for it, a thrift store, paying all of $3.99 for it. So, I was kicking myself when I caused a small hole.

The next morning, I decided to give mending it a try. First, I used a small piece of iron-on patching fabric on the underside. This little bit of fabric stabilizes the knit to keep it from stretching as I machine stitch over the hole.

I attempted to color-match thread to the print. I had varying shades if dark purple, light lavender, and some hot pink. The hole was in a patch of medium purple.

I zig-zagged over the hole with colored thread. Unfortunately, I made the wrong choice (going with one of the paler shades) and had to unpick the mending thread before trying another color choice. 

I searched my threads again and found a small amount of a color closer to the bit of fabric where I was mending. 

I zig-zagged over the hole with the new color. The end result was a mending job that while it doesn't exactly match, it blends in with the print so well that when a daughter asked me where the hole was, I had a hard time finding it at first. I'd call that a success.

I've repaired several other knit tops in exactly the same fashion. They hold up well to wear and laundering -- sometimes the patch job outlasts other areas of the shirt. My favorite spring top will now go on for many more wearings and the mend job cost me exactly zero $.

Still -- if only mishaps never happened. Sigh.

~~~~~~~~~~~~~~~~~~~~~~~~~~~~~~~~~~~~~~~~~~
Be a voice that helps someone else on their frugal living journey

Are you interested in writing for creative savv?
What's your frugal story?

Do you have a favorite frugal recipe, special insight, DIY project, or tips that could make frugal living more do-able for someone else?

Creative savv is seeking new voices.


~~~~~~~~~~~~~~~~~~~~~~~~~~~~~~~~~~~~~~~~~~~~~~

share this post