Stay Connected

Friday, February 5, 2021

Making Heart-Shaped Soaps


Hi, friends! More Valentine's stuff today.

So, you saw I was cleaning up my heart-shaped cookie cutter. You rightly guessed that I'd be using that cutter this next week.

Well, these are what I made with the cutter -- heart-shaped soaps to give as a gift to my son and daughter-in-law for a small Valentine's gift (they don't read my blog, so I think it's safe to reveal this here). 

Earlier this week, I mentioned that I need to work with what I have on hand. I can't run out to the mall to pick up a small gift or even go browse Michael's or other stores for supplies to make something.


In "shopping" my craft cupboard, this is what I came up with. I have a small amount of melt and pour soap base, soap coloring, peach soap scent, and this heart-shaped cookie cutter. I found a sturdy lid to a small box to use as a form in which to pour the melted, dyed, and fragranced soap.


I lined the box with plastic wrap and got to mixing and melting my ingredients. 


Once the soap had hardened for a couple of hours, I popped it out of the lined box onto a sheet of waxed paper. I used the cookie cutter to cut heart-shaped soaps out of the rectangle, pressing firmly, straight down in order to get as good of a heart as possible.


After the soaps sat for a day, I smoothed the corners with a rag to finish them.


I wrapped the soaps in a plastic treat bag then boxed them up.


With cut-out soaps, there are leftover scraps. I remelted those scraps and poured it all into a small, round plastic container (saved from an individual serving cup of applesauce). 


This circular soap is now our kitchen hand soap. Good timing, too, as we were just about to finish the last bar of hand soap. (We keep both liquid soap and bar soap at the sink, as some of us prefer one over another.)

Before I tried this technique, I wasn't sure how it would all turn out. A couple of tips:

  • I think you could make other shapes of soaps using this technique. The caution would be to use simple shapes (as opposed to very intricate ones). 
  • use a cutter that is still in very good condition with tightly welded seams 
  • don't use a vintage cutter or one that has a lot of sentimental value, as cutting through soap could cause a split in the seam on an older and very well-used cutter. (In contrast cutting dough is a much gentler operation.) My cookie cutter, as old and well-used as it is, survived the soap-cutting. But I could see how the welded seam was a tiny bit stressed. (Some soap was pressed under a corner of the welding.)  
  • limit the depth of the soap block to 3/4-inch for easier cutting of the soap


I like how these soaps turned out, and I think my son and daughter-in-law will be pleased with this gift. 


Thursday, February 4, 2021

Cleaning Corrosion from Tin-Plated Cookie Cutters


I always intend to do the right thing with my cookie cutters. But you know how it is. I get busy with something else entirely and my cutters just don't get the love they need.

Most of these older cookie cutters are tin-plate over steel. Over the years, the tin wears away in spots (usually the cutting edge), allowing a little rust to develop. In addition, tin actually tarnishes. My own cookie cutters can look like something I really don't want touching food. But I don't want to buy new ones to replace these old favorites, either.


So, what I do is buff the tarnish and rust right off, using a Scotch-brite pad (the other side of my kitchen sponge) and a paste of baking soda and water. It takes about 10 to 15 minutes to get the cutter clean enough to my satisfaction.

When cleaning up a cookie cutter, I focus on the cutting edge. It's this edge, that if rusty, can impart some really unlovely rust markings onto the cookie dough. Not a pretty sight.


After the corrosion has been buffed off, I wash the cutter in hot, soapy water and dry completely with a towel.


Finally, I use a small square of paper towel dipped in vegetable oil to give it a moisture-repellant coating. 

My cookie cutter is now ready to use.


The best way to take care of tin-plated cookie cutters is to wash in hot soapy water immediately after the last cookie cut-out. Rinse, shake dry, and put them into the oven after turning it off to completely dry all of the cracks and crevices of the cutters.


Wednesday, February 3, 2021

Valentine's Treats for My Family


A week ago or so, Kris asked in the comments if I had any plans for this Valentine's Day. With the holiday now just around the corner, I thought I'd share some of the things I'll be doing for my family to celebrate. More than just about any other year, this year, I really have to work with what I've got. So, here's the first of a handful of posts telling you what we'll be doing.

This first one is a family tradition that goes back over 30 years in my household and was inspired by a treat that my mother would make about 60 years ago.

For special days (birthdays, Christmas, St. Patrick's Day), my mom would make shaped pancakes to delight my sister, brother and I when we were small children. She would "draw" the shapes on the griddle with the tip of her large spoon and ordinary pancake batter that she thinned just a bit, making teddy bears, our initials, shamrocks, bells, "gingerbread" men, and Christmas trees.

When my own oldest child was a toddler, I discovered that hearts are also easy to "draw" with the batter. Ever since, I've made heart-shaped pancakes for my family nearly every year. Some years, I left the pancakes plain, so they could be to-go Valentine's breakfasts. Other years, when Valentine's fell on a weekend, I pulled out all the stops.

Well, this year, Valentine's Day is on a Sunday, which means I'll be up bright and early making heart-shaped pancakes with all the trimmings.


I use a large serving spoon to make the heart shapes, pouring the batter into a large blob, then drawing it down on one side.


And finishing the other half of the heart on the other side in the same way, just reverse.


They don't look perfect, but they're close enough.


Once flipped over, they begin to look better.


After they finish cooking, I plate them up then outline the edges with whipping cream and fill in the centers with whatever red or pink jelly or jam I happen to have. This year, I'll be using pink vanilla-rhubarb spread to fill the centers.

Pancakes are a very inexpensive treat that I can make for my family any time the mood strikes. The ingredients are basic -- flour, milk, egg, oil, sugar, salt, baking powder -- and items I always have on hand. Making them festive is the fun part. To this day, I think chocolate chip pancakes are still my daughters' favorite festive pancakes. But I also like to add colored sprinkles for confetti pancakes or top with fruity syrups to change things up from the traditional maple syrup. But for this upcoming holiday, it just wouldn't be Valentine's Day if I didn't make heart-shaped pancakes.

Tomorrow, I'll share another Valentine's treat I have ready and waiting.

Tuesday, February 2, 2021

"What on Earth Do They Eat?"


I made a grocery order just now, and I was wondering if the people who shop my order for me ever wonder how we're surviving on what looks like an imbalance of foods. Then I thought that you friends may also wonder how we're eating (and what we're eating), based on seeing what groceries I bought in January. Given what I posted, it would be reasonable to assume we ate nothing but produce, frozen French fries, ketchup and whipping cream for the whole month.

So, I thought I'd give you a rundown for all of our meals last month.

Breakfasts
  • oatmeal (scratch, not instant)
  • toast (homemade bread)
  • Great Value brand of Cheerios
  • semi-homemade donuts (canned biscuit dough formed into donuts and fried)
  • homemade yogurt
  • applesauce
  • fresh fruit (apples, oranges, tangerines, bananas)
  • frozen fruit (foraged blackberries, blueberries)
  • juice
  • dried fruit (raisins, cranberries, prunes)
  • scratch muffins, coffeecake, cornbread
  • eggs
Lunches
  • sandwiches (using homemade bread, eggs, cheese, peanut butter, homemade hummus)
  • salads and other raw veggies
  • homemade soups
  • eggs
  • cooked dried beans
  • any homemade bread product (leftover cornbread, muffins, flour tortillas, loaf bread)
  • pasta and homemade sauce
  • leftovers from previous night's dinner
Snacks
  • pretzels, crackers
  • nuts
  • raisins
  • fruit
  • cookies, breads
Desserts
  • cookies
  • homemade pie
  • scratch cupcakes
  • coffeecake and snack cake
  • ice cream (leftover from December)
  • holiday candy
  • rice pudding
  • homemade milk and cornstarch pudding
  • homemade cheesecake
Beverages
  • milk
  • juice
  • coffee
  • tea
  • cocoa from homemade mix
  • water
  • sparkling cider (on New Years' day)
Dinners
  • Hot Dogs, Buns, Sauerkraut, Hoppin' John, French Fries, Brussel Sprouts in Cheese Sauce, Scratch Cheesecake (using hot dogs, homemade buns, canned sauerkraut, dried black-eyed peas, rice, frozen peppers, seasonings, frozen French fries, frozen Brussel sprouts, scratch cheese sauce, homemade cheesecake)
  • Chicken and Dumplings (using canned chicken and canned vegetables, scratch dumplings)
  • Tuna Casserole, canned carrots, and applesauce (using canned tuna, canned soup, frozen and fresh veggies, cheese and onion powder, pasta, jarred applesauce, canned carrots)
  • Chicken Nachos and Canned Corn (using canned chicken, corn tortillas, avocados, cheese, homemade salsa, lettuce, olives)
  • Stir Fry (using rice, canned chicken, TVP, eggs, cabbage, canned carrots, frozen peas, nuts, soy sauce, sesame oil)
  • Pigs in Blankets and carrot sticks, apple wedges, canned corn (using canned biscuit dough, hot dogs, carrots, apples, canned corn)
  • Pizza (homemade crust or homemade French bread as crust, homemade pizza sauce, pepperoni, green pepper, frozen mushrooms, olives, canned pineapple, frozen ham from Christmas, cheese)
  • TVP Meatballs and Marinara over Pasta (using TVP, eggs, tomato paste, canned tomatoes, herbs, seasonings, pasta)
  • Spaghetti and Meat Sauce (using tomato paste, canned tomatoes, herbs, seasonings, onions, celery, ground beef, pasta)
  • Vegetarian Lasagna (using tomato paste, canned tomatoes, herbs, onions, celery, frozen broccoli, TVP, pasta, mozzarella and Parmesan)
  • Chicken Noodle Soup and Italian Bread (using canned chicken, canned and fresh veggies, pasta, herbs)
  • Chicken, Vegetable, and Potato Soup  with Scratch Biscuits (using canned chicken, canned and fresh vegetables, garden potatoes, seasonings)
  • Vegetarian Chili and Cornbread (using several types of beans, green pepper, onions, canned tomatoes, herbs/spices, avocados, cheese, homemade cornbread)
  • Lentil-Vegetable Soup and Homemade Bread (using lentils, canned tomatoes, fresh and frozen vegetables, spices, herbs, Parmesan, homemade bread)
  • Hummus and Italian Bread w/ Raw Veggies, Homemade Apple Cobbler (using dried beans, sesame seeds, olive oil, seasonings, homemade bread, carrots, celery)
  • Tomato Soup and Toasted Cheese Sandwiches (using tomato paste, seasonings, homemade bread, cheese)
  • Spinach Frittata, Muffins, Canned Fruit and Vegetables (using eggs, canned and frozen spinach, cheese, homemade pizza sauce, scratch muffins, canned fruits and vegetables)
  • Burrito Bowls (using pinto beans, seasonings, rice, canned corn, homemade salsa, cheese, olives, avocados)
  • Scrambled Eggs, Hash Browns, Canned Vegetables, Bacon (using eggs, cheese, garden potatoes, canned vegetables, bacon)

Many of these meals we did twice, either as leftovers or just repeated in the month. For side dishes, we used various canned and frozen vegetables, as well as fresh cabbage, lettuce, avocados, celery, carrots, oranges, tangerines, bananas, and apples.

January is a month when I take it easy on myself and don't expect anything spectacular. I used a lot of canned chicken this past month, as it's easy. We also ate eggs for several dinners and used dried beans a few times per week.  These are all easy foods, in my mind. I'll likely make more of an effort this next month, now that I've had a month of easier cooking as a break.

We ate every meal cooked from home, with exception to a single meal that my husband's office provided for him for a meeting one evening. One afternoon, a meal in a bag showed up on our doorstep. My husband's work seemed to feel they had to bribe their employees to all attend a Zoom meeting. Otherwise, all from home. 

Sometimes, it feels a bit boring to only eat our own cooking. But, for the most part, it's working, and no one is going hungry.


Monday, February 1, 2021

Active Dry Yeast, Instant Yeast, or Bread Machine Yeast?


There's a lot of confusing information out there about the different types of dry yeast stocked in the baking aisle of grocery stores. Walmart carries Active Dry Yeast, Rapid-Rise, Quick-Rise, Bread Machine Yeast, Instant Dry Yeast and a couple of these fancy yeasts, such as Platinum Instant Yeast with dough enhancers and Gold label SAF-Instant Yeast. Last spring, when every store was out of yeast, I was looking to get any reasonably-priced yeast I could find. You could say I was not at all picky by the time June rolled around. I eventually found 1-lb bags of SAF-Instant Yeast in stock and grabbed it while I could.

For the most part (for us home-bakers,) the differences between the most common dry yeasts are minimal. But it is helpful to understand the properties and benefits of each.


Active Dry Yeast (use 2 1/4 teaspoons enough for up to 4 cups of flour)

  • widely available
  • been around for decades -- If a bread recipe was published before 1970, this is likely the type of yeast originally used.
  • The flavor of this yeast is preferred by many bakers for its milder, less-yeasty taste.
  • In King Arthur's tests, Active Dry Yeast takes longer to fully rise, as much as twice as long.
  • Since ADY takes longer to rise, this is a good yeast to choose when you need to focus your attention on something else for more than an hour during the rising process, such you need to run out to pick-up your kids, or run a very quick errand, without missing that crucial window to pop your loaves of bread into the oven.
  • ADY is also the yeast to use for a recipe calling for 2 rise periods for the dough. Mostly, you find this extra rising in the instructions for older bread recipes.
  • According to Red Star, you don't need to rehydrate the yeast in warm water first, although you can if your recipe calls for that step.
  • Years ago, there was a more significant difference between ADY and Instant yeast. King Arthur's Flour says the difference today is minimal.
  • For most applications, ADY and Instant Yeast can be used interchangeably, just don't expect the same timing on rising dough.
  • If using a bread machine, Red Star recommends adjust the amount of yeast according to the the type used: for Active Dry Yeast, use 3/4 teaspoon yeast for every 1 cup of flour; for Instant Yeast, use 1/2 teaspoon yeast for every cup of flour.
  • When using ADY, liquids (not including softening yeast) should be between 110 and 115 degrees F, per Fleischmann's website.


Instant Yeast  (2 1/4 teaspoons for up to 4 cups of flour)

  • came onto the market in the 1970s
  • may say "fast-rising", "highly active", or "fast acting" on the label
  • not recommended for refrigerated or frozen yeast dough use -- per Red Star
  • a smaller granule size of yeast compared to ADY
  • considered an easy-to-work with yeast because it is added directly to the dry ingredients, dissolving into the dough very quickly (no need to proof in water)
  • Instant Yeast loaves rise faster than ADY loaves because the yeast produces more carbon dioxide bubbles than ADY
  • According to King Arthur's website, SAF-Instant Red is their preferred yeast for most bread baking.

The brand SAF has both a Red label and Gold Label Instant Yeast

  • Saf-Instant Red is a basic instant yeast, good for almost all yeast bread -- artisan, pizza, sandwich, rolls, bagels
  • SAF-Instant Gold is a particular yeast designed to work with very sweet doughs -- Challah, Panettone, Hawaiian bread or rolls


Rapid-Rise (Fleischmann's brand), Quick-Rise (Red Star brand), or Bread Machine Yeast (Fleischmann's brand) (use 2  1/4 teaspoons for up to 4 cups of flour)

  • These are instant yeasts that may also contain enzymes to strengthen the gluten, accelerate fermentation and condition the dough.
  • works 50% faster than ADY
  • designed for one quick rise in the dough
  • In King Arthur's test, the Quick-Rise yeast loaf initially rose faster than Instant or ADY, but after one hour of rising, lags behind the Instant Yeast loaf and requires an extra 15 minutes (still much faster than the ADY loaf).
  • often used in bread machines
  • Some bakers say this yeast does not produce as flavorful a loaf of bread as ADY or Instant Yeast, can be yeasty in flavor.
  • Dough can be mixed and kneaded, then formed into a loaf immediately (single rise after loaf formation only).
  • In using Bread Machine Yeast in the bread machine, softening in water is recommended. Use 1 teaspoon sugar, 1/2 cup water, 110-115 degrees F (from total amount called for in recipe), stir in yeast and allow to stand 5-10 minutes. Add to remaining ingredients. The remaining liquids should be about 80 degrees F for use in bread machine.
  • For the regular cycle on bread machine, use 1/2 teaspoon Bread Machine Yeast for every cup of flour
  • For 1-hour recipes or express setting on bread machine, you'll want to double or triple that amount of yeast for every cup of flour (1 to 1  1/2 teaspoons yeast for every cup of flour).
  • When using Rapid Rise or Bread Machine yeast outside of the bread maker, Fleischmann's recommends a temperature of  120 to 130 degrees F for the liquid ingredients.
  • You can use Rapid Rise, Instant Yeast, or Bread Machine Yeast interchangeably with minimal variation in outcome.


Additional info:

  • 1 packet of yeast contains 2  1/4 teaspoons
  • For doughs with greater than 1/2 cup of sugar for every 4 cups of flour (for instance, if your recipe calls for 3/4 cup sugar and 4 cups of flour), use an additional packet of ADY or Instant Yeast. Sugar retards the yeast activity in dough.
  • Use 1 packet of yeast (2  1/4 teaspoons) for up to 4 cups of flour, 2 packets for up to 8 cups of flour, 3 packets for up to 12 cups of flour
  • When dissolving ADY yeast for hand mixing or using a stand mixer, use water between 110 and 115 degrees F; but when dissolving ADY for a bread machine, use water that is 80 degrees F -- per Red Star's website
  • Once opened, store large quantities of yeast (such as the bags) in an airtight container in the freezer or the refrigerator. Personally, I keep a small jar of yeast in the fridge and the rest of the bag in the freezer. King Arthur's website says that yeast stored in the freezer will keep and work as if it was fresh for a year. The article's author also says that they have had good results with yeast stored in the freezer for 6 years.
  • When following a recipe that calls for Rapid Rise Yeast, you can substitute ADY at 25% more (recipe calls for 1 teaspoon Rapid Rise, sub 1  1/4 teaspoon ADY)
  • When following a recipe that calls for ADY, you can substitute Rapid Rise in equals amounts, no change needed, per Fleischmann's website.
  • If yeast is way beyond the expiration date, check its viability before proceeding with recipe. Soften 2  1/4 teaspoons of yeast in 1/4 cup water (100-110 degrees F. Stir in 1 teaspoon sugar and wait 10 minutes. If mixture is bubbly or foamy, the yeast is viable and can be used in your recipe (deducting 1/4 cup liquid from overall recipe).


sources:
kingarthurbaking.com
redstaryeast.com
fleischmannsyeast.com


Saturday, January 30, 2021

Making Budget Foods and Recipes User-Friendly: A Quick Egg Supper -- Utterly Simple Frittata


Back to my weekend version of this blog -- basic frugal foods made easy. 

A lot of folks weren't raised learning basic frugal cooking skills. Instead, in their family homes of origin, a lot of foods that they consumed were what we'd recognize as convenience foods, such as boxed meal helpers. There's nothing at all wrong with that scenario. However, they now find themselves (through no fault of their own) on a very limited budget, unemployed or forced into early retirement due to this pandemic, struggling financially right now and looking for help so that they can help themselves. Enter Basic Frugal Foods Made Easy, my weekend version of this blog that goes back to the basics to help others make very delicious foods while sticking to a tight budget. Remember, once you learn a piece of information or a new skill, you own that information to use over and over again. 


Eggs make a quick & easy meal for a tiny budget

When thinking about the different categories of foods, high-protein foods are generally the most expensive. Even the least expensive meats and seafoods can top several dollars per pound. If you're looking for a complete protein at a budget price, eggs are a winner. 

A large egg contains about 6.3 grams of protein. And a pound of eggs contains about 50 grams of protein, roughly the same amount contained in 12 ounces of 73% lean ground beef. 

Determining the cost per pound for eggs

The USDA sorts eggs into sizes according to weight. A dozen large eggs should weigh approximately 24 ounces, or 8 large eggs should weigh about 1 pound. When large eggs are priced between $1 and $2 per dozen, the cost per pound is 66 cents to $1.33. 

To figure the cost per pound of eggs at your store, this is the USDA's estimate of eggs per pound based on egg size. Determine the cost per egg (based on your prices), then multiply by how many are in a pound.

  • Extra-large eggs -- 7 to a pound
  • Large eggs -- 8 to a pound
  • Medium eggs -- 9 to a pound
  • Small eggs -- 10 1/2 to a pound

The Italian frittata: a simple, all-in-one-pan egg dish

Due to the high-affordability of eggs around the world, just about every culture has a signature egg dish. The French have omelets, quiches, and souffles. The Spanish have their tortilla (which is not what we know as a tortilla but actually a skillet-cooked egg dish). Huevos Rancheros is a classic Mexican egg dish. Scotch eggs are British pub-fare. And in Italy, just about every cook knows how to make a frittata. 

Frittatas have a lot in common with the Spanish tortilla and the French omelet. All are made in a skillet, and all are great vehicles for leftover cooked meats and vegetables. What sets frittatas apart from other egg dishes is their utter simplicity -- beaten eggs added to a hot and oiled skillet, topped with cheese, with or without additional vegetables or meat, then top-cooked either by flipping or by finishing in the oven.

Frittata techniques and tips that succeed:

  • use a 9 or 10-inch oven-proof skillet (handle can go into an oven)
  • heat the pan before adding oil. There's a saying in cooking -- "hot pan, cold oil, food won't stick"
  • do not add extra liquids like milk or cream to the eggs
  • cook vegetables to reduce the overall liquid content before adding the eggs
  • adding the liquid egg to a hot and oiled pan quickly sets the bottom layer of the egg, creating a barrier between the still-liquid portion of the egg and the pan, preventing sticking
  • do not stir the eggs once in the pan

As mentioned above, there are two basic cooking techniques for making a frittata. One, cooking the entire frittata on the stove, flipping the partially set eggs onto a plate, then sliding back into the skillet to cook the other side. And two, which I think is the least complicated, starting the frittata on the stove, then popping it, skillet and all, into the oven to set the eggs. 

The most basic frittata is nothing more than eggs, onions cooked in oil, cheese, salt and pepper. Frittata wedges served on slices of Italian bread make a delicious open-faced sandwich for busy-day suppers. With the addition of some cooked vegetables, you've hit all the major food groups on a plate. Leftover frittatas can be kept in the refrigerator for a couple of days. Simply reheat and serve.

To get started, I'll share one of my family's favorite winter frittatas -- spinach, onion, and Parmesan frittata.


Spinach Frittata (serves 3 -4)

equipment needed:

oven-proof skillet, needs to have a handle that can go into an oven (9 or 10 inches in diameter), lid that fits the skillet
wire whisk and bowl
sieve or colander to drain spinach

ingredients:

5 eggs
1/4 teaspoon salt
dash pepper
1/2 large onion, diced
10-oz block frozen spinach, thawed, drained, water pressed out  OR  13.5-oz can spinach, drained, water pressed out
1-2 tablespoons vegetable oil
2 tablespoons olive oil
nutmeg
Parmesan cheese, about 1/4 to 1/3 cup

note: if using a non-stick skillet, use the lesser of the oil amounts. If using a regular skillet, use the greater amount of oil.


Thaw, drain and press water out of the spinach. Alternatively, canned spinach can be used -- drain and press out excess liquid.

Preheat the oven to 350 degrees F.


Chop the onion. 


Whisk the eggs with salt and pepper.


Heat the skillet over Med for a minute or two, then add 1 tablespoon vegetable oil and 1 tablespoon olive oil. Tilt the skillet to coat the entire bottom of the pan. (I don't measure the oil, but just eyeball amounts.)


Add onion to the pan and cook, stirring often, for 5-6 minutes, or until onions are barely golden around the edges.


Add the drained spinach to the pan, breaking it up and mixing in with the onions. Cook for 2 to 3 minutes, then sprinkle with about 1/8 teaspoon nutmeg all over. 


Spread the spinach/onion mixture evenly across the bottom of the skillet. Drizzle with remaining oil. (You want to be able to barely see a thin film of oil on the bottom of the skillet in any bare spots.) Cook for a half-minute to heat the added oil.


Quickly pour the egg/salt/pepper mixture over the spinach and onions. 


Sprinkle with Parmesan cheese.


Bake for 5-9 minutes. Check to see if the eggs look barely set -- the center doesn't jiggle when you shake the pan gently.

Remove from the oven and cover with a lid for 5 minutes. 


Use a table knife or off-set spatula to go around the edge of the frittata to loosen it from the skillet. 
Cut into wedges and serve. 

And that's how I make a budget-friendly, super-easy, supper, lunch, or brunch entree.


You can garnish servings with fresh tomato slices, herbs, more cheese, marinara sauce, grilled onions etc.

Add an additional egg for 4 larger servings.


This recipe, made as directed, contains about 40 to 44 grams of protein. When divided by 3 persons, that's 13-15 grams of protein, each. When divided by 4 persons, that's 10-11 grams per serving.

Cost for entire recipe varies, ranging from $1.45 to $2.40, depending on amounts of oil, Parmesan cheese, and use of canned (cheaper) vs frozen (more expensive) spinach. In addition, cost is obviously dependent on your local prices. 


Other possibilities: you can add 1/2 cup of diced, cooked meat and up to 1 1/2 cups of any cooked vegetable to a basic onion, egg, and cheese frittata. Suggestions -- zucchini, pepper strips, sliced mushrooms, fresh tomatoes, asparagus bites, etc. Just cook the vegetables with the onions until most of the water has evaporated. 

If you like creamy and melty cheese, cubes of Fontina, Swiss, or mozzarella can be used in place of grated cheese.

For a high-protein/low-carb pizza substitute, try a pizza frittata. Cook a basic onion, egg, and cheese frittata, then top with pizza sauce, cheese, pepperoni, and black olives. Pop back into the oven for a couple more minutes to melt the cheese, then remove and cover with a lid for 5 minutes. 

You can also make a plain egg and cheese frittata. Skip the onion, spinach, and nutmeg. You won't need as much oil, as there will be no sugars from onions or other vegetables to create sticking issues. Go ahead and reduce the oil by 1 tablespoon. Heat the skillet, add the oil, add the whisked eggs/salt/pepper and top with cheese. Then bake.


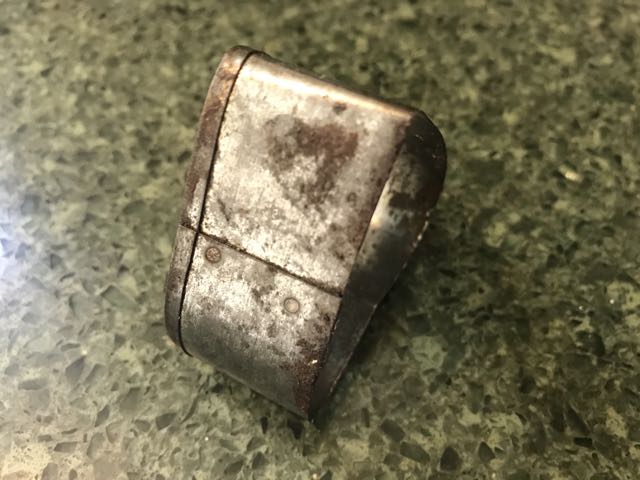
You might have noticed that my skillet doesn't have a handle. This is a vintage Farberware skillet from my husband's parents' home, near 70 years old. When the handle split and came off, we hung onto the skillet to use as an oven-proof pan, using oven mitts to handle it when hot. One of these days, I'll come across a replacement handle at a good price. Until then, this has made a great, oven-proof skillet.


Friday, January 29, 2021

The Choice to Repair Instead of Replace

In a perfect world, appliances would last 100 years or more. I'd even settle for 50 years or more. Sadly, parts of even the best appliances give out long before the whole ceases to function. The gasket on our 12-year-old refrigerator began tearing at about year 6. The bowl on my food processor developed a crack around year 17. And due to my own clumsiness, I broke the glass jar on our 39-year-old Oster blender just the other week. In all of these appliances, it was the non-machine parts that were an issue. The good news is, I don't need to have any mechanical skill to "fix" any of these appliances. The bad news is, spare parts simply aren't available for some appliances.

just the glass replacement

In many cases, it's money-wise to replace a single or even multiple parts. With simple fixes like these non-machine parts, it's a matter of popping off the old and popping on the new. My appliances are ready to go again. 

For my blender, I was able to save the blade assembly and the lid, needing only a new glass jar. The new jar cost about $9 with an additional $9 for shipping. Sound like a lot? Internet searches indicate that the older gen Oster appliances are known to last far longer than any new blender at the low-end of the price range. In just a few years, I should get my money back by not needing to replace the blender.

After several decades of use, you would think that I'd feel my near-vintage blender had served its duty and now it's time for its retirement. On the contrary, this blender has served me well because it was so well-made. It will likely grind, crush, and puree for many more years, if not decades. 

Back in the day, Oster made a superior blender. When different elements have broken or worn out, Oster makes all the needed replacement parts. I take that as a good indication of the company's confidence in their product -- that they feel they are worth the repair. By buying a replacement part, I want to send the message to Oster that I'm a consumer who is willing to repair a high-quality appliance instead of replacing it. 

It goes without saying, but it's also a good environmental value to choose repair over replace -- less added to landfills and less emissions spewn into the atmosphere in the production of new appliances.

In some cases, making a green choice winds up costing us a little more in our wallets. But for many appliance repairs, we save some money and only sacrifice in aesthetics. My almond tone-on-tone blender may not look as fashionable as a sleek new model. But it saved me real money and it was a good choice for our planet.


Thursday, January 28, 2021

Maintenance Work for My Emergency Pantry


I made a brief mention of our back-up or emergency pantry in my grocery recap for January. I thought I'd share some of the thoughts that have come to mind over the past 10 months, since beginning this major stock-up.

An emergency pantry can be a blessing, providing food during a time when you most need it, as well as a way to save money by buying in bulk when you find a deal. It can also be an enormous waste of money if you don't do the work to maintain it.

  • if possible, free-standing shelves that you can walk behind as well as in front are preferable to shelves up against a wall. Being able to walk to the back would allow for easier rotation of stock -- stock from the back, take from the front. As is, my shelves are in a pocket tucked into a wall, so not only can I not get behind my shelves, but I also can't get in from either side. When I restock, I have to clear the entire shelf. There's a temptation to not bother putting new stock behind old, but expiration dates do creep up on items that you thought might keep for years. Case in point, jarred Parmesan cheese usually has a best-by date of only a few months into the future at the time of purchase. Surprise to me!
This is my emergency pantry, tucked
 into a wall behind a door -- not ideal,
but it's better than nothing.

  • it's important to work in your emergency pantry about once a month, to inventory, organize, sort, check expiration dates, and to make note of what is in abundance and what is lacking. I once again sorted through our back-up pantry yesterday and found a couple of surprises. I have plenty of regular instant coffee, but no decaf. Also, I have one 10-lb bag of high protein all-purpose flour (I use for yeast bread) and not two, as I'd thought. Each bag ensures we have high quality homemade bread for 2 months. So, by only having half of what I had thought means that I will need to replenish this flour sooner than planned. I also discovered that we're not going through raisins as quickly as I had anticipated. Knowing that now, I'll step up pushing the raisins for snacking and baking.
  • I grab a box from the garage every other week and fill it with items from the back-up pantry to add to the kitchen supplies. Regularly using what's in the emergency pantry will help prevent waste due to expiry.
my restocked kitchen pantry
  • This is key to using what you've stored -- I actually base my meal plans on what I bring to the kitchen from the emergency pantry. 
  • In tandem with resupplying the kitchen with items from the e-pantry, it's also important to have a plan to restock those back-up supplies. This is also a good time to assess the value of your emergency pantry. For our family, having all of this extra food on-hand has meant I didn't need to go out to get groceries more often than once every 3 to 4 weeks -- especially important during this period of increased virus spread. During a non-pandemic year, I can also see value in limiting grocery shopping during the cold and flu season. I will keep a back-up pantry in future years, as well, focusing my greatest stocking up in the months of August, September, and October each year. Also, I'll keep emergency supplies for the duration of this pandemic, which means I'll restock in the spring this year as well as summer/fall.
  • As I restock, I will use the information about my family's preferences that gathered as I reorganized the back-up panty each month. For example, we don't need as much jarred applesauce or raisins for the future, but could use more canned vegetables. And we prefer the natural-style peanut butter. 


If you stocked up in advance of this winter, what have you learned about keeping an emergency pantry?

Wednesday, January 27, 2021

January Grocery Recap

Here we are in the last handful of days of January. I thought I would get one more pickup from Walmart, but then I saw we had an abundance of milk, eggs, and produce remaining. So, I'm putting off my pickup until next week. I am finding that I often misgauge how much we will need to cover 3 weeks at a time. Sometimes we run short on items, and sometimes we have a surplus.

For January, I did one pickup order from Walmart early in the month, then had my daughter pick up 4 things for me later in the month. I spent a total of $54.07. Even in a non-pandemic year, January is a low-spend month for us. So, this amount isn't surprising.

We are still preparing meals from our back-up pantry, spare fridge, and freezers. Every other week, I bring out additional cans, boxes, and bags from the back-up pantry to add to the kitchen supplies. We're still doing well with what's on hand plus a few extras each month. I'm thinking that in March I may want to do a little restocking of our back-up pantry. In addition, I'd like to add some variety to our meat this coming month. I'm not a fan of Walmart meat, so this will require me to shop in-person in another store (Fred Meyer, most likely).

This is what we bought for January:

8 large bananas (each banana was about 2 servings), 42 cents/lb
2 heads cabbage, 40 cents/lb
3 heads lettuce, 40 cents each
green pepper, 80 cents
4 avocados, 58 cents ea
1 bundle celery, $1.28
5-lb bag oranges, $6.28
3-lb bag fuji apples, $3.23
frozen onion rings, $2.58
frozen sweet potato fries, 2 bags, $2.78 ea
frozen pepper strips, $1.92
6 gals 2% milk, 1 gal whole milk (for yogurt), $2.18
pint whipping cream, $1.98
3 dozen eggs, $2.88 total
30 oz mayo, $2.48
ketchup, 88 cents
8 oz cocoa powder, $1.98


My list for my next shop so far contains celery, bananas, apples, cabbage, avocados, dried cranberries, dried apricots, frozen mushrooms, meat, milk, eggs, cheese, and instant coffee/decaf. I'll also try to think of something special to pickup and make for Valentine's Day.

And that about wraps up January's grocery spending.


Tuesday, January 26, 2021

Experiment Successes and Fails

I think it's important to regularly experiment. Our experiments may fail, at times. But that's not the same as us failing. In my opinion, my own failure would come from never trying new ways to do things. Besides, success becomes sweeter after a failure or two. Here's what went right and what went wrong in the past few months.

My new hair routine

I have not used shampoo for 4 months now. 


This is what I've been substituting for shampoo, an inexpensive conditioner designed to protect color-treated hair. I continue to be pleased with the look and feel of my hair. I'd say this experiment was a success for me with my hair type (coarse, dry, curly, with a tendency toward frizz).


Some mini coffeecakes


I had a dream a week ago. I was in a bakery, and in the glass case were these coffeecake muffins. I awoke with such a hunger to replicate those pastries. I finally got around to making them yesterday and was very pleased with the result. I didn't use a recipe, but made a standard coffeecake batter, a cinnamon-brown sugar-pecan filling, and a streusel topping. I scooped a layer of batter into the bottom of the muffin liners, topped with the cinnamon-sugar, then another layer of the batter. I used a knife to swirl the cinnamon through the batter. Finally, I sprinkled the coffeecakes with streusel, then baked. 


They were everything I dreamed they would be, minus the bakery setting.


My nasturtium plant and seeds


Last fall, I brought one hanging basket with a healthy nasturtium plant indoors. I was hoping to collect a dozen or so seeds from the plant. 


The plant was setting seeds, so it looked like my hopes would come to fruition. Sadly, this is all I was able to collect from the plant -- 3 very tiny seeds. 


I don't have much confidence that they'll grow into anything. The only upside is it is now nearly February and my plant is still hanging in there, sitting in the kitchen window. 


It might survive until spring when I can set it outside again. Keeping my fingers crossed. But I think I'll need to buy nasturtium seeds to grow more plants for this upcoming summer.


So, I had two successes and one fail. I learned a lot about expectations. I also learned that I would never know the answers to my questions if I didn't at least give it a try.


What have been your best experiment successes? Any experiment failures that surprised you? 


Monday, January 25, 2021

What Crisco Has to Do with Cold & Dry Winter Air

This season of cold outdoor air and heated indoor air does a number on my skin and nails. When the cuticles on one of my fingers began to split and peel the other day, I was reminded of a very frugal and effective tip that came from my dermatologist many years ago. 

I was in the midst of my first winter in a cold and dry climate and my lips were cracked and the cuticles around my fingernails were splitting. My dermatologist shared what she'd been using on her hands since her internship. Even before COVID, medical personnel were known for frequent hand washing. My dermatologists hands were so dry and irritated from all of the washing that one of the nurses told her about "Cream C," other wise known as Crisco shortening, to use as a barrier cream on dry skin.

This is how much shortening I use for both hands,
front and back, around fingernails, and up past my wrists


To this day, I follow that frugal advice from my dermatologist. After I wash my hands, I pat them dry, but don't dry them completely. I then put a tiny dab of store-brand vegetable shortening (and I mean tiny) on one finger and rub it all over my hands, fingers and tips, around the nails, and up my sleeve a few inches. The key is to do this right after washing/patting dry (so that there's some moisture to lock in) and use so little that your palms don't feel greasy. (If I do put too much on and find my palms have the slightest feeling of shortening, I wipe my palms on a towel.)

I also use shortening as a lip balm before bed and on cracked heels (covered with socks) a couple of times per month. Shortening has got to be the cheapest beauty product that I use. 

The other aspect of using shortening that I appreciate is that it's food-grade and fragrance-free. When I'm working in the kitchen, the last thing I want to do is handle food after using a fragranced hand cream. That just sounds like ick to me.

So, that's my frugal beauty tip for this mid-winter day -- a little Cream C for dry hands, cracked heels, and dry lips.


~~~~~~~~~~~~~~~~~~~~~~~~~~~~~~~~~~~~~~~~~~
Be a voice that helps someone else on their frugal living journey

Are you interested in writing for creative savv?
What's your frugal story?

Do you have a favorite frugal recipe, special insight, DIY project, or tips that could make frugal living more do-able for someone else?

Creative savv is seeking new voices.


~~~~~~~~~~~~~~~~~~~~~~~~~~~~~~~~~~~~~~~~~~~~~~

share this post