Stay Connected

Thursday, May 11, 2023

The (sort of) Finished DIY Grill Station With Countertops

Some DIY projects are never really finished.

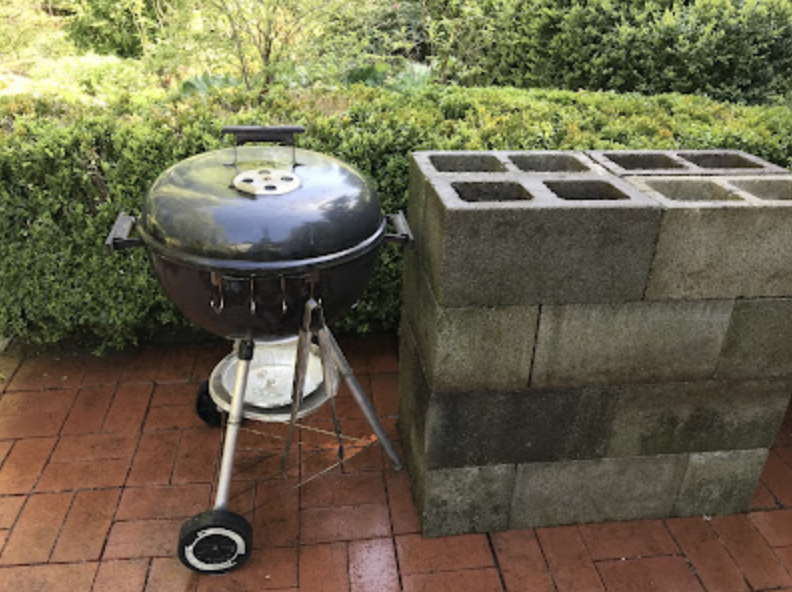
Yesterday's post showed a grill station sans countertops. 

Adding counters makes a huge difference, IMO. We went to Home Depot this afternoon, as I'd mentioned yesterday.


The toppers that I found to use as countertops are extra large pavers, 16 by 24 inches. The pigments and surface texture are variegated throughout each paver to mimic natural stone. The colors range from rust and browns to slate gray. The underside is smooth, if that's the look we had wanted. One paver fit the narrow stack and two pavers, side by side fit the wider stack. These pavers were the only part of the grill station that we had to buy for this project. They cost $10.78 each, for a total project cost of about $35 including tax.

The paver overhangs both in front and back of the stack of concrete blocks. They're so heavy, it took us two people to place each paver. Although nothing is securing the blocks or pavers to each other, I don't think anything is going anywhere unless I physically lift it.


After Kris suggested potted plants in front of the stacks yesterday, I pulled a pot of peppermint from a shady spot on the deck and placed it in front of the wide stack. I'm going for an edible plant theme with the plant groups surrounding the grill station. The peppermint should be very happy in this filtered sunlight spot. 


On top of the wide stack I have plans for 3 pots of culinary herbs, one rosemary, one thyme, and one sage. The "pots" are also following a "food" theme. These are empty #10 cans from this winter's canned tomatoes. In addition to buying the pavers, I also bought 2 of the 3 herbs and a can of indoor/outdoor spray paint in the color Eden.


Before planting in the cans, I needed to prepare them to be pots. I used an old nail and hammer to add 3 drainage holes to the bottoms of each can.


Next I gave each can two coats of spray paint. The color of my pot cans is very close to the green in the outdoor fabric (shower curtain) that I will use to cover some cushions.


Here are the 3 cans, two with herbs placed inside. I'll pick up the sage when I go to Fred Meyer on Saturday. I won't be potting the cans just yet. I like to give painted objects a couple of days to cure before handling them too much.

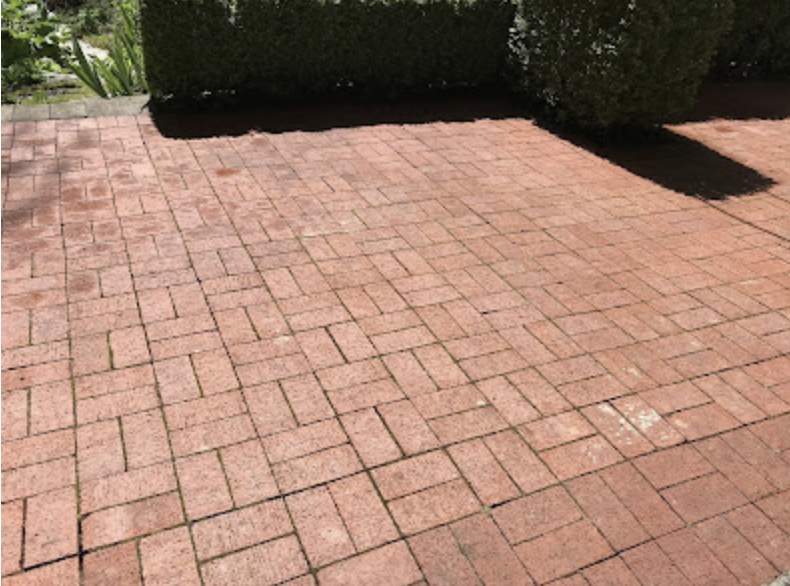
The white marks on the pavers are scuffing from stacking and moving around of the pavers. The scuffing washed off fairly easily. The close-up of the paver above shows one section that had been wiped off with water and a rag -- scuff marks gone.


The entire grill station project was conceived of a week ago and put together in less than 2 days. It's definitely in the "do-able" category.

There's more to come on this small patio. Stay tuned. . .

Wednesday, May 10, 2023

My DIY Outdoor Grill Station

The yard improvement project continues this week.

you can see the previously-cleaned main patio through the hedge opening

There's a small section of the back patio that is partially separated from the main patio. It's been the spot for our tumbling composter and a kettle-style grill. Earlier this week I moved the composter to the side of the house near the garden. The grill was still in the garage, so I could really "see" what I had to work with in this space. I've had this idea that I wanted to make this small patio a dedicated grill spot instead of an incidentally-placed grill on the composter patio. Time to get busy with planning. I scoured the internet for grill station ideas and came up with a couple of plans that will work for my area and supplies.


Today I got out the pressure washer and began to clean the bricks. A good 2 hours later and the patio was scrubbed nicely. 


Some tulips got decapitated, however.

After a break to have lunch and rest for a bit, I headed out to work on the space some more. It was time to begin defining the grilling area. One of the DIY projects I found online used concrete blocks to create counter space on either side of a portable grill. I wandered the property and found enough concrete blocks for this purpose. With some help from my husband, we scavenged blocks from several spots in the yard. These blocks had served well in their previous lives, but now were ready to move on to new horizons.


While my husband ran an errand, I hauled the blocks, one by one, in a wagon to the brick patio. I had previously drawn up a plan for stacking the blocks. Consulting my plan, I stacked the blocks in 4 layers. The work was hard, but at least in the early layers, I still had energy.

I pressure-washed the stack of blocks and set the portable grill next to it.

At this point, I was ready to begin the second, narrower stack, but didn't have the 8 blocks needed. When my husband came home, he helped me scavenge these last eight. 

So this is where I finished up for the day. I have one 32-inch wide stack of blocks and one 16-inch wide stack. I will be going to Home Depot tomorrow to find something that will work as toppers/countertops.

For years, when I'd grill dinner, I'd set my utensils, trays, seasonings on the ground while cooking. I had wanted something that would serve as a counter next to the grill for cooking, but could also double as a buffet set-up for outdoor gatherings. And of course, I have a teeny-tiny budget, so I needed to work primarily with what I had. The concrete blocks were from previous uses. The only "things" I will need to buy are surfaces to use as countertops. 

I really wanted to finish this today, but dinner wouldn't make itself. Tomorrow I'll update with a photo of the station with counters and reveal my plans for the corner opposite the grill on this patio. For now, my muscles are tired, so, so tired. A good day's work.

~~~~~~~~~~~~~~~~~~~~~~~~~~~~~~~~~~~~~~~~~~
Be a voice that helps someone else on their frugal living journey

Are you interested in writing for creative savv?
What's your frugal story?

Do you have a favorite frugal recipe, special insight, DIY project, or tips that could make frugal living more do-able for someone else?

Creative savv is seeking new voices.


~~~~~~~~~~~~~~~~~~~~~~~~~~~~~~~~~~~~~~~~~~~~~~

share this post