Stay Connected

Monday, December 7, 2020

A Dozen+ Holiday Gift Wrapping Ideas Using Recycled Materials

Here's an opportunity to combine repurposing materials that were destined for the landfill or recycle center with staying out of stores this holiday season to minimize virus exposure. There are so many ways to use recyclables in creative ways. And in some cases, the end result can be so spectacular, one may permanently stop buying holiday gift wrap. Here's my list. If you have links or ideas, please leave a comment below.

cereal boxes

image source: http://stuffyoucanthave.
blogspot.com/2010/10/cereal-boxes.html

This creative box is the gift wrap and box in one, using an empty cereal box. Instructions and template on Stuff You Can't Have by Catherine McEver.

image source: https://www.cucicucicoo.com/
2013/12/tutorial-make-gift-bag-cereal-box/

Looking for something more, um, pop fun? These cereal boxes are not at all disguised, which is part of their charm. Instructions for how to make a "gift bag" from the base of a cereal box by Lisa on Cucicucicoo.

festive printed grocery bags as wrapping paper

image source: https://acreativemint.typepad.com/
a_creative_mint/2010/12/trader-joes-a-little-red.html

Some grocery stores print their holiday grocery sacks with fun and festive images. Cut open the bags along the back seam, smooth out, wrap gift, then add some red ribbon. Voila, festive gift wrap from a paper grocery bag. Leslie on A Creative Mint demonstrates how a Trader Joe's grocery bag is transformed into charming gift wrap with the help of red and white baker's twine, red and white Japanese printed papers, plain white gift tags, white paper doilies, and white adhesive label blanks.

paper gift shop or clothing store bags

image source: https://the-feathered-nest.
blogspot.com/2008/12/
great-tutorials-from-last-christmas.html 

Small specialty gift shops in my area often use brown paper bags for purchases, sometimes adding a sticker or ink stamp with their store name and logo. You can cover the store info on the bag with a sheet of music (printed from your computer or from an old book of sheet music). Add a bit of greenery and wisp of thin twine with hot glue, and you've got a lovely gift bag. The Feathered Nest by Dawn Edmonson features this project and several others on her site.

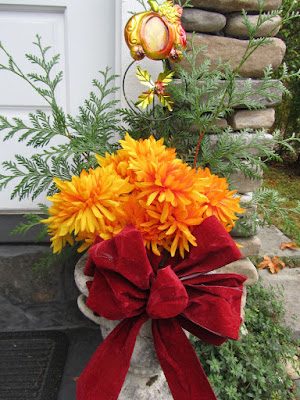
I made this bag last year with an H & M shopping bag and some brief shots from 2 cans of spray paint. I used the bag in a gift exchange with my garden club. The first comment the recipient made was what a beautiful gift bag this was. Not seen in this photo, I also tied 2 of the spray-painted leaves from our Thanksgiving table onto the handle. I posted about how I made this bag in November of 2019.

potato chip bag

image source: https://www.marthastewart.com/
274678/gift-wrapping-ideas?slide=f5120c45-a763-4676-8b50
-53ad9e564df5#f5120c45-a763-4676-8b50-53ad9e564df5

Who doesn't love receiving a shiny package to open during the holidays? Potato chip and other packaged snacks often come in bags that have a silvery interior. Cut an empty chip bag along the bottom and main back seam to make one large sheet. Wash the silvery side with hot, soapy water and dry. You now have a large, sheet of shiny wrapping "paper" for stylish and chic-looking gift wrap. Of course, Martha Stewart does an excellent job of this.

your leftover newspaper

image source: https://yourstrulyg.wordpress.com
/2011/10/16/diy-newspaper-gift-bag/

We all know you can wrap a gift in the colorful comic section of the newspaper. What about making a gift bag from the Sunday funnies? You've seen how I make small gift bags out of copy paper (with sheet music and DIY celebration wrap). You can make larger gift bags from larger sheets of paper, such as a map or a newspaper. Here's a comic page gift bag, using 2 sheets of the Sunday newspaper, some cardboard squares to reinforce the front and back, some glue, and a couple of lengths of ribbon. Gwyneth on Yours Truly, G gives all of the how-to's that you might need to turn your Sunday funnies into a cute gift bag.

image source: https://www.ariyonainterior.com/
25-newspaper-gift-wrapping-ideas/


Another option for your leftover newspapers is to simply use them as the gift wrap. Black, white and red make a classic holiday combination. If you're like me, you have a stash of saved red ribbon from previous years' packages. 


If your gift didn't come in a box, you can repurpose empty cardboard packaging from cake mixes, mac 'n cheese boxes, cereal boxes, or cracker boxes to give your newspaper-wrapped gift a more polished look. You can even cut a larger box down to size to fit a smaller gift.


Add a sprig of greenery from your yard or houseplant and you've got a beautifully-wrapped gift. I also love the look of black or red ink stamped images on the newspaper. Rittika from One Brick at a Time offers 25 different ways to use newspaper as the base paper in wrapping gifts -- all of them are very lovely.

catalogs or magazines

image source: https://snapguide.com/
guides/use-magazine-pages-as-gift-wrap/

Are you inundated with catalogs this season? Or do you have a stash of magazines in your basement? You can do lots of clever things with magazine/catalog pages. The covers (made of heavier weight paper stock than the interior pages) are perfect for making bows. Magazine or catalog pages can be taped or glue-sticked together to make larger sheets or use single pages for smaller gifts. 

Think outside the box, here. For instance, scientific magazines have a unique interest factor and often darker color combinations for gift wrapping. Vintage-y holiday versions of catalogs (like Victorian Trading Co or Vermont Country Store) have images that are perfect for turning into Christmas gift tags. Real Simple magazine used a 2-page spread of images of cookies to wrap a gift. I see possibilities for that stack of old Women's Day and Family Circle magazines that I have stashed in a cabinet.

image source: https://www.salvagesisterand
mister.com/diy-gift-wrap-from-magazines/

Salvage Sister & Mister show how even an obvious catalog page with prices and item numbers can look sophisticated as gift wrap. I love the folded star embellishment added to the package, too.

bows and ties

For tying gifts: raffia, baker's twine, jute or butcher's twine, kitchen string, pinked-edge fabric scraps, cotton yarn, and cut strips of paper, potato chip bags or plastic wrap will all do the trick.

"Bows" don't have to be bows. Some of the most beautiful adornments for holiday packages are made from garden greenery, cinnamon sticks, pinecones, and twigs. However, if you're after that more traditional look, bows can be made from paper scraps.

image source: http://charletswebsite.blogspot.com/
2012/11/holiday-paper-bows-how-to.html

Charlet Mallett from Charlet's Website provides all of the measurements and instructions needed to make star bows out of wrapping paper scraps or magazine/catalog pages. 


image source: https://www.marthastewart.com/
2223350/how-to-make-bows-ribbon

Martha Stewart shows how to make additional styles of bows out of ribbon, but these two could also be made with cut strips of paper. For Martha's details on bow-making, see this article.

gift wrapping as part of the gift

image source: https://mixedkreations.com/
diy-mercury-glass-jars/

While these are all wonderful ways to breathe one last life into something that might be garbage, I also like the idea of "wrapping" a gift in something that can be used again by the recipient, such as a small gift that is wrapped in a scarf, handkerchief, dish towel, or cloth napkin. 

How about "wrapping" a gift in a reusable container that was reclaimed from the garbage/recycle bin, like a glass jar that is either lined with opaque paper/fabric or is covered with acrylic or spray paint. Linda from Mixed Kreations shows how she made these beautiful mercury glass jars. I think they would make fabulous wrapping for a special gift. The recipient could reuse this jar as a personal or bathroom storage container.

making a plan for saving this year's bows and ribbons to use next year

Finally, why not make a dedicated "recycle gift wrap and bows" box to use on your gift exchange day for saving those special wrapping pieces to use next year. If your group knows in advance where to put beautiful bows for saving, there's less chance these items will be tossed into the garbage. The box doesn't need to be anything fancy, simply a dedicated box to store all the wrapping items that you wish to save.

edited to add:

Kris linked to these adorable gingerbread house gift bags made with brown paper bags and white puffy paint. Super cute! 


Friday, December 4, 2020

Two Special Ornaments for Our Tree

If you have grown children who have moved out and on with their lives, this may resonate with you. 

When my son and daughter-in-law married, it became time for them to establish some of their own traditions. All of my kids have collected Christmas ornaments since their early childhoods. And each year, they would put their own ornaments on our family tree. 

With a new family unit formed a couple of years ago, it was time for my son and daughter-in-law to take their ornaments for their own home. As a mom, there's a sadness in that for me. I don't get to look at the collection of boat and airplane ornaments that my son chose in his youth. And I don't get to see the angels, hearts, and stars that we'd given to my daughter-in-law when she was still a girlfriend/fiancée. Those ornaments have their own home now.

Two Christmases ago, our family began a new tradition for tree ornaments. When one of ours moves out and on with their life, they get a special ornament for our tree that lives in our home. I took two of our plain glass ball ornaments and used a gilded pen to write each of their names on them. Last night, I lovingly placed the "Angie" and "Chris" ornaments on our tree, knowing that while the two of them physically live somewhere else, I hold them close in my heart always.

sniff, sniff Someone pass me the tissue box.

Have a great weekend, everybody!
Thursday, December 3, 2020

Our Family's Annual Christmas Tree Decorating Party

Bottled Coca-Cola, now that's not frugal! Or is it?

About a dozen Decembers ago, I got a pretty spectacular deal on a 6-pack of individual glass bottles of Coca-Cola -- 65 cents for the whole carton, after sale and coupons. I don't usually buy soda, but I was shopping for treats for our annual Christmas tree decorating party. My family was tickled by the individual glass bottles, so much so that I saved the empties to reuse for the next year. Every year since, I've filled the bottles with store-brand cola (this year -- Sam's Choice, 67 cents/2-litre), and we all get a good laugh over the mileage from that one great deal a dozen years ago.

One of our family's holiday traditions is to gather for a snacky dinner followed by hanging Christmas ornaments on the tree. One way to make any dinner festive is to simply serve all finger food for a meal. For this party, we eat our dinner in the room with the tree (Christmas music jingling and jangling in the background). It's a fun and festive time that costs very little, as most of the treat foods are either homemade or not-terribly-expensive grocery foods.


This year's menu

carrot and celery sticks with dip
black olives
crackers 
homemade cheese spread
sliced pepperoni
cocktail sausages in BBQ sauce
tangerines
dried cranberries
mixed nuts
spanakopita (which has been tucked in the freezer since my daughter's graduation in 2018. It's commercial and unbaked, so it should still be good.)
homemade peppermint swirl bark squares
cola in the recycled Coca-Cola bottles

As I said above, our snacky foods fit within our modest grocery budget. 


For this year's peppermint bark, I gently swirled the 2 chocolates together instead of layering. As a result, the squares were less inclined to separate into white and dark when cutting. I like my peppermint bark to be minty, so I added about 2 drops of peppermint oil to both the semi-sweet chocolate chip portion and the white chocolate portion. I trimmed all 4 sides before cutting into squares -- DELICIOUS scraps! I can see that I'll need to exercise some restraint with these.

The cheese spread was simply some cream cheese blended with garlic powder, onion powder, and shredded cheddar. Very tasty!

(raising my cola bottle in the air) Here's to a healthy, safe, and blessed holiday season for all!

Wednesday, December 2, 2020

Burn Time of Candles and Economy

I love candles. I love the scent of the wax while a candle is burning, as well as the scent of the smoke when I blow it out. I really love how candlelight flickers and affects shadows in the room. What I don't love are the exorbitant prices on premium jar candles that you can buy at pricey shops in the mall. 

Premium 3-wick candles

I had a thought that perhaps those expensive candles make up for some of their cost in a lengthy burn time. I went to Bath & Body Works website and discovered that their 3-wick candles have a burn time ranging from 25 to 45 hours. These candles retail for $24.50; but if you're savvy, you can find them on sale for as low as $9.50. Last year's candle day at Bath & Body works was Saturday, December 7. It's a once a year event and draws large crowds. (ask me how I know -- 1 daughter who loves, loves, loves these pricey candles) So, for as low as $9.50, your premium candle will burn between 25 and 45 hours, and cost between 21 and 38 cents per hour. Of course, I have to admit, I do love the fragrance of many of their candles. And perhaps that accounts for some of the premium price.

Taper candles

The burn time on taper candles is based on their length. The accepted rule of thumb is 1 hour per inch of candle. So, the 11-inch tapers that I've seen at Target for $3.99 a 2-pack will burn for 11 hours each at 18 cents per hour. Jo Ann Fabrics has a 4-pack of 10-inch tapers for $3.99. The burn time for these tapers would be about 10 hours each, for a cost of about 10 cents per hour.  My local Walmart sells Better Homes & Gardens 12-inch tapers in 12-packs for $5.47. The cost per candle is about 45 cents, for a cost per hour of burn of about 4 cents. As you can see, the price on taper candles varies considerably. When buying this kind of candle, it's worth the effort to check several stores, including your local grocery store. To make a price comparison with Bath & Body Work's 3-wick candles, it would take 3 tapers to achieve a similar amount of light. That means I would spend about 12 cents per hour of burn time for 3 tapers. Of course, in contrast to a jar candle which is a self-contained candle within a holder, taper candles need candlesticks. Although, many of us already own this type of holder.

Votive candles

Votive candles can burn between 10 and 15 hours, if appropriately sized for the holder. Ideally, you don't want much air space between your votive candle  and the holder, as the melting wax will pool in the base of the holder and won't be reached by the wick, shortening the burn time. In addition, you should extinguish a votive candle that has burned to within 1/2-inch of its base, to prevent cracking of the holder. This 1/2-inch of residual wax is not lost, however. You can reclaim this wax and make a new candle, see this post.

Yankee Candles sells some really nice votive candles, regularly priced at $2 each. After Christmas last year, I picked up a bunch of their holiday-scented votive candles for 50 cents each. With Yankee Candles, you're paying for the premium name brand as well as the scent. You can pick up decent votive candles from the local drug store for 89 to 99 cents each at regular price or about 40 to 50 cents each on clearance after the holidays. Yankee Candles says that their votives have a burn time of up to 15 hours. My local Rite Aid's website says that their votives have a burn time of about 12 hours. So, for a price as low as 50 cents per votive with a burn time of up to 15 hours, each hour of the candle's life costs about 3 cents. Granted, it takes more votives to create a similar amount of light as a larger candle like Bath & Body Work's 3-wick. Still, 3 votive candles can cost me as little as 9 cents per burn hour.

Battery-powered LED tea light candles

The hands-down winner for cost per burn hour for a candle is not even made of wax. If one is not picky about a candle being "real" or not, then battery-operated tea light candles are the biggest bargain. I bought a 4-pack of flickering LED tea lights from Dollar Tree several years ago and they're still going strong. Dollar Tree has since down-sized the package to 2 flickering LED tea lights. The packaging indicates that each tea light has a "burn time" of about 120 hours. That means that the cost per hour is less than a half-cent. If I group 3 of these together, my cost per hour is about 1 and a half cents. These are best showcased in some sort of holder. I've placed these in a variety of "free" holders, including canning jars tied with ribbon, nestled in juice glasses filled with candy corn or mini candy canes, inside painted and punched tin cans, and in textured glass votive holders. I've even placed LED tea light candles in ribbon-tied canning jars on top of wide glass candlesticks designed for pillar candles, as a bargain alternative to pillar candles for those holders.

This price analysis was an interesting exercise for me. I love my LED tea lights, but who knew they were just so economical?!

Tuesday, December 1, 2020

Making a Holiday Swag with Branches from My Yard

The elves have been busy in my neighborhood! 

I've been taking early morning walks this past week, enjoying all of the holiday decorations that my neighbors have put up. It seems that there are even more (and earlier) holiday decorations than previous years. Perhaps this is simply because so many folks are home during the week; but I also like to think that we're all doing what we can to provide cheer to one another through outdoor decorations.

This morning, one of my daughters came with me on our walk and we talked about what we could do to decorate our outdoor areas that are highly visible for passersby on the street. I mentioned that I have everything that would be needed to make a swag for the front of our garage: the evergreen and berry-laden branches in the yard, a 12-inch length of heavy wire (mine is green, but silver would've also worked as it would be hidden by the greenery and bow), and a weather-proof bow.

Once home, I grabbed my pruners and gardening gloves then clipped about 7 branches, mostly cedar but also a couple of branches of cotoneaster for their beautiful red berries. I piled the branches neatly on top of each other and used the length of wire to bind them all together about 6 inches from the top of the bundle, finishing on the back side. After adding the outdoor ribbon, my swag was ready to hang. I used our house's flag holding bracket between the two garage doors as my hanging spot, threading the long ends of the bundle's binding wire through the perforations of the bracket and twisting securely. 

I spent about 10 minutes making the swag and hanging it. This is so easy, yet it adds such a festive note to the front of our home.

I hope that my little effort brings a smile to someone passing by.

Monday, November 30, 2020

November Grocery Recap

Another month of spending more than I intended. While I don't feel I was panic-buying this past month, I was definitely emotional-spending. I bought a lot of treat foods and just generally didn't care (all that much) that I would be spending more than I had planned. However, I can also see that almost half of my shopping covered 3 holidays, 1 family party, and our now continuing Friday pizza & movie nights. My household budget allows an extra amount to cover holidays, in addition to the grocery budget. 

In addition to party, holiday, and treat foods, there are certain produce items that I like to buy for my family this time of year, and I'm willing to spend a little extra for them, such as the clementines and avocados. What is conspicuously absent this month/this season is a turkey. And I'm not feeling all that sad about it. I have to admit, the bratwurst were pretty delicious this year.

I shopped twice this month, both times at Walmart, three weeks apart and spent a total of $189.45. In addition to what I bought, I am also heavily (very heavily) leaning on my stock-up pantry for November through February. Our fridges, freezers, and pantries remain very full. I'll shop again sometime in mid-December.                          


Here's the breakdown of all of my November grocery purchases:

Some of these items I ordered specifically for Thanksgiving. (obv. I bought more than needed just for the holiday and plan to use at other times this month and next)
1 pack bratwurst sausage for Thanksgiving, $2.96
1 pack bratwurst buns, $1.98
spicy mustard, $1.27
3 bundles of celery, $1.26 each
4 cans cream of mushroom soup, 50 cents ea
2 10-oz bags frozen mushrooms, $1.98 each
pint whipping cream,  $1.98

I bought the following for our Christmas tree decorating party, again with planned extras for rest of the season
6 lbs clementines, half at $3, other half at $3.98
large box Ritz crackers, $1.96
2 litre cola, 67 cents
Little Smokies sausage, $2.87
16 oz cream cheese, $2.87

I bought the following for holiday baking
3 8-oz cans mixed nuts, $2 ea
2 2-lb bags powdered sugar, $1.62 ea
1 pound pecan halves, $9.48
24 ounces dried cranberries, $4.94
2 bags chocolate chips, $1.74

other special occasion foods
1 bag mini marshmallows, 88 cents, for hot cocoa
2 large packs of pepperoni, $7.47 each, for Friday pizza nights this winter
2 bottles sparkling cider, $1.96 ea, for Christmas and New Year's dinner
20-oz bag frozen sweet potato fries, $2.73, for a treat some night

The rest of the items were just for general use.
3 heads iceberg lettuce (25 cents each, so I figured why not?)
30 bananas, half at 42 cents/ lb, half at 38 cents/lb
2 Folger's decaf, $6.32 ea
1 Folger's regular, $8.12
regular mustard, $1
soy sauce, $1.62
sesame oil, $2.98
raw honey, $7.93
2 boxes toasted oat cereal, $1.23 ea
4 bags oyster crackers, 80 cents ea
2 jars applesauce, $1.98 ea
6 dozen eggs, 96 cents/dozen
12 gallons 2% milk, $2.18 ea
2 gallons whole milk for making yogurt, 1 at $1.50, 1 at $2.18
2 lbs popping corn, $1.83
2 whole butternut squash, $1.18 ea
80-ct corn tortillas, $2.44
4 avocados, 58 cents ea
1 bottle ketchup, 88 cents
large bottle BBQ sauce, $1.88


In addition to buying special foods to lift our spirits, I also think I'm spending more for many of the individual items because I'm not shopping around for the best prices or watching for sales. Also, I think for me personally, I buy more when I'm putting in an order to pick-up than I would if I were shopping in-person. It's super easy to add an item to my online order. In contrast, when I'm shopping myself in the store, I think twice about a lot of items and often skip an item or two that don't seem absolutely necessary. 

I will say that I continue to compare unit prices. I may be emotional-spending, but I haven't lost my mind entirely!

So, that's my personal analysis of why I continue to spend more on groceries than I have in past years. And I'm more than okay with it. There is a time and season for everything. This is my season to spend more on food.

Thursday, November 26, 2020

What's a Few Raindrops When You're With the People You Love

As so often happens in the Pacific Northwest, the forecast shifted as Thanksgiving neared. However, it didn't look like it would be a complete washout, so we decided to make our outdoor plans a go. Mostly, the rain was just an occasional sprinkle Thursday afternoon. I had suggested everyone wear a parka with a hood. That advice made the difference between being miserable and having fun despite a few raindrops. It was a great day. We stayed socially distant and outdoors. 

This was the first time in almost three months that we've seen our son and daughter-in-law. To get together for Thanksgiving (and stay safe and keep to the governor's orders) meant we would need to do something entirely different. The idea of an outdoor cookout was floated to all parties. Maybe you can guess -- November cookouts are not the norm for our area. 

Around 11:30 AM, this is how the patio was looking -- rather damp, but the heavy rain appeared to be gone. We dried off the chairs, moved a couple of small tables into place, and I began my work transforming the patio into an autumn gathering spot. For social distancing, each household had their own side of the fire ring, more than 6 feet apart.

Over the last week, I'd gathered up all of our autumn-themed decor items, both from indoors and from the porches. I had a couple of table cloths, lots of faux flowers, candle jars, a lantern, faux and real pumpkins and squash, a wicker cornucopia, and some outdoor ribbon.


Since it was still looking like a drizzle could occur, I began my sprucing up with the most weather-proof items first, this time the outdoor ribbon. I tied bows around the 2 newel posts at the base of the deck stair railing. (You'll notice that we desperately need to paint the stair railings and  stair risers.) Ribbon is a super cheap way to decorate for holidays. This is Dollar Tree ribbon purchased about 4 or 5 years ago. I keep reusing it year after year.


Next, I placed a faux pumpkin at the base of the stairs leading onto the patio, one on each side. As I've mentioned before, our yard is plagued with rodents squirrels. Leave a real pumpkin out on the porch and by morning there will be nibble marks. So, for outdoor use, I opt for craft pumpkins. These two are from Michael's, also bought about 4 or 5 years ago.


I have 3 small square tables, which was just right for 1 table between every two chairs to share for drinks or plates. I added a candle jar with battery candle and small pumpkin as decor to the back of each little table. Again, a little ribbon turns a canning jar into a holiday candle jar. The battery tea light candles are from Dollar Tree, bought about 8 or 9 years ago but used judiciously (so they last for many years).


I have one longer bench table that I used as a complimentary decorative element, a second focal point of sorts. Here's where the bulk of my decor was laid out. While my husband was lighting a fire in the fire ring, I was quickly placing items. The table cloth was a piece of yardage from Jo Ann Fabrics about 20 years ago. The galvanized French flower bucket came from Michael's 3 years ago and has different faux flowers rotated in and out of it for the front porch, depending on season. It will go back on the front porch filled with cherry red faux geraniums for the Christmas season later this weekend. Today it held faux sunflowers. The lantern was a clearance find at Kohl's (used a $10 coupon) several years ago, with a clearance votive candle from after Christmas sales at the local drugstore in a cleaned out votive holder from an office gift 3 Christmases ago. The squash is something we grew this summer (actually, it volunteered in a patch in the yard -- Woo Hoo!). And to the left is a wicker cornucopia (bought at the thrift store 6 or 7 years ago) filled with more faux flowers. By the way, my faux flowers for outdoor use always come from Dollar Tree. 


Here's the whole autumn gathering spot, waiting for the six of us to, well, gather. Each chair had a throw blanket and pillow. Some of us used the throws as extra wraps when dusk fell and some of us used them for seat cushioning.

I mention where and how I've acquired all of the decor pieces that I used on Thursday to illuminate just how inexpensively this sort of temporary decorating can be. And in my case for Thanksgiving, all of this cost me absolutely nothing, as these were items that I already had but just moved around and into place for the occasion.


The candle in the lantern was lit just before our guests arrived. However, it wasn't until daylight faded that the candle's glow a became prominent added light source.


The sun sets around 4:30 this time of year. By 6 PM, the moon was peaking through the clouds and stars were out to see. The last of the logs were burning down, signaling an end to a wonderful afternoon.


In the aftermath, I asked all of my family members if they would consider doing something like this again. I received a resounding "YES" from the whole bunch.

You know, I recognize that a lot of folks have no interest in decorating an outdoor space to be enjoyed for 5 or 6 hours total. This is something that I do that I take considerable joy in the doing. Perhaps there is an aspect of home-keeping that particularly appeals to you. This is mine.

Happy Thanksgiving and have a wonderful weekend, friends!


Monday, November 23, 2020

Outdoor Thanksgiving Looks Like It's a Go!


The weather forecast looks like it should be dry for my town on Thanksgiving day, greatly simplifying our plans to get together with our son and daughter-in-law. The daytime high is only expected to be 46 degrees F, so we'll cookout midday over our fire pit on the patio. We should be able to remain entirely outdoors for the whole visit.  The sunset is around 4:25 this time of year, so I expect we'll not linger much beyond then.

The Menu (no turkey!)
bratwurst cooked over the fire
buns
sauerkraut, cheese, mustards
green bean casserole
praline sweet potato casserole
corn souffle
mashed potatoes and gravy
pickled beets
relish tray of carrot sticks, olives, homemade pickles
apple & cranberry crumb pie
pumpkin pie
hot spiced apple cider

I can put most of this together on Tuesday and Wednesday. Without a turkey to roast and time, the cooking should be simpler and more predictable. I'm using a lot of canned foods, including the sauerkraut, green beans (and soup for casserole), sweet potatoes, corn, beets, olives, home-canned pickles, cranberry sauce, pumpkin puree, and apple juice. The end result should be easy cooking for me. I even opted for pre-made buns and instant potatoes for this occasion. I'll be busy, but not so much that I feel exhausted.

One of the bonuses to having an outdoor Thanksgiving is that the house doesn't have to be completely clean. I'll be making the outdoor area as festive as I can, however. My decor plan for our patio is to pull together as much of the autumn pieces that I have around the house and porches (faux and real pumpkins/squash, artificial autumn flowers, baskets, lantern, cushions, blankets) and group them together, with this sort of look. (Cover Victoria Magazine 2014)


This shouldn't take me more than about 20-30 minutes to assemble -- simply put it all into place on the patio tables and chairs. My version may not be as well color-coordinated as the magazine cover, but I think it will be homey.

Wishing you all a good Thanksgiving week!


Friday, November 20, 2020

This Week's Menus Plus Homemade Brown 'n Serve Freezer Pizzas

wrapped homemade brown 'n serve pizza

We're plowing through our rotation of canned vegetables. This week, we made creamed spinach with some of those canned leafy greens. My daughter prepared it, adding a topping of Parmesan cheese over each serving. Delicious -- we all loved it! 

I roasted a whole chicken this week and managed 3 dinners from the bird, 1 lunch of chicken noodle soup, and enough stock for our upcoming Thanksgiving side dishes.

And we made desserts twice this week -- one a no-bake bar cookie and the second a cake. Both of these lasted for several days.

One of the side effects of this pandemic is that many of us are cooking dinners at home much, much more than normal. Sharing our weekly menus may provide much-needed inspiration for each other, as we find ourselves more and more drained from this experience. As you can see, my menus are all pretty simple and rely heavily on our pantry staples.


Saturday
fried TVP patties in a homemade teriyaki sauce
rice
canned beets in vinaigrette
canned peas
leftover peanut butter, cracker, and chocolate bars

Sunday
refried bean and TVP tostadas, using homemade fried flour tortillas and served with homemade salsa
canned carrots
canned green beans
leftover bar cookies

Monday
roasted chicken and gravy
canned cranberry sauce
bread and butter (it happened to be bread-baking day)
canned yams baked in a sugar, spice, and butter topping
oven-roasted frozen broccoli (drizzle of olive oil and sprinkle of salt)
leftover bar cookies

Tuesday
leftover chicken in homemade marinara sauce (canned tomato paste)
pasta
creamed spinach with Parmesan cheese
leftover bar cookies

Wednesday
pigs in blankets (sausages wrapped in refrigerator crescent roll dough)
canned corn
green beans
canned pineapple
German chocolate cake

Thursday
chicken and dumplings with canned carrots and canned peas
leftover canned cranberry sauce
prunes stewed in pineapple juice (leftover from canned pineapple)
leftover cake

Friday
homemade frozen pizza (brown 'n serve pizza)
carrot and celery sticks
tangerines
leftover cake


Needing some family fun time, our foursome decided to make every Friday evening pizza and movie night. I make a pizza and we rotate who chooses the movie. Making a pizza from scratch each week adds up to a lot of work. However, making one large batch of dough and sauce for several pizzas at a time saves work over making small batches each week.

I bake the first pizza for us to eat right away, using a hot oven (about 400 degrees F) so that the bottom is crispy and the cheese and toppings are bubbly and golden. I prepare the rest of the pizzas as brown 'n serve pies. When I reheat them later they brown and crisp up without over-browning, like those dinner rolls which are pale but cooked when you buy them to be toasted in the oven at home. 

underside of part whole wheat pizza
before second bake time

I follow similar suggestions for brown 'n serve pizzas as I do for homemade brown 'n serve rolls. To make brown 'n serve pizza, I prepare the whole pizzas as I would for immediate consumption, except I bake them at a lower temperature. My goal is to bake the dough fully and melt the cheese, but not brown either.

topside of pizza before second bake time

To do this, I bake the topped pizza on a baking sheet at 350 degrees F (until the crust is thoroughly cooked, but the toppings and cheese have not reached the point of browning), about 18-20 minutes, depending on thickness and toppings. After cooling for about 30 minutes, I wrap the extra pizzas in plastic wrap and freeze. 

To reheat, I thaw the pizzas on the counter for about 45 minutes then brown them on an oven rack (no pan) for about 9-11 minutes at 380 degrees F. They turn out perfectly. 

Brown 'n serve pizza are my homemade version of commercial frozen pizza. I spend a couple of hours one afternoon to make enough pizza for several easy dinners without sacrificing any of the fresh-baked flavor or texture upon reheating.


Wishing you all a wonderful weekend!


Wednesday, November 18, 2020

Frugal Gift Wrapping Hacks

I've posted these two hacks previously, but old tricks can be useful again and again.

My son and daughter-in-law are celebrating birthdays this week!. I thought I'd get out to a store long before now to pick up more gift wrap. As you can guess, that just didn't happen this year.

For my daughter-in-law's 3 gifts, I had 2 large sheets of pink tissue, 1 small sheet of black and white striped tissue (from a Sephora birthday freebie two years ago), and some silver holiday curling ribbon. In addition, I printed another sheet of homemade birthday gift wrap, a tip that I posted about in 2019.

Here's how the wrapping went:

Gift no. 1

gift wrap hack -- wrap the package on the diagonal to save paper

the sheet of tissue was too small to wrap with the traditional method


turning the box on the diagonal means less paper is needed
(I placed a sheet of white copy paper on the top side of the box - here seen as under the box - so the label would not be visible through a single layer of tissue.)


fold up opposing corners and tape
fold in and up remaining corners to cover the rest of the package


once the package is flipped over, it looks well-wrapped
added some shiny silver curling ribbon to finish the package


Gift No. 2

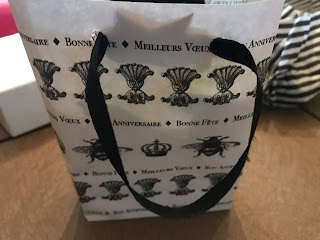
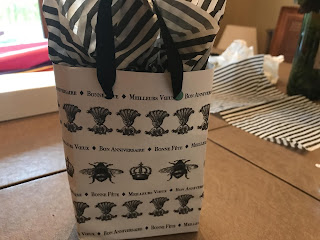
gift wrap hack -- turning a sheet of paper into a gift bag

I had an assortment of small items for which I wanted a small gift bag. I used a single 9 X 11-inch sheet of homemade birthday wrap. A 9 X 11-sheet can make a bag that is about 4 inches wide, 1 inch deep, and as much as 6 or 7 inches tall. I chose to make a 4 X 1 X 5-inch bag.


I found a box with similar width and depth dimensions to the size of bag I desired. The length of the box simply overlapped the edge of the paper -- not a problem for this.


I wrapped the sides of the paper over the box and taped the paper side together (but not onto the box itself).


I trimmed the excess length of the paper, so that my bag base would be neater. Then I folded the remaining bottom end of the paper as I would do when wrapping the ends of a package -- sides in,

 
flaps down and taped


I creased the corners all around the box 


before carefully sliding the box out of my newly-formed bag.


I added handles with two short lengths of black ribbon by threading the ribbon through holes punched in the top of the bag and stapling together the ends of each ribbon (overlapped) inside the bag.


Once filled, I added a crumpled half of the striped tissue to the top. 

Obviously, a single sheet of copy paper makes a very lightweight bag, the sort that would not support being held by the handles alone if the gift has much weight.


Gift no. 3

No hack, just wrapping an upright gift in the second large sheet of pink tissue, other half of the striped tissue, and a bit of the silver ribbon.


I'm pleased with how they turned out and I hope my daughter-in-law will be too!
~~~~~~~~~~~~~~~~~~~~~~~~~~~~~~~~~~~~~~~~~~
Be a voice that helps someone else on their frugal living journey

Are you interested in writing for creative savv?
What's your frugal story?

Do you have a favorite frugal recipe, special insight, DIY project, or tips that could make frugal living more do-able for someone else?

Creative savv is seeking new voices.


~~~~~~~~~~~~~~~~~~~~~~~~~~~~~~~~~~~~~~~~~~~~~~

share this post