Stay Connected

Tuesday, August 20, 2024

Easy as Pie: A super easy way to make pie

The Rustic Bramble Tart

I make rustic fruit tarts as an easy way to make a two-crust pie. I've made these with apple, berry, cherry, pear, and plum pie filling. Those are homemade pie fillings, but a rustic tart would also work well with a can of commercial pie filling.

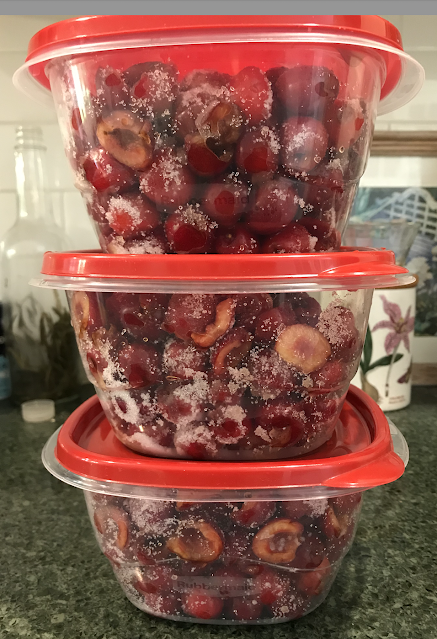
Right now, we are inundated with fresh blackberries. My daughters and husband are harvesting as many as we can wash and freeze to use in winter desserts, breakfasts, and smoothies. For tonight's dessert, I've made a rustic bramble tart. Did you know that blackberries, raspberries, and other prickly-shrub fruits are known as bramble berries? I come across the word "bramble" in my English cookbooks periodically, for example a recipe for "bramble scones." I use blackberries for that scone recipe.


ingredients:

1 patty of pie dough, enough for a single crust (pre-made rolled up pie pastry such as Pillsbury Refrigerated Pie Crust work well for these tarts, too)

2 cups of fruit pie filling (fresh or frozen berries, fresh or frozen peaches, fresh, frozen, or canned apples, with appropriate amount of sugar and flour or 1 can of fruit pie filling)

granulated sugar, about 1 teaspoon

confectioner's sugar, 1-2 teaspoons


tools

a large baking sheet

rolling pie

off-set spatula or knife


time

20 minutes to prepare the tart (depending on fruit filling prep); 30 to 35 minutes to bake


I use the paper wrappers from a stick of buuter to grease the baking sheet.
There's usually enough butter left on the paper to do a thorough job.
  • Lightly butter an extra-large baking sheet.
  • Preheat oven to 400 degrees F.
I made this filling with about 3 cups of fresh blackberries, 1/4 cup of flour,
and 1/2 cup of blackberries.
I had about 1 cup of cooked filling leftover, which I will use on pancakes,
waffles or baked custard later this week.

  • If making your own filling, prepare the fruit filling for the pie with fruit, sugar, and a thickener, such as flour, cornstarch, arrowroot, or tapioca flour. Precook the filling in a microwave in short bursts of about 1 minute each to thicken and stirring often or in a saucepan over the stove, stirring often. This typically takes 3 minutes for me in our microwave. Set aside, stir occasionally to help it cool.
  • While the filling is cooling, roll out the pie pastry to about 14 or 15 inches in diameter, about as wide across as your baking sheet.
  • Carefully transfer the pastry to the buttered baking sheet. Chill the pie pastry on the baking sheet in the fridge while the filling cools a bit more, about 4 or 5 minutes.
  • Spoon the prepared and thickened filling onto the center of the circle of dough.
I made my tart a little small today, so it ended up not round, but a pentagon.
  • Using a table knife or off-set spatula, gently fold the pastry over the filling to make a round-ish and flat tart. 
  • Check for cracks near the edge that could leak filling. Repair any cracks with a scrap of dough and a drop of water.
  • Sprinkle with granulated sugar (optional)

  • Bake at 400 F for 15 minutes. Reduce heat to 375 F and bake another 15 to 20 minutes, or until golden. Remove from oven.
  • Allow to cool on the baking sheet for 30 to 40 minutes.
  • Using a couple of regular or off-set spatulas, gently lift the tart onto a serving plate.
  • Just before serving, sprinkle confectioner's sugar through a sieve or sifter. Cut into wedges.
I use my own homemade pie pastry that I make in a 5-crust batch, freezing in single-crust patties. I use this recipe. I wrap each patty separately, freeze, and then get them out and thaw for an hour, one at a time, as needed. If making your own pastry from scratch, make the pastry before preparing the filling, so the dough can rest before rolling out.


I make these rustic tarts for everyday desserts as well as company desserts. For some reason, they seem to look a bit more "wow" than my standard two-crust pies. I get a lot of compliments on their appearance. I guess the rustic or artisan look of baked goods is appealing to many people.

Keep rustic tarts in mind for fall potluck meals. They're easy, fast, inexpensive, and always enjoyed.

Monday, August 19, 2024

We were never guaranteed an easy life

Hi friends,

So, if you read the comments from my post a week ago, you know I fell and injured myself. I hurt my neck, upper back, shoulder, lower arm, and my ankle. I still have pain. I've been wearing a sling for my shoulder a few hours every day. I have to be careful not to stress my left arm and shoulder. This may sound weird, but typing was stressful for my shoulder all week. It's doing better, but still gives me pain. I'm mostly better, except my neck and shoulder.

I chose not to see a doctor. I'm pretty sure I didn't outright fracture anything or tear anything badly. We're nowhere near our medical deductible for the year. So this would cost a couple hundred, minimum. The past year and a half has been extremely costly for my household. We are struggling financially more than any other year and have even dipped into our funds set aside for retirement to pay bills. A year ago we paid a family member's medical bills, we've had expensive car repairs, we needed a new roof, we still need a new furnace and dishwasher, and a week ago one of our daughters crashed our car (she's okay, thankfully). So, I don't want to hear any criticism for my decision to forgo medical attention for injuries that may just heal on their own. Nor do I want to hear how we should have set aside more for emergencies. We have and then some.

I feel very defeated right now. To help cheer myself, I went outside to see what easy work I could do to beautify my surroundings. A couple of weeks ago I potted 2 large pots with my homegrown marigolds. Today, I managed to pot the rest of the marigolds, using the seedlings I started from seeds, soil from my yard, and pots I already owned. At least I don't need to spend money to add cheer to our home.

I guess I'm just rambling. I hope you all have had a good week and weekend.

Monday, August 12, 2024

I'm getting there . . .


So today I put two coats of the gray solid stain on the top rail of half of the deck railing and one coat of the stain on the bottom rail of half. I expect the entire staining will take three days of work.


It looks good. I'm keeping my fingers crossed that it stands up to our winters better than paint.

Once I'm done with the staining, I'll paint all of the vertical elements of the railing black. I may or may not get to all of the painting this season.  I'll be happy with just getting the horizontal surfaces stained this year and paint on the verticals next year, if that's how it works out.

How was your weekend? Did you do anything fun?


Thursday, August 8, 2024

Can you believe I'm thinking about fall already? Fall front porch decor plans

When the light begins to shifts, here, my mind starts thinking about fall. It's still hot during the day, but the light changes trigger my subconscious.

I thought I'd share what I have planned for my revamped front porch for fall.

the remaining marigolds after moving several to larger pots

I started a bunch of autumn-colored marigolds from seeds in spring. I've been growing them in small pots for the last couple of months.


Over the weekend I transplanted some of them into a couple of terracotta-colored pots. Since my coleus is still doing well in the lime green pots on the front porch, I'll leave them in place. But in front of those I'll put these slightly smaller pots of autumn marigolds in front or alongside the coleus. I have some small terracotta clay pots that I will move some of the other marigolds into as well, to cluster around the base of the taller marigold pots. Other folks use mums as a fall flower. I'll be using my homegrown marigolds.

current front porch, with nothing in wall planters

For the wall planters -- I never did plant them for this summer. By the time I got them painted, I had my surgery and then wasn't doing very much except what was necessary at the time. So that meant any gardening I was doing pertained to the vegetable garden. But now I'm ready to do the wall planters.


I came across this photo on the internet. I plant on doing something similar with Dollar Tree faux flowers, greenery and pumpkins. (It will have to all be faux, as the squirrels get into everything, and there is no sunlight that hits the wall.) One of my daughters was in Dollar Tree this even picking up some poster board, and she said they had all of their fall stuff in already. I'll be going over in the morning to see what I can find.

I also have some faux pumpkins that I will add to the front porch.

I will update you later this month when I have something pulled together.

How about you? Does a change in the sunlight trigger you to think about fall? Is there anything that you're looking forward to about fall? I'm looking forward to fall-inspired meals, cozy evenings, raking leaves with my family, and a last cook-out in early October.

Wednesday, August 7, 2024

Windfall apples for winter's apple crisps, cobblers, and spiced compotes

Our early apple tree is ripening right now. Every other day I go out and pick a bucket full to bring in for fresh eating. At the same time I scavenge dropped apples from under the trees and in the nearby bushes.


This is today's pile of dropped apples. After washing them, I trim off bruises, chop the apples (skin still on), and freeze in gallon zip lock bags. In fall and winter I make crisps, cobblers, and sautéed spiced apples to go with cold weather meals.


Those 10 apples left me with over a quart of chopped apples.


Last year I wound up with 2 gallons of chopped apples in the freezer. This year I'm on track to meeting that amount. So far this week I have about 1 gallons of chopped apples.

You know the saying, one bad apple spoils the whole bunch. Well, if I'd put these dropped apples into the fridge drawer with the other fresh apples, it would rot sooner than the rest and possibly lead to others in the drawer spoiling prematurely. Apple bruises only grow with time. Getting them trimmed, chopped, and frozen as soon as I can saves more apple for winter treats.

Tuesday, August 6, 2024

Have I shown you our screen door to the deck?


We've had this screen door for about 12 years and really think it's a good alternative to a pricier installed screen door. We weren't in a financial position to have a screen door installed at that time, so I ordered this one.


It's a flexible fabric screen supported on an adjustable tension rod. The rod is secured at the top of the doorway, and the screen hangs from it. Here's a similar screen from Home Depot. The one in the link is for a single door. The one we have is for a 48-inch width doorway (which works on our 48" French doors). The screen goes up in under 3 minutes and requires no skill to install. 

We need a screen for about 3 months each year. At the end of the season, I take it down, roll the screen fabric around the tension rod, and store it upright in a closet.

Our particular screen has an opening down the center. We don't use that opening. Instead  we simply push the whole screen out of the way as we come and go. It falls back into place after entering or exiting.

So a price comparison -- the Home Depot  36-inch single instant screen door sells for about $24 (I think we paid about $30 for the 48-inch screen). A framed screen door (that would require installation) would cost upwards of $100 for a 36-inch width.

I just wanted to share this, as I think it's a good, budget-friendly alternative to a pricier screen door, especially for an area like mine, where I only need screening for 3 months out of each year. We actually prefer to not have a screen on this door the rest of the year, so we can see through the window better.

Monday, August 5, 2024

Tips for cleaning out a manual defrost chest freezer

I don't usually work on Sundays. However, this past weekend, I did tackle one chore. My chest freezer needed thawing and sorting so that we could begin filling it with garden and orchard produce for winter use. This needed doing and on Sunday I had the helpers around that I needed for sorting.

The frozen foods

  • start by finding other frozen storage for frozen meat. I was able to find enough room in my other freezers for the meat that I had in the chest freezer. 
  • I sort and bag freezer contents (using plastic shopping bags) as I empty the freezer. This pays off when I go to refill the freezer.
  • use ice packs and ice chests for any frozen food that won't fit in existing freezers while defrosting. Ice packs can be gallon zip lock bags filled with ice cubes or those pre-filled ice packs, either the gel ones or the ones that are likely filled with treated water and are hard when frozen. We have 3 styrofoam ice chests in which our meat deliveries come packaged. I used all three to hold the contents of the freezer while defrosting. We also have several hard-pack ice packs that we pre-froze before thawing the freezer. Once filled with frozen foods, move the ice chests to the coolest part of your house while you defrost the freezer.
  • no ice chests? You can also use cardboard boxes insulated with towels on the inside and with ice packs, plus quilts on the outside. They won't keep foods as cold as an ice chest, but they're better than storing foods at room temperature for a few hours.
Thawing and cleaning the freezer
  • I've found that I don't need to completely thaw all of the ice in the freezer. Once the ice has begun to thaw, it will slide down the walls. I pull complete sheets of ice out of the freezer and toss them out into the garden. I use a large plastic scoop to scoop up chunks of ice and slush into a bucket, as well. By removing ice and slush from the freezer as it is thawing, I save an hour or more of thaw time, which shortens the amount of time my frozen foods will be kept outside of the chest freezer.
  • Once thawed, I only wash out the inside if it has a bad smell. A solution of a tablespoon of baking soda and a pint of lukewarm water makes a good deodorizing cleaner.
  • I also thoroughly dry out the exterior drain hole, using a piece of paper towel twisted into the opening and left there for about 15 minutes to absorb excess moisture. Drying out the opening allows for a tight fit of the plug.
  • After throughly drying the interior of the freezer with multiple cotton rags and towels, I replace the drain plug, turn the freezer back on and shut the door. After about an hour, it's cold enough to transfer foods from the ice chests back into the freezer. Because I sorted contents into bags as I emptied the freezer, it's super easy to reload. Some people sort into plastic milk crates, which can then be stacked inside the now-clean freezer.
  • I line the floor of a cleaned out chest freezer with a double layer of heavy plastic. I use a couple of large, thick plastic bags. (Mine came from 10-lb flour purchases.) If you line your freezer floor, then if a liquid item leaks badly or a container of liquid bursts as it freezes, the foods on the floor of the freezer will still be retrievable without thawing the freezer. I learned this the hard way. I put a couple of gallons of milk in the freezer. Even though I had poured off a couple of cups of milk prior to freezing, one of the plastic jugs burst and leaked about 2 cups of milk onto the floor of the freezer, completely freezing the jugs to the floor of the freezer along with several bags of frozen produce. I couldn't remove any of those foods from the freezer floor for months until it was time to defrost that freezer again. So, since that unfortunate episode, I have frozen liquids that leaked in my freezer. Since I now line my freezer floor with heavy plastic, the foods that were frozen in the liquid at the bottom of the freezer came right out, along with the heavy plastic. There was no need for me to thaw the freezer in order to retrieve those items. And, with a double layer of plastic, if some of the liquid seeps under the plastic, only one layer of plastic could become frozen to the freezer floor, meaning I could still lift the top layer off along with the food item frozen to it.
Refilling the freezer
  • when you refill your freezer, don't use those handy hanging baskets (that came with the freezer and hang from the lip of the opening) in the hanging position if they keep the freezer from closing tightly. When I use the hanging baskets, ice slowly builds up along the top edge of freezer, preventing the freezer from maintaining a super tight seal. This leads to excess frost build-up at the top of the freezer walls and more frequent need to defrost the freezer. I do use one of the baskets as an organizer inside the freezer. However, I don't use it in the hanging position.
Afterward
  • After several hours of refreezing, I check the temperature of the inside with a freezer thermometer. I keep our freezers at 0 degrees F. Those control dials only have MIN and MAX with a range in between, and are not exact. If the temp of the freezer isn't at zero, I adjust the settings as needed and recheck in 30 minutes or so.
  • the rule of thumb for when to thaw a manual defrost freezer is once the frost has built up to 1/4 inch in thickness in any area of the freezer. Thicker frost not only takes up room, but it decreases the efficiency of the appliance, costing more in the long run to operate it. In addition, defrosting removes excess moisture, which is the culprit in freezer burn and "freezer taste". I defrost our freezers once per year, at a point in the year when we've gone through most of last year's produce harvest but before needing space for this year's. That means I'm defrosting our freezers sometime in mid-summer.
I don't thaw all of the manual freezer space at one time. Next week, we'll tackle the other manual defrost freezer. 

The entire process took about 6 hours yesterday. The defrost phase took about 5 hours with me periodically checking on the ice layer and removing what ice and slush I could. It took 5 to 10 minutes to thoroughly dry the interior with rags, and about 45 minutes in the operating mode to drop the temperature low enough that the freezer was colder than the inside of the ice chests.

Were there any surprises? We found more frozen chicken than I knew about, as well as a couple of donuts, half of a Danish pastry, a half carton of rainbow sherbet, lots of bread scraps and burger/hot dog buns, three pounds of butter, and some pecan halves. I'll be making something with the bread scraps later this week, and the donuts and Danish are already gone. It's nice to have more chicken than I thought, too. The biggest benefit, though, is we now know what we have and how much.

Thursday, August 1, 2024

I'm working hard this week,

but I wanted to wish you all a lovely weekend.

one of several cabbage seedlings transplanted today

I grocery shopped in the morning, sanded in the afternoon, then transplanted some fall cabbage seedlings in the late afternoon before making dinner. Whew! What a day.

I started 2 trough planters of turnip seeds in early July. They're growing well so far.

My fall harvested garden veggies will be cabbage and turnips this year, hopefully ready to bring inside in late October to early November.

Now I've got to go clean up the kitchen. Have a wonderful weekend, friends!

Wednesday, July 31, 2024

How the deck railing project is going


I continued to use the disk sander on the railing all last week and Saturday. Sunday was a day of rest. And then Monday ushered in some rain. I did get pretty far on the railing until the rain. I've now sanded the handrail on the entire railing, with exception of needing to scrape the small amount up against the support posts.

With the sun coming back this afternoon, I'll get back to sanding and scraping. I'll begin the bottom rail tomorrow. I hope to get that part done in a week. Then I can apply a stain to the top and bottom rails.

The sanding is going faster than I had thought it might. So, I just might get the entire railing refinished this summer. I'll keep you posted. And again, thank you all for your advice and tips last week.

We had initially planned on having the deck railing replaced with a composite railing that would never need repainting. Then the roof needed replacing (big $$$), the car needed expensive repairs (more big $$), the dishwasher needs replacing, the furnace needs replacing, and the list never ends. So we sat down and talked about how we can do as much as possible on our list for this summer. Refinishing the existing railing was the one item that we could do ourselves. If we like the end result, we will have saved some substantial $$ over replacement.

Tomorrow morning I'll be up early and out there scraping and sanding.

Tuesday, July 30, 2024

What's been in my grocery cart this month? July 2024 Grocery Spending


I only had 2 shopping days this month, each about 2 weeks apart.

On July 2, I did the shopping for the 4th of July, sticking to the local stores Walmart and Grocery Outlet. I stopped at Grocery Outlet first and bought hot dog buns ($2.99), 3.31 pounds of Fuji apples (49 cents/lb), 2.25 lbs sweet cherries (2.49/lb), cherry tomatoes ($2.50), 2 bags of raw vegetable medley), 2 bags frozen sweet potato fries ($3.99 each), chicken jalapeño franks ($3.99), and a cheese, meat, breadstick, and olive charcuterie tray ($5.99). I made my own raw veggie tray, using the bagged vegetable medley (raw cauliflower, broccoli, and baby carrots) plus the cherry tomatoes, and some dip and raw bell pepper I had at home. At Walmart (right across the street) I bought uncured all-beef hot dogs ($4.99), bananas (58 cents/lb), a kale salad kit ($3.98), a case of flavored sparkling water ($4.98), bag of marshmallows ($1.17) and a bar each of unsweetened ($2.42), milk ($1.12), and 70% dark chocolate ($1.12) for making s'mores. I spent a total of $56.25 for all of the above. We ended up with so much leftover food that I was using it in meals for several days after the 4th and didn't need to go shopping again for 2 more weeks.


In addition to those 2 food stops, I also ducked into Value Village (right next door to Walmart). I've been looking for a waffle maker that makes heart-shaped waffles for a while. I lifted the lids on all of the waffle makers and lo and behold, one of them made mini hearts! It was Senior Tuesday, which means I received a discount of 30%. Originally priced at $7.99, I paid $5.59. This will be a fun addition to Valentine's Day brunch. I love specialty-shaped waffle irons, but I'm unwilling to pay the "new" price for this type of item.

On July 17 I did the second grocery shopping of the month. This day I went to WinCo, Walmart, and Grocery Outlet. At WinCo I bought 3 cans of tuna (88 cents ea), a jar of mayo ($3.28), 2 16-oz jars of peanuts ($2.28 ea), 5-lb bag of organic flour for bread ($6.96), salt (67 cents), 2 cartons soy milk ($3.38 ea), 1 pound natural peanut butter ($2.18/lb), 2/3 lb sunflower seeds ($2.08/lb), bananas (58 cents/lb), 24-ct string cheese ($5.48), 2 lb block sharp cheddar ($6.78), 2 lbs butter ($3.68 ea), frozen fish sticks ($5.98), a gallon of milk ($3.49). I stopped at Grocery Outlet next and bought 2 boxes of graham crackers (99 cents ea), and 2 packages bacon ($1.99 ea). Directly across the street is Walmart, where I bought marshmallows ($1.17), uncured beef hot dogs ($4.98), 2 packs turkey snack sticks ($3.72 ea), 3-lbs vegetable shortening ($6.18), and a 5-dozen case of eggs ($16.38). I spent $100.48 in total at all 3 stores.

We're planning another cookout, so I've been picking up a few things that will keep several weeks (beef hot dogs, graham crackers, marshmallows). Otherwise, we wouldn't be going through so many marshmallows!!!

For the month I spent $156.73 on food. Of course, this wasn't a meat delivery month, plus we'vee been supplementing with our garden and pantry/freezer stockpiles. I'll need to replenish some of stockpiled foods next month. So, I expect to spend more.


I'm curious, how do some of my prices compare to yours? In most cases I buy the store-brand on products.

Monday, July 29, 2024

Did/Do/Will You Charge Your Adult Kids Rent While Living At Home?

And how did you arrive at an amount?

Our financial arrangements with our kids and how we came up with the amount

I have mixed feelings about charging my adult kids rent. On the one hand, I want to offer a free place for them because I love them. On the other hand, this is real life, and my daughters need to learn that real life has costs. We ultimately did choose to charge our adult kids. But mostly the "rent" charged reflects some of the real costs of their addition to our household.

We are a family of 4 adults. I took some of the monthly expenses and divided them by four, charging each daughter one-fourth of those monthly amounts.

Each adult daughter pays:

  • one-quarter share of utilities: heat, electricity, water/sewer, internet, garbage pickup
  • one-quarter share of groceries, except the beef I buy from a rancher, but including the cleaning, laundry, and paper supplies
  • the increase (not a quarter share, just the increase) in our car insurance having them as drivers of our singular car
The total monthly amount for each is relatively low. I figure they would have to pay for these items/services anyway if they lived on their own. 

I realize this type of arrangement with adult kids is variable, depending on circumstances. I do think it's helpful to see what others are doing under different circumstances.

If my daughters earned higher salaries, I might charge more. However, I would put the majority of that into a savings account for them, so they would have a little kitty of money to start themselves in their own places someday. 

Alternatively, I might request they set aside a certain portion of their incomes for their own future. This is what we did with our son. He made a healthy salary just out of university. We allowed him to live at home while he saved a sizable chunk of money to put down on a house. We live in an area with very high home costs compared to the average income. Allowing him this extra time to set aside money for a house meant that he and his wife were in a good position to buy when interest rates dropped to historic lows.

I will add, when my adult kids were students and living at home, they lived here rent-free. However, they were expected to work in summers to help fund their tuition and fun things for themselves. It wasn't until they were out of university and working year round that we began discussions about charging rent.


What have you decided to do regarding charging rent for your adult kids living at home?


Thursday, July 25, 2024

Have you ever refinished a deck railing?

I'm looking for advice today.

My project for the next few weeks is to refinish the railing to our deck. In past years, we've sanded and scraped flaking paint on the railing and repainted over it. Living where it's so wet most of the year, paint doesn't hold up well for us. 

So, we're going to sand all of the paint off the horizontal surfaces of the railings and use outdoor stain and seal instead of paint. For me, this means I have to sand off every bit of paint, years and years of layers of paint from the top rail and bottom rail. I'll use a grey solid stain (most coverage for a stain) on horizontal surfaces. The stain will need refreshing every year. However, reapplying stain is a lot easier than sanding/scraping and repainting.

Being vertical so water sheds easily, the balusters and support posts for the railing seem to hold the paint well. So, I'll paint all of the vertical surfaces, instead of stripping and staining those parts. I'll use a black paint on vertical surfaces. I'll need to repaint these parts every 5 years or so.

For this project I bought a disk sander designed for stripping paint. It works pretty well, but this is still an involved process. I've worked 2 days so far and have removed the paint from the majority of about half of the top railing. I should have the majority of the entire top rail done by the end of the weekend. I'll still need to go in with scrapers and sand paper to get the bits that are close to the upright posts where the sander couldn't reach. I'll also need to sand and scrape the bottom rail by hand, as the balusters are too close together for the sander.


My questions -- has anybody here ever refinished a deck railing? Have you stripped outdoor paint from wood surfaces? If so, did you sand it off or use chemicals? Do you have any tips for scraping/sanding paint in tight areas? Have you used any special tools for sanding or scraping? Thank you for any advice you can offer.

Wednesday, July 24, 2024

Knockoff of Kris's Blue Jean Button Waistband Adjuster

old button to the right, new button to the left

A while ago Kris mentioned buying a no-sew jean button pin that could be used to cinch in the waist on a pair of jeans. The way these work is you push the pin part attached to the button through the denim waistband an inch or so over from the original button on a pair of jeans. The pin is secured by a flat metal disk on the inside of the waistband. Then use this as the final button for securing the waist. Viola, a pair of jeans at least a size smaller in the waist.

If you tend toward a curvier figure, a button pin will hold the waist tighter while still being roomy enough in the hips and seat. A button pin is also helpful for someone in the process of shedding excess weight, but not at a final weight. The old jeans are too large, but one might be reluctant to buy smaller ones just yet. A button pin doesn't do anything for the extra fabric in the hips and seat, but it does keep your pants from falling off constantly. Of course, one could also just wear a belt.

This past year, between thyroid malfunctions and reduced ability to eat at times from dental issues, I lost weight. My thyroid is returning to normal, and I'm done with dental procedures for the time being, so I've been able to regain a couple of pounds. Yet my work jeans are still so big that they look sloppy. I'm constantly hiking them back up to my waist.

Being an impatient type, I decided to do something about it right here and now. I couldn't stand to have the low-crotch look another day, and I was too impatient to wait for an Amazon package with one of those jean button pins. I also didn't want to spend money on work jeans. So I decided to just sew an extra button on the waistband. I looked through my button box and found a plain looking button that would fit through the buttonhole while not slipping out easily. I sewed it on a little over an inch from the original button. I won't take the factory button off as I could very well return to my previous weight and need that extra room.


The extra button worked great. My pants actually stay up while I'm working. I'm now wishing I'd done this a whole lot sooner.

I'm sharing this today because I think many of us have weight that fluctuates enough to cause clothes to not fit right, and we'd rather not buy all new wardrobes with each fluctuation. 

Tuesday, July 23, 2024

Makin' Bacon (Bits)


We like to add bacon bits to salads. I've bought those fake bacon bits many times. But it bothers me that there are some artificial ingredients in those imitations bits. The real bacon bits sold in packets seem to be a more natural choice. I've made my own bacon bits from sliced bacon many times. However, I've only made them on an "as needed" basis.

Last week at Grocery Outlet I found 12oz packages of sliced bacon for $1.99. That's a great price for bacon in my area. The catch was that the packages expired in about 7 days. I decided right then and there to buy 2 packages and make a couple of large batches of bacon bits to keep in the freezer. (I didn't have more cash on me that day to buy more than 2 packages, in case you're wondering why I didn't buy more.)

On Saturday I cooked up my bacon bits. From each 12-ounce package, I ended up with about 4-5 ounces of bacon bits and about 5-6 ounces of bacon fat to use in cooking, all for $1.99 per pack. 

I checked Walmart's prices on packages of real bacon bits. For $1.98, Walmart sells a 2.5 ounce package of ready-to-eat real bacon pieces. By cooking my own at home, I about doubled the yield for the same price, plus I saved the cooking fat which will replace oil or butter in sautés.

I bagged my bacon bits and am storing them in the freezer until needed. They crumbled apart easily even when frozen.

The time spent cooking the bits amounted to about 15 minutes total. Not a bad time exchange to pay half the price for an item.


What are your "bacon" tips? How do you save on bacon?

Monday, July 22, 2024

The Finished Chair-Bench


Over the weekend I finally finished the chair-bench. I love how it turned out. It's not a perfect-looking bench. But it's not supposed to be. It's supposed to look like a hybrid between a couple of chairs and a bench.

As you may remember, I combined the metal frames from 2 thrifted chairs ($5 each) with several cedar pickets from an old fence (free, repurposed) to make this bench. My husband helped me cut the pickets down to size. I braced the pickets together on the underside with shorter lengths of fence pickets to form a seat. And we cut notches to fit the seat to the metal chair frames at the back. 

I painted the pieces at a couple of different times in the crafting of the bench, doing sides and undersides of pickets as well as one coat of black paint on the top. Including the paint and sealer purchased last year for the chairs, I spent about $20 for spray paint/sealer. Added to the $10 for the chairs, my new bench cost about $30 plus my time. Not bad for a garden bench.

This weekend, I attached the seat to the metal chair frames and put the final coats of paint and clear sealer on the seat top.

I've set the bench on the small patio adjacent to the front porch of our home. I really like the way it looks in its setting. The scrolls of the metal chair frames echo the scrolls of the wall planters and wall scones by the front door. Meanwhile, the slats of the bench pair well with the slats of Adirondack chairs on the porch. And the bright green cushions (made from a shower curtain bought at Value Village last year) are a near match in color to the green of the spray-painted flower pots on the porch.

To prolong the useful life of this bench, my plan is to move the bench inside to the entry hall in late autumn, then moving it back out to the patio in spring each year. In the entry hall, it will occupy the short wall beneath the staircase. I think it will look nice right there during the holiday season. I'll be able to add a couple of wintry decor items on the bench seat for Christmas. Just a little teaser -- I'll post more later this week about a thrifted find to use as a winter holiday decor piece.

I'm glad to add this new piece to our furniture collection.

Thursday, July 18, 2024

I'm trying to use up last years' jams and jellies as I start making this years'


We've just begin harvesting the raspberries. This morning I had a quart of fresh berries, enough to make 4 1/2 pint jars of raspberry jam.


However, I still have a couple of jars of raspberry jam remaining from last year.


So, as I was cooking today's raspberry jam, I began thinking of ways to use up the old jars. Since I have a bit of a sweet tooth, these raspberry finger cookies came to mind.

I was brainstorming other ways to use jam and jelly. Besides spread on toast, scones, muffins, or sandwiches, here's what I came up with:

Desserts

  • various cookies and bars
  • in making granola
  • topping cheesecake
  • between cake layers or to top plain cake
  • to fill tarts
  • to glaze fresh fruit
  • to top ice cream
Salads
  • to sweeten vinaigrette salad dressings
  • to make fruit-flavored vinegar (swish a bit of jam with white vinegar)
  • in creamy salad dressings to top fruit salads
Mains
  • in glazes for pork, chicken, salmon, or meatballs
  • in making barbecue sauce
Breakfasts
  • as topping for pancakes, waffles, French toast, or in stuffed French toast
  • to fill crepes
  • inside a jam omelet
Beverages
  • to flavor plain tea, iced or hot
  • to flavor and sweeten lemonade
  • to mix with sparkling water


What do you think? Do you have any favorite ways to use up jam or jelly?


Wednesday, July 17, 2024

Just barely enough

I did the grocery shopping this morning. I use cash when I buy groceries. Cash keeps me accountable in my spending. I thought I had more than enough for groceries. Imagine my surprise when at my final stop, I had just barely enough and was counting coins to make that last purchase. I will say, I skipped grocery shopping last week and needed to buy more than I might usually. But still, grocery prices have really jumped up in my area. 

I've got two sets of receipts in front of me, one set from 6 weeks ago and the other from today.A month and a half ago, I bought a 5-dozen case of eggs at Walmart for $9.98. Today, I paid $16.38 for the same size and brand of eggs. Six weeks ago I bought 2 pounds of butter at WinCo for $2.98 a pound. This morning I bought 2 pounds of the same butter at WinCo for $3.68 a pound. Six weeks ago I bought 1 gallon of milk at WinCo for $3.11. Today the same brand and size of milk at WinCo was $3.48. Six weeks ago I was paying $2.68 per quart of soy milk. Today I was shocked to see it had jumped to $3.38, same brand, same store. 

It isn't all bad news. The flour that I normally buy for bread, the natural peanut butter that my family likes, our staple fruit bananas, and the usual cheese that I buy have stayed at the same price. But nothing on my usual list has come down in price this year.

We're doing okay, though. I suppose the garden produce, cooking most meals from scratch, and using our stockpile of freezer and pantry foods are keeping us from needing to rework our grocery budget. The same can't be said for all of us, however. I read last month that 27% of Americans divulged that they are skipping meals periodically as a strategy to keep their grocery spending stable. Obviously, this isn't a sustainable solution to the problem of high food prices. Our church sponsored a food drive two months ago, informing the congregation that the food pantry's shelves were emptying at an alarming rate. I don't know what the answer is with rising food prices. My hope is prices will come down enough so that those 27%-ers don't have to skip meals anymore. In the meantime, generosity to food banks can go a long way to help those really struggling. 

As annoyed as I am to find higher and higher grocery prices, I also know that I am blessed. There is always enough food in my kitchen. I'm sorry that this post is more about me working through my thoughts about my grocery shopping than anything of help to someone else. Sometimes I just need to write things out to see what I am missing. Today, my writing revealed that I am already blessed beyond measure. 

Tuesday, July 16, 2024

Today on the farm . . .


 . . . we finished harvesting all of the cherries. 

We've been picking daily for the last week. Each day, we'd pick a dishpan or two of cherries, then my daughters and I would pit them all. Today was our last day, and I'm rather relieved. As I usually do, we left a few cherries on the tree for the squirrels, raccoons, and birds. I like to give them just one last taste before they have to find a new source of food.

So here's our total: 4 jars of cherry preserves, 1 pint of candied cherries, 3 jars of cherry syrup, 3 cherry pies, and 22 quarts of frozen pitted cherries for cooking later in the year. We also have 4 quarts of fresh cherries in the fridge right now, and we've been eating fresh cherries as a fruit for the past week. Fresh cherries, pitted and halved are delicious on salads. Today I made a large salad for lunch -- greens topped with cheese, chopped nuts, quinoa, and fresh cherries. I dressed it with a blackberry vinaigrette. Very delicious, and it felt so gourmet to have fresh cherries on our salad.

This is an absolute record for us. The local weather forecaster said this would be a bumper cherry crop for our area, and he was spot on.

I never thought it would be possible to get tired of eating fresh cherries daily.

Monday, July 15, 2024

A One-Year Compost Pile


I've mentioned before that we compost using two different compost bins. The first one is a straight-sided, rest on the ground, open to the dirt beneath plastic bin. It takes about a year to completely fill. I layer yard and kitchen waste with cardboard and paper. I don't follow precise ratios, but instead try to remember to add some paper and cardboard from time to time.

The above photo is just after lifting the plastic bin off of the pile after one year of filling. The pile is about 3 X 3 feet. I've moved the bin to a new location, so we can improve the soil there.

After one year you can still see some paper and cardboard in the layers, as well as some dried stalks from plants. I'll begin to turn the pile over into an adjacent bare spot to improve decomposition sometime this summer, when I have more time of course. As material breaks down, the pile shrinks.


In the meantime, I can access some good composted material from the bottom. I have dug out a couple of gallons of compost to amend soil when planting some perennials and shrubs this spring and summer. I simply dig away at the bottom edge of the pile where everything is pretty well decomposed.


Occasionally someone in the household will add something to the compost that is only partially compostable. Here's the plastic lining from a take-out paper coffee cup. All that is left is the plastic. The paper part is long gone. I pick these bits out when I come across them when digging. In a perfect world, my family would remember that these cups don't go into the compost but are better set aside for fire starters in the outdoor fire pit. It does make you think, though, right? When we get a takeout coffee, our tasty hot beverage is steeping in a plastic-lined cup. That can't be good for us. 

We've had the same plastic compost bin for 25 years. It's cracked and chipped, but still does a good enough job holding material in a heap. The pros- it was inexpensive. We bought it through a community program, paying about $10. It's great for bulky items like complete plants at the end of the gardening season. I pile whole tomato plants into the bin. Because it's open at the bottom, worms quickly get to work. Cons-also because it is open at the bottom, critters can dig into it from underneath. Also, as the material only gets turned after a year, it takes longer for it all to decompose. All in all, we're pretty happy with this composter.

Before we bought this one, we had an open heap behind an evergreen tree away from the house or boundary with our neighbors. The heap did work, but we had problems with critters digging in there and making a mess.

Our other compost bin is a tumbling one. I'll tell you more about that one, and what we think another time.

Do you compost? What type of bin do you use? Does your material breakdown faster than it does for me?

Thursday, July 11, 2024

The Purple Chair

I think the garden is a great spot for a bit of whimsy or surprise.  

This wooden chair was formerly sage green, then white, and now I've painted it purple to tie in with the purple blooms of my lavender container garden. The large right lavender is just now in bloom. If you look closely you can see the purple blossoms.

I used spray paint, Rustoleum 2X Grape, gloss and top-coated with Rustoleum 2X Clear, semi-gloss. I chose the shade of purple that I wanted while in the store at Home Depot, comparing the color on the can to an actual English lavender plant beginning to bloom in the garden center there. Grape was practically the exact shade of purple. I'm sure I must have looked a bit silly holding cans of spray paint up against the potted plant.

It took 1  2/3 cans of the purple spray paint and just a little from the can of top-coat that I had from a project last year. The entire painting part took 3 days.

Anyway, purple may be an unconventional color for a chair. But I think it looks lovely in the garden next to the white pots of lavender.

Wednesday, July 10, 2024

It's a battle for the sweet cherries in our yard, but I'm making the most of it


Every summer it's the same battle. The squirrels, raccoons, and blackbirds want our cherries before they're fully ripe for our family's fresh eating. We do get to eat some of the cherries ripe and sweet off the tree. But also, I've gotten creative in using the cherries before they ripen and get snatched by the critters. 

a bit of a rustic looking cherry pie

This week I made cherry pie using underripe sweet cherries, lemon juice, corn starch, sugar, salt, and almond extract for the filling. 

more cherry pie filling to use in another pie this week

One trick I've learned about making pie with sweet cherries is to cook the filling in a saucepan before pouring into a pie crust. Sweet cherries tend to have a higher water content than sour cherries. So cooking some of that water out in the saucepan helps the pie cook evenly, fully cooked filling that's not at all soupy and crust that is golden brown. The pie was a hit and lasted 2 days in our house. I made another batch of pie filling yesterday, and I will bake it into a second cherry pie for tomorrow's dessert.

candied cherries

Today I made a batch of candied cherries, following the instructions from this site. Overall, I think they turned out pretty good. The next time, though, I'll use less water to begin (maybe 2 1/2 cups instead of 3), as it took a long time for the liquid to thicken to syrup consistency and thus candy the cherries. I felt the cherries came out slightly overcooked as a result. I suppose the site's author used a larger saucepan than I did, and that would've cooked the liquid out faster. Anyway, I am pleased with the cherries. 


Four cups of fresh cherries yielded two cups of candied cherries plus about 6 ounces of surplus syrup. I'll freeze the candied cherries and use them at Christmas in fruitcake and to top Swedish spritz cookies. I'll be using the surplus syrup on waffles later this week.

Tomorrow I plan on making cherry preserves. In years that we get a good crop of cherries, I make Bonne Maman style cherry preserves. These preserves are not only delicious on toast or muffins, but they make a nice topping for ice cream sundaes or filling for cakes. 

My fingernails are so badly stained from pitting so many cherries this week. Fortunately, I don't have any place special I need to go. I guess that's a price I'm willing to pay. Terrible looking fingernails in exchange for tasty cherry treats made with organic and very locally-sourced cherries.

~~~~~~~~~~~~~~~~~~~~~~~~~~~~~~~~~~~~~~~~~~
Be a voice that helps someone else on their frugal living journey

Are you interested in writing for creative savv?
What's your frugal story?

Do you have a favorite frugal recipe, special insight, DIY project, or tips that could make frugal living more do-able for someone else?

Creative savv is seeking new voices.


~~~~~~~~~~~~~~~~~~~~~~~~~~~~~~~~~~~~~~~~~~~~~~

share this post