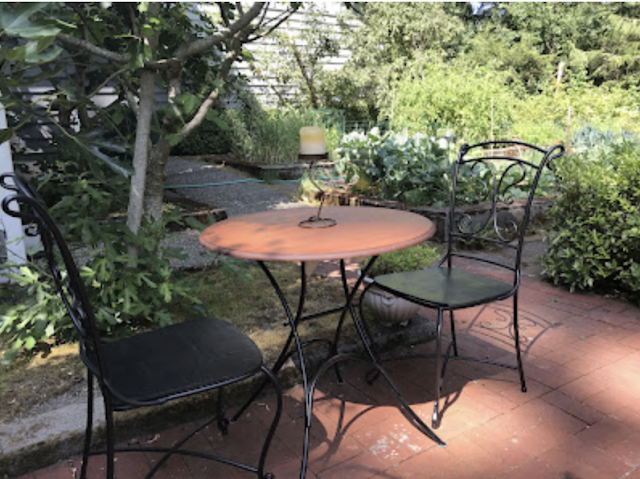
Jog your memory a bit -- this is what I started with in May of this year, a $5 garage sale table and two $5 thrift store chairs.
I spent many hours sanding, staining, spray painting, and sealing the pieces. I took a bit of a break from this project earlier in the month and came back to the pieces this week.
Below photo: Here they are, sitting opposite the grill station on the small patio in back, as viewed from behind the fig tree.
I'm not that pleased with the seats. They were a mess. Remember, these were upholstered chair seats. So the plywood under the foam and fabric was thin and water damaged. It probably wasn't all that great to begin with, given that the manufacturers planned for the wood to be covered with foam/fabric. The layers of one of the wood seats' edge had split. I filled the edge gaps with wood glue and clamped it closed until the glue dried. The top of the water damaged seat was wavy and rippled. I didn't want to sand too much off, so I figured I'd live with the result.
For the time being, I have enough lime green shower curtain fabric left over from making patio cushions plus the foam from the chairs to make removable chair pads for each seat. I'll get to this next week. Chair pads will conceal the finish of the wood seats. In the long run, I'll probably buy a new piece of plywood and cut new seats, then finish and seal.
Below is the view facing the bistro set from the small patio.
Cost-wise -- I spent about $40 for the pieces and finishing supplies. I used 2 1/2 cans of spray paint and about 1/2 can of sealer, plus a small amount of stain. I also bought a dowel to make plugs for some holes in the wood seats. I have a little paint leftover and lots of sealer/stain, plus most of the dowel to use in other projects.
Was it worth it? I like projects, so I don't consider my time spent as a negative. The cost was a whole lot less than any bistro set I could buy ready made. My family really likes the set-up and are all looking forward to having breakfast, lunch, or a glass of iced tea at the little table on the little patio. So yeah, it was worth it.
The candle and candle holder on the table were free. Both were found on free piles. The candle holder had some autumn foliage wired onto the stem. It wasn't the look I was going for, so I removed the faux fall stuff.
The pillar candle was found in a basket of free candles a few years ago. It was just the right size.
One of the things I like about making over secondhand finds is in the process of working on the pieces, I put a fair amount of myself into them. They no longer feel like secondhand stuff or someone else's castoffs. But instead, they feel wholly mine.


What a difference! I love bistro tables. They put me in mind of an outdoor cafe in Europe somewhere. :) Your transformation looks very elegant.
ReplyDeleteHi Kris,
DeleteThank you! I'll have to think of a small sidewalk cafe in Paris as I'm sipping my morning coffee at the bistro table tomorrow.
What an inviting space you have created. I'm sure it will be enjoyed often. I especially like the green color of the chair bottoms.
ReplyDeleteThank you, Live and Learn. I'm looking forward to sewing the green chair pads. I think the green will add a nice pop of color.
DeleteThat came out really nice! The cushions will add a nice touch. Good job on the remake!
ReplyDeleteThank you, Cat. They're not perfect, but they're good enough. And I think the green chair pads will be a nice color boost.
DeleteIt looks beautiful. Maybe you can make foam cushions to make the seats more comfortable? Will you be able to reuse the leftover paints/ stains? Do they keep well? Thank you.
ReplyDeleteHi Farhana,
DeleteI'll be making seat cushions with the salvaged foam from the original chairs and the leftover shower curtain fabric. I agree, they'll be more comfortable and bright and cheery.
If cans of stain are sealed tightly, they keep for many, many years, decades even. The spray paint should keep for a few years, too. I've been using my cans of silver and gold spray paint for over a decade and they still work just fine. Black spray paint is a perfect color for me to keep on hand. I find I use it often. And I really like the tone of the brown stain. I may use the rest of the can on our kitchen table this summer.