Stay Connected

Wednesday, October 23, 2024

Three Shirt Days

We've entered the time of year that my family calls the "three shirt days." These are the days when it feels so cold to us that we often wear 3 shirts or 3 layers during the day at home. For some reason a 55 degree F day in fall is so much harder to take than a 55 degree F day in spring.

Sitting around the dinner table, we have these discussions on which is the best way to layer, long underwear against the skin, or tank top first then long underwear, or a couple of flannels over a long-sleeved tee, or fleece over any two layers. Today I chose long underwear under a thin sweater hoodie, topped with a fleece zip up jacket.

According to REI, the outdoor adventure store and their gurus, there is a right way to layer. The first layer should be long undies in a fabric that will wick away moisture. Makes sense, cause when you feel sweaty in cold weather, you just feel chilly overall. The second layer should be insulating, like polyester fleece or something like down or synthetic puffy jackets or vests. The third layer should be a waterproof and windproof shell, like a windbreaker or jacket. Obviously, these are outdoor recommendations for dressing. But perhaps some of the same principles could be put in use for indoor dressing. While indoors I don't need anything water or wind proof. However, the wicking long underwear top does make a good base layer for the reasons they stated, to draw moisture off the skin. I do like the insulating effect of polyester fleece. Fleece has some breathability, too, which is welcome. So, I'm good for two layers according to REI.

I also consulted some emergency/survival websites on how to dress for indoor warmth in the event of a power outage. While a power outage is an extreme case, some of their tips could prove helpful for me, an always cold person. While our furnace is indeed working, we keep the house on the cool side compared to what I grew up with. Survival Frog recommends wearing layers that would include thermal and/or woolen garments. Wool is the traditional cold weather fabric. It was around long before polyester fleece or waffle-weave thermals ever existed. I think wool has fallen out of favor a bit for a couple of reasons. It can be itchy, it's more fussy to launder, it attracts moths when in storage, if it gets soaked in the rain, it takes a while to thoroughly dry, and it can smell when wet. Meanwhile, poly fleece goes into the washing machine and dryer, doesn't have a weird smell, doesn't shrink, and isn't itchy. 

The Frog also suggests wearing usual outdoor accessories indoors when suffering a power outage, such as scarves, hats, mittens, thick socks, and always shoes. I always wear shoes indoors because my feet prefer it. And I occasionally wear a knit headband indoors. It's really, true, though, wearing a hat or knit headband must hold in some heat, as I actually get sweaty when wearing something on  my head indoors for very long. Despite my anecdotal evidence for wearing a hat to hold in heat, it's not true that you lose 40% to 45% of your body's heat through your head. According to WedMD, you lose the amount of heat through your head at the same rate as any other exposed part of your body. Your head makes up about 10% of the surface area of your being. So if your head is uncovered, you would lose approximately 10% of your heat through your head. But still, if you're chilly, blocking 10% of your body's heat from escaping will be 10% saved heat. And that's something.

Here's an idea I may try this winter, making some pocket hand warmers from my 100% cotton flannel fabric scraps, rice, and some cotton thread. To warm them, pop them into the microwave for 20-30 seconds or more, then tuck them into hoodie pockets. Instructions and tips can be found at All Free Sewing.

I find I drink a lot of tea, hot cider, hot decaf, broth, and simply hot water this time of year. Warming up my insides goes a long way toward keeping me more comfortable as the weather turns chillier.

When we're sitting, we use blankets and throws to hold in heat. And I've been known to bring a fleece throw to the kitchen table in the early mornings. We call these "fleece napkins" in our house.

Did you know there's a "right" way to make your bed for chilly nights? According to Life Hacker, you'll stay warmer if you put a thin wicking layer (such as a flannel sheet) closest to your skin, then an insulating layer (such as a puffy comforter or knit/crochet blanket), followed by a topping of a densely woven blanket (such as wool or dense polyester). This follows REI's advice to start with a wicking layer, then an insulating layer, and finally the layer that blocks heat loss. In the bedding's case, putting the dense blanket on top prevents convective heat loss.

You know, in our house there is such a thing as a four shirt day, too. Those are the days when I wash my hair. Wet hair makes for a chilly day. And long hair takes a long time to dry. I try to choose to wash my hair on a day when I'm planning on being some place warm for part of the day, such as an appointment in a well-heated office or church. I pull my hair back neatly while still wet. By the time I get home, my hair is about half dry and I can bear the chilly indoor air for rest of the time needed.

I can feel it already. It's going to be a long time before the two shirt days return.

That's how we stay warm on these three shirt days. When the weather turns chilly, how do you stay warm? Are you an always cold person, too? Or do you run on the warm side?


sources:
https://www.rei.com/learn/expert-advice/layering-basics.html
https://www.survivalfrog.com/blogs/survival/11-ways-to-stay-warm-during-a-winter-power-outage
https://www.webmd.com/a-to-z-guides/features/do-we-really-lose-most-of-our-heat-through-our-heads
https://www.allfreesewing.com/Winter-Projects/DIY-Hand-Warmers
https://lifehacker.com/how-to-feel-warmer-if-youre-always-cold-1848310457

Tuesday, October 22, 2024

Pumpkin Spice Butter, Using Canned or Fresh-Cooked Pumpkin


Many years ago our family went to a pumpkin and corn farm in the fall. In addition to fields of pumpkins and corn, they had this cute little store at the front of the farm. The store's shelves were lined with jars of relishes, jams, and butters. Being a crisp October day, one of the butters in particular caught my eye, the pumpkin spice butter. It was about $5 a jar back then. I didn't buy any, but decided to try making it myself. I played around with a few recipes and came up with something of my own that we enjoy at our house. And it's a fraction of the cost of the pumpkin butter from the farm store, specialty market, or any place else you might find it. 

I thought I'd share this recipe in case anyone wanted to try making a small batch of pumpkin butter for themselves. And since you can use canned pumpkin, your pumpkin butter can be made with ease.


Pumpkin Spice Butter

one 15-oz can or 2 cups strained (to remove excess liquid) home-cooked pumpkin
1 teaspoon cinnamon
1/8 teaspoon or a bit more ground cloves, depending on preference
5/8 teaspoon ground ginger
3/8 to 1/2 teaspoon ground nutmeg, depending on preference
3/4 cup granulated sugar
1/3 cup apple juice or apple cider
3/4 teaspoon to 1 teaspoon lemon juice
(tiny dash salt, optional, see notes below)

Stir all ingredients except the lemon juice together a medium saucepan and cook over the lowest setting on stove until dark brown and thick. Stir in lemon juice. When done, you can draw a spoon across the bottom of the pan and no liquid will seep into the scraped space, and it should hold its shape on a spoon like stiff mashed potatoes. 


Cook this low and slow. I left mine to cook for a little over an hour on the lowest setting on my stove, stirring periodically to prevent scorching. I was busy with other kitchen and laundry chores that day, so it's not like I was standing at the stove for all of this time. I began with half home-cooked pumpkin, which is more watery, and half canned. So if you're making yours with all canned pumpkin, your cooking time will be a little shorter.

Yields about 12 to 14 ounces

note: I'll also add that one of my daughters likes this pumpkin butter with a dash of salt. So some years I add just that, a very tiny dash of salt to the cooked butter.

Keep refrigerated for up to 4 weeks or frozen up to several months. Do not can this pumpkin butter. However, you'll be pleased to know that it freezes beautifully. 

With this last batch, I refrigerated half to use this month and froze half to enjoy later.

If what you prefer is butternut squash over pumpkin, this also makes a delicious butternut squash butter.


Ways to use pumpkin butter:

  • as a spread on toast, scones, biscuits, or plain muffins
  • filling for cinnamon swirl-type breads or rolls
  • to add a generous dollop to French toast, waffles, or pancakes
  • blended with softened cream cheese as a spread on bagels
  • to fill small, baked tart shells
  • as the filling for a spice or vanilla cake between the layers
  • use a dollop on curried lentils or meat in place of chutney
  • as a condiment to roast pork or poultry
  • as a dip or spread for apple or pear wedges
  • layered in an autumn parfait of pudding: pumpkin butter, whipped cream and a nut sprinkle
  • blend with caramel sauce for topping ice cream
  • blended into plain eggnog 

Have you tried pumpkin butter? What did you think? 

Monday, October 21, 2024

Harvest Season: Making Use of Every Last Bit

Industry, perseverance, and frugality make fortune yield.
--Benjamin Franklin

If I say the phrase "harvest season" what comes to mind? I think about bringing in corn, pumpkins, squashes, and apples.

In our summer garden, we eat our favorites, the best of the best. In our harvest season garden, I'm bringing in all of the odds and ends and some foods that don't look as great as their summer versions (celery is one of those veggies). So harvest season for me is all about bringing in the last of the edible veggies.

I've been working diligently at harvesting everything edible from our garden. Every day, I go out there to see what needs to be picked that day before it will no longer be a desirable food.

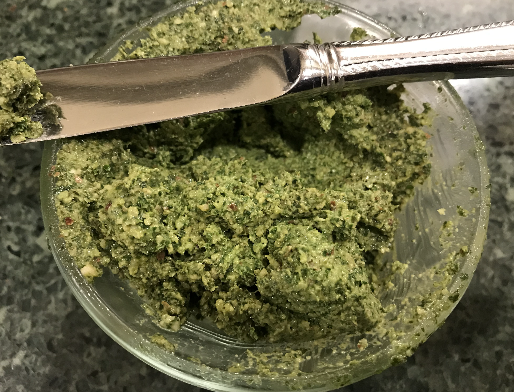
I told you about the carrot leaf pesto I made last week and the week before. This past Saturday, I picked every nasturtium leaf bigger than a dime to make a third batch of pesto. I filled out the quantity with parsley and watercress. The resulting nasturtium-watercress-parsely pesto is delicious. One of my favorite ways to use pesto is on macaroni pasta with a little diced tomato and Parmesan cheese blended in. When this current batch of pesto is gone, I'll make radish leaf and watercress pesto using veggies from the fall container garden.

I also told you about the crabapple sauce I made last week. I used a cup of it in the applesauce-raisin bar cookies that I baked over the weekend. Crabapple sauce can have a sharp flavor on its own. But in the cookies it was delicious. To eat this sauce as is, I blend it 50/50 with plain applesauce to mellow the flavor. I still have about 1/3 of the crabapples left to harvest. I plan on making cider with these apples.

One daughter had some time one day to help me harvest greens to chop and freeze. We harvested Swiss chard, sorrel, Brussel sprout leaves, and parsley on that day. You can cut about half of the Brussel sprout leaves at this point in the season without compromising the growth of the sprouts. We sliced them thin and froze in a large bag. The texture of Brussel sprout leaves is a lot like kale, but a bit thicker. The Swiss chard will be the first of the garden greens to die out from the cold, wet weather. So, I've been making an effort to pick those regularly for meals, as well and the large bag that we froze. Sorrel has a lemony taste but a texture much like Swiss chard. So we chopped and froze the sorrel and bagged with with the chard. The two together should go well in quiches, frittatas, and soups. Parsley will do well for several more weeks. But as we have so much of it, we're working at harvesting it for the freezer on a regular basis. Frozen parsley can be added to sauces, soups, stews, vegetable medleys, and winter pesto.

I harvested a third batch of unripe figs on Saturday to preserve in a light syrup flavored with cloves and lemon juice. So far I've canned about 16 jars of sweet green figs to enjoy throughout winter. When we finish a jar of the figs, I use the syrup to flavor and sweeten hot tea or pour over pancakes.

Yesterday I cut all of the long stems of rosemary to dry on the counter this week. Rosemary is a nice flavor addition to potatoes and various Mediterranean dishes. Later this week I'll harvest more thyme for winter cooking. Thyme is my favorite herb to use with beef dishes.

I picked the last remaining small green tomatoes today. I  chopped them fine and froze to add to chocolate spice muffins (Green Tomatoes in Hiding) when I bake again soon. It's time to pull the tomato plants up and pile them on the compost heap.

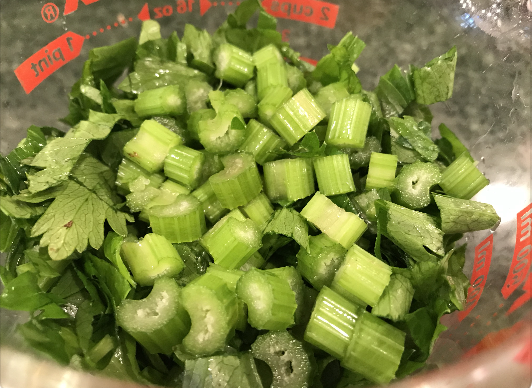
I also began harvesting the celery plants today. I pulled up about half of the plants, chopped, and froze the stems and leaves in a large bag to use in winter soups and sauces. I also harvested the last of the cucumbers and summer squash plus some green beans this morning. And I picked what are probably the last of the overbearing raspberries. One more cold night like last night and the raspberries are gone.

I will need to harvest the Brussel sprouts, the remaining Brussel sprout leaves, the remaining green beans, the rest of the Swiss chard, celery, and parsley, the last third of the crabapples, and perhaps one more batch of green unripe figs.

When your harvest is carrot greens or nasturtium leaves or unripe figs, you have to be creative in how you cook those foods and diligent at using them up. My lunches and dinners have featured a lot of oddball pestos, crabapple-apple sauce, the top leafy parts of celery stalks, and preserved unripe figs. You do what you've got to do.

It's been a lot of work. I mentioned to my husband that I could probably harvest every edible thing we grow if I had an assistant. But alas, all of my potential assistants have their own jobs. So, I'm doing my best to harvest what I can.

Thursday, October 17, 2024

Owning Your Frugal Knowledge for Life

Today was crabapple sauce day. I made 13 pints of crabapple sauce for the freezer.

In the comments from yesterday's post, Tina reminded me of a thought I've had over the years: Once you learn a frugal skill, you own that knowledge for life. And if you learned that skill early in life, you own the knowledge for a long time, which means you save yourself a lot of money instead of a little. An example, if you taught yourself how to change the oil in your car when you were a teen, you can save thousands and thousands of dollars on home oil changes over your lifetime. 

Even if you're living on easy street for a while, if the tide turns for you later on, you can revert back to your learned frugal skills. Frugal skills and knowledge remain with us throughout our lives. We own the mental access to that information.

As Tina mentioned yesterday, returning to some of her frugal skills learned in her younger days is allowing her to choose her career at this later time.  She's not locked into a job that she doesn't enjoy. 

my Foley food mill for making applesauce

As with other types of skills, we build on our frugal skills with useful tools or seeking out better ways to do things. And mastering one frugal skill often leads to the mastery of adjacent frugal skills.

a cup of sour milk that no one would drink was used in a batch of pancakes this morning

homemade pancake syrup -- brown sugar, water, salt

Sometimes it isn't a skill but a tip that you learn and incorporate into your life that is money-saving. Once you've learned that tip, you own that knowledge and can refer back to it over and over.

I believe that many of these basic frugal skills and knowledge should be taught in school again. While you can learn them on the fly as needed, it's a whole lot simpler to learn them when you're young and not in the throes of a spoiling milk emergency. After all, life's emergencies often don't come with a warning.

Covid, the lockdowns, the shortages were evidence that many of us weren't really prepared. Imagine how much less stressful that period would have been all around if everyone had gone into the pandemic with some basic frugal life skills, like cooking at home. Having survived 2020, are we as a society better equipped to handle a future emergency? Did many people learn some useful skills for thriving in adverse situations? I hope so. Learning how to bake bread is like learning to ride a bike. It all comes back to you when you try again.


(Tina, I hope it's okay with you that I referenced your comment in this post.)

Wednesday, October 16, 2024

What motivates your frugality?

Frugal dinner for two. We could have eaten out, but chose to stay in for a home-cooked meal of leftover meatloaf on macaroni (my cheapest pasta shape), smothered with homemade Italian tomato sauce, with garden green beans on the side. Dessert was a home-made apple crisp made with our tree apples.


Today was all about making salsa. I've now put up 16 pints of salsa for this coming year. I'm glad to have scratched salsa off my list. I could buy salsa. The store brands are not that expensive.  However, we like my homemade salsa, and we love that there's always a jar at the ready for meals and snacks. And the $$ savings is nice, too.

So while de-seeding peppers and chopping vegetables I was thinking about all of the reasons we continue to live a frugal life, my motivators for frugality. The list is long, warning. But it sums up why my husband and I have chosen to be frugal.

My reasons are primarily financial (not a surprise), but a few reasons are more ideological. Some reasons have to do with parenting, although one could argue that everything we do that our kids can see is parenting through example. Some reasons have to do with my place in God's kingdom, how I love the world through generosity with what I've been given. Some reasons have to do with my personal fears and what ifs.

In no particular order, here's my list:
  • to stretch limited finances to cover all our current needs
  • to never go into debt and risk losing what we have gained due to missed loan payments
  • to save for our future when we'll be less able to work and may need more hired assistance
  • to pay for a few luxuries in our lives - well-maintained home, garden, and car, plus a vacation every few years
  • to give generously to those in need and to support our church and missions
  • to leave something to our children and causes that we support
  • a challenge to do what culture has said is impossible -- American dream on one income
  • to allow one person to focus on nurturing the family, home, and giving time to others
  • to set an example for my kids and others around me
  • to be responsible and pay for the things and services we use
  • to save for unforeseen circumstances or needs
  • in the past, but pay for education for our children without taking out loans (ours or theirs)
  • to offer financial help to any of our family when they need it
  • to not be wasteful -- I abhor waste, it really gets to me
  • for a mentally, spiritually, and physically healthier lifestyle
I have days when I wonder "why bother? Why not just live my life spending without thinking?" Then I think of my motivations. This (almost) always triggers reason in my mind.

Our motivations have shifted over the years, obviously. In our early years of marriage, being frugal was a matter of survival. Over time we've slowly built up a cushion, so we aren't living on the edge any longer. Our focus has changed from children's basic needs, to older children's educations, and now to our own future retirement. 

I may have missed a motivator or two. But I think my list hits all of the most important reasons for our frugality.

So, what motivates your frugality?

Tuesday, October 15, 2024

An Autumn Picnic

This was the view we had at the river.

From the kitchen window I could see a sky awash with pink clouds early that morning. I had my fingers crossed that we would have beautiful weather for this day. We were rapidly running out of nice autumn days to enjoy a picnic at the river. It needed to be warm enough that we wouldn't shiver during our lunch on the grass. As it turned out, the gentle warmth from the sunshine melted our cares away.

This small park along the river in the vintage district is virtually unknown to the average shopper and peruser. It never ceases to amaze me that we can have the entire park practically to ourselves. Meanwhile, just up the trail from where we picnic is a cafe with outdoor seating, with exactly the same view that we enjoy at no cost. The wait time for a table on this cafe's patio looked to be at least 30 minutes, with eager diners standing in the doorway as we passed by to the trail which would take us to the river front.

The previous afternoon I'd made a batch of hummus and a batch of pesto to go with dinner. I'd deliberately made enough for leftovers to take to the river the next day. In the morning, we made hummus-pesto-fresh tomato sandwiches on whole wheat bread. We cut up apples, packed some apple-raisin bar cookies and some cubes of cheddar, and made a large thermos of apple-spice tea. The tea was a 50/50 blend of apple cider and black tea plus a pinch of cloves and dash of cinnamon, all heated together. Our al fresco repast was as enjoyable to us as any diner meal would be.

After our lunch we peeked into the various vintage stores then stopped by the pie shop to each select a slice to bring home. Perhaps that doesn't make sense -- we saved by bringing our own lunch, but then spent on pie to take home. Having the assorted slices of pie after dinner was our way of extending the pleasures of the day into the evening. 

Just as the weather forecasters predicted, our lovely warm autumn days washed away with the rainfall Monday morning. 

I don't know why I felt we needed a picnic to mark this autumn. This isn't something we've done in the past. Perhaps this year, with several difficulties, I just felt we needed to celebrate something, anything, celebrate that we are well and here together, celebrate that seasons are cyclical, and we will always return to summer. Maybe we don't need something to celebrate, but we can just enjoy being. Anyway, this was our autumn picnic.


Monday, October 14, 2024

My Autumn Container Garden Progress

I wanted to show you what's possible for a fall season, shallow container garden in a cool maritime climate. We get our first freeze (32 degrees or lower) in early to mid-November most years. Up against our house on the south-facing side, temperatures can be a degree or two warmer, even at night. That gives us some leeway for keeping a fall container garden going well into fall.

I realize that in many areas, it's already too cold to begin a container garden for fall, even with fast growing vegetables like radish greens. Still, I wanted to show you in photos what can be grown, to keep in mind for future growing seasons.

I'm growing two vegetables this fall, radishes for the greens and watercress. Both of these greens are frost tolerant and can grow in the reduced amount of sunlight that we receive this time of year.


The containers I'm using are fairly shallow, about 7 inches high. I posted about them in the spring, showing that I drilled drainage holes on the bottoms and lower sides.


In this first container, (above) I started radish seeds around Labor Day (the first weekend of September). I planted the seeds close enough to not expect radish roots, but to focus on the greens. I use radish greens in soups, stir fries, salads, and pesto. This batch is now ready to begin harvesting at about 6 weeks since sowing.


This next container (and two others just like it) were seeded with radish seeds around 3 weeks ago, about the end of the 3rd week of September. Due to sowing later in the fall, they were slower to germinate than the ones sown around the first of September. I expect these will be ready to harvest for cooking in about 1 month (early to mid-November). 


At the same time that I seeded the second batch of radish containers I also seeded a container of watercress. Watercress is a slower grower than radishes. Their primary merit this time of year is that watercress can survive occasional overnight freezes once the plants are large enough. I may have waited too long to start them for fall. If push comes to shove, I can bring this container and the radish ones inside and place under lights or in the window to continue growth. For now, both vegetables do better in colder outdoor temperatures than heated indoor areas.

All of the containers are out in the open right now so they can benefit from maximum rainfall for the time being. As the nights become colder, I'll move the containers up against the house. The greens will likely stop putting on new growth in early November. Keeping them up against the house but still outdoors will only serve to hold them until I want to cook with them.

Many of you just want gardening season to be over. I get that. But for those of you finding produce prices, especially leafy greens, to be outrageous this fall (as I am finding in my stores), here's a way to grow some of your own leafy greens, even well into fall depending on your growing zone. I reused my spring and summer containers, the soil within, and without any additional amendments (no fertilizer or compost added for fall growing). There seems to be enough residual nutrients in the "used" soil for these current leafy greens to grow.  The seeds are all from what I've saved when my plants went to seed. So there's been no cost in the seeds either. Whatever grows in these containers will be free for me and with very little work. That's a price I can't pass up.

Like I said earlier in this post, this may be too late for others this year, with exception of those living in the southern tier of the US. However, this is a viable idea for fall seasons.

Thursday, October 10, 2024

Applesauce-Raisin Bar Cookies (plus my carrot green pesto)

Are you ready for another autumnal recipe?

I wanted to share a link to a recipe I've made twice this month, applesauce-raisin bar cookies.  The recipe is technically for applesauce cookies, but I added about 1/2 cup of raisins. Doesn't it look like there are raisins in the photo at the website? 

If you have an inexpensive source of applesauce, these are very budget-friendly. They call for just 1/4 cup of butter, whereas most cookie recipes that use butter call for about 1/2 cup. These sweet and spicy bars are a soft cookie. The frosting, as made by the recipe,. will use another 3 tablespoons butter. However, I made 2/3 of the frosting recipe, using 2 tablespoons of butter, and we liked them a lot that way. So, in total, I used 3/8 cup of butter, still less than most of my cookie recipes. 

I also think they're a healthier cookie than many recipes, with just 2/3 cup of added sugar and applesauce and raisins for additional sweetness. The rest of the ingredients include 1 egg, flour, baking soda, salt, and spices. For the pumpkin pie spice, I used a combination of cinnamon, cloves, ginger, and nutmeg, totaling just over a teaspoon (we like to taste the spices).

The recipe suggests cutting the pan of cookie bars into 20 servings. I cut mine into 24 bars. Mine baked in under 25 minutes. So I'd suggest setting the timer for 20 minutes and checking at that point.

If you try these, let me know what you think.


And for the carrot top pesto --

I made it this morning, doing a large enough batch to have some for dinner tonight and lunch tomorrow (a little autumn picnic scheduled). It turned out really delicious. I didn't have any basil, so I just used oodles of carrot tops, almonds, garlic, olive oil, salt, lemon juice and just a little water to get the right consistency. It's very tasty. I added this and that until the flavor was just right. I will say, pesto is an excellent way to use up a lot of carrot leaves. I'm down to about one more recipe of some sort and I will have finished off all of this year's carrot tops. I highly recommend making a pesto with carrot greens for the gardeners on here.

Wishing you all a lovely weekend. Happy Thanksgiving weekend to our friends in Canada! 🦃

Wednesday, October 9, 2024

Changing how I see what our garden produces

I was out digging the carrots in the garden today, and I had this revelation about how home gardens actually are versus what we thought they should be when we first started out.


When I first began keeping a garden, I had this idea that I would grow the foods that I saw in the grocery store. I would grow carrots, iceberg lettuce, tomatoes, green beans, peas, cabbage, and corn. Those were the foods that my family was happy to eat. So I thought that's what I'd grow. 

In reality, iceberg lettuce is hard to grow to maturity here. The squirrels and raccoons have decimated our corn when we've tried to grow it. And the peas are hit or miss for us. We do always get plenty of tomatoes, some green beans, at least a couple of good heads of cabbage, and carrots of varying shapes and sizes. One glaring difference in the foods that I can grow here is that they almost never look anything like grocery store produce. Some of this year's carrots are so wonky-looking. The cabbage heads have their share of bug bites. And the green beans and tomatoes have obvious blemishes.

But appearance isn't the only thing I've had to adjust my thinking on. I've made an abrupt departure on my thoughts of what to grow. As it turns out, kale does exceptionally well here. Up until 25 years ago, I'd never eaten kale. I planted it anyway and we've learned to like it. Almost the same thing with rhubarb. I had tried rhubarb in a pie when I was young, but I was not impressed. Rhubarb loves my climate. So we grow and eat a lot of rhubarb.

It isn't just what I grow, but the parts of each vegetable that we consider food in our house. Turnips do okay here. But it's the leaves that outperform the roots. So, I grow turnips for the leaves. Ditto on radishes. We eat turnip greens and radish greens now with no hesitation. Funny thing, I've never seen turnip greens or radish greens sold by themselves without the roots attached in the market. Hmmm, maybe other folks don't appreciate bitter greens like my family has learned to do.


In my garden-to- kitchen lifestyle, I've had to develop an eye for opportunity in the whole plants. Today while digging the carrots, I realized that we really get very little in the way of actual carrots for eating. What does seem to grow in copious amounts is the carrot tops. 

I've chopped and frozen carrot leaves in previous years. but I think I was thinking of the green portion as a little bonus, but not always used in a timely manner. Today I tried to switch up my thinking a bit and see the opportunity I had before me with freshly dug carrots. 


Carrot leaves are delicate in flavor. I've decided not to freeze the leaves for future additions to soups and stews this year, but instead see them as a focal ingredient to use in a seasonal soup or an unusual pesto. The availability of fresh carrot leaves is fleeting each year. They will only stay fresh on my newly dug carrots for a day or two. Today I made a cream of carrot soup that was quite delicious. Tomorrow I plan on making a carrot leaf pesto. After enjoying the soup at lunch, I found myself rethinking the leaves as an extra part of the vegetable and more of a part on equal footing with the roots.

I have a similar experience with the garlic scapes each year. I'd grow the garlic for the scapes alone each year, they're that delicious. And yet when was the last time you saw garlic scapes sold in the supermarket? 

Many of the delicacies we gather from the garden are so fragile and have such a short store-life, only home gardeners get to enjoy them. 

So, instead of thinking how unfortunate it is that I can't grow iceberg lettuce or corn, I'm trying to see how rich I am in many delightful treats that others don't have available to them.


Tuesday, October 8, 2024

Busy-Day Biscuits

I've mentioned these biscuits in posts before and have been asked to provide a recipe and how-to. So, since I made some to go with dinner tonight, I thought this would be a good opportunity to share.

biscuits split and spread with pumpkin butter

This method for making biscuits is about the quickest I can do with scratch baking. Both my ingredient list and method are simplified in order to get the biscuits into the oven as quickly as possible. It takes 5 minutes, tops, to mix the dough and get these onto a baking sheet. No cutting in shortening, no rolling and cutting out dough. Just simply mix and drop the dough.

dry ingredients dumped into bowl

Ingredients:

2 cups flour (I use 2/3 cup whole wheat + 1 1/3 cup all-purpose)
1 tablespoon baking powder
1/2 teaspoon salt
1/4 cup fat in liquid form (more on that below)
1 cup milk

bacon fat from the freezer, about 3 T.

For the fat, you can use liquid oil or solid fat, such as coconut oil, butter, shortening, or rendered meat fat such as bacon fat. 

If using a solid fat, melt it in the microwave before adding to the dry ingredients. In this batch, I used part bacon fat and part vegetable oil. I melted the bacon fat in the microwave, then added oil to the 1/4 cup line on the measuring cup.

melted bacon fat

I topped off the bacon fat with vegetable oil to the 1/4 cup line


How to:

Preheat oven to 450 degrees F. Lightly grease a baking sheet. 

Measure the dry ingredients into a mixing bowl. Use your mixing spoon to stir up these ingredients before adding anything else. This should take 30 seconds or so. 

Pour the liquid fat over the dry ingredients and stir in until there are clumps of fat-soaked flour throughout. Pour the milk over all and stir together to form a stiff dough.

Drop by large spoonfuls onto baking sheet. Don't fuss with the dough too much. I scoop it by spoonfuls, then use a rubber spatula to turn the spoonful of dough out onto the baking sheet.

Bake for 10 to 15 minutes, until lightly browned. Time will depend on the size of each biscuit (my batch made 10). The degree of browning will depend on whether or not you substitute whole wheat flour for some of the all-purpose. More whole wheat flour will result in less browning, but they're still fully baked.


I often make a half-batch and bake on a small baking sheet. A half-batch is about right for one meal for my family of 4. Tonight I baked a whole batch so we could enjoy these with breakfast in the morning.

split hot biscuits and spread with favorite topping

I typically get these into the oven just before I set the table, toss the salad, fill the water pitcher, and dish up the rest of dinner. They come out of the oven piping hot as we're finished saying grace. Our oven is 4 feet from the table. So, cracking the oven door open after baking warms us up on chilly fall and winter evenings.

There you go -- how I make scratch biscuits the quick and easy way. Do you make drop biscuits?


Monday, October 7, 2024

No-Egg, No-Butter, No-Milk Snack Cake (Pumpkin and Other Variations)

I had a busy day in the kitchen today. I was processing some garden produce and baking bread. While I had the oven hot, I also thought I'd bake a quick and easy autumnal cake for my family to enjoy this October week. I made the Pumpkin Spice variation of this snack cake. 

I've shared this recipe before, but it's such a great one to have in your back pocket, I wanted to share it )or the link to it), once again. It takes no eggs, no butter, and no milk. Plus it mixes right in the baking pan, so there's less to wash up afterward. Both eggs and butter are expensive for me right now. So this cake is not only an easy dessert, but a budget-stretching one as well.

Sometimes I frost these cakes. Other times, like tonight, I serve it in squares unfrosted. Since I know my family members will snack on this cake tomorrow or have some with breakfast, I made it a little healthier. I substituted 2/3 cup of whole wheat flour for some of the white flour in the batter. So it has some whole grain, plus some pumpkin. That should give it some health-points.

Anyway, I wanted to bring this recipe to the front of minds now that it's pumpkin and apple season (you can make this cake with applesauce in place of pumpkin). I'll add that for the pumpkin variation, I use 1 teaspoon of any of the fall spices, not just allspice. For today's cake, I used a combination of cinnamon, ginger and cloves totaling 1 teaspoon. 

Enjoy!


Thursday, October 3, 2024

Sometimes the homemade version costs more or the same as the commercial convenience food. Why is that?

We'll first rule out poor shopping (paying more) for ingredients, as I know we all shop carefully for the foods we buy, even if we're not buying super large sizes of everything.

There's also the thought that commercial products are manufactured in bulk, working with bulk-priced ingredients. But I don't think that's the whole story.

The real answer, I believe, is we tend to use better ingredients and more of the good part of the ingredient list than the manufacturers do. 

Take the cream of celery soup I made the other day. You can see my ingredients. If I were to make a label for what's in mine, the first ingredient (the most by volume) would be celery, followed by milk, then onion, then stock, flour, butter, oil, and seasonings.

Let's compare the homemade ingredient list to that of a commercial cream of celery soup.

Here's an image of the label from a can of Great Value Cream of Celery Soup:


What? The first ingredient is water. Shocking, huh? It doesn't say dehydrated celery, just celery. Cream is listed as less than 2%, following salt. So there's less cream in the commercial "cream" of celery soup than there is salt. And there's no butter at all! The fat used is entirely soybean oil. If this isn't enough to make me want to always make my own, there are several ingredients on the list that I'm not interested in consuming.

So, when you make your version of a commercial product from scratch at home, and it doesn't seem like it's saving you much money, think about the nutrients that you're getting in your homemade product. Think about the whole food ingredients that went into your version. Think about the ingredients that you didn't include in your scratch version. 

Like I said yesterday, with my cream of celery soup, I use 1/2 that recipe for a tuna casserole to feed the 4 of us. With the celery and onion that each of us are getting in our portion of the soup alone, it amounts to about a half-serving of vegetables. That's before I add the other vegetables that make my dish a casserole. 

So, as I said, I did save money by making my own cream of celery soup. So what about other examples of convenience items where it may cost a bit more to make your own? How about boxed mac and cheese? Walmart's Great Value Original Macaroni and Cheese sells for 58 cents. That's pretty cheap. It serves 3 people. If I were to make a scratch version to feed three, I estimate my batch would cost about $1.00 to $1.10. 

My ingredient list would read as follow, from greatest amount to least: pasta, milk, cheddar cheese, butter, salt, ground mustard powder, pepper. Pretty basic and pretty simple.

Here's the ingredient list for the Great Value mac and cheese taken from Walmart's website:


There are cheese-like ingredients and derivatives, but no plain old cheese on the list. The "cheddar cheese seasoning" first ingredient is whey. Whey is a by-product of the cheese-making process. Now I know that whey is sometimes added to "health food" products, like protein shakes. But do we really think Walmart is adding whey to their mac and cheese because of its health value? I'm sure that the recipes for these products are made with profit in mind as a co-op between the kitchen and the financial wings of the company.

Anyway, I'm glad that my homemade versions contain real food ingredients that not only am I familiar with, but my great grandmother would be as well.

So my answer to why a homemade version isn't always abundantly cheaper than its commercial counterpart I believe has to do with the quality of the ingredients. Better quality simply costs more. But it's also tastier and most of the time it's better for us.


Wednesday, October 2, 2024

Condensed Cream of Celery Soup for Casseroles (Freezable)

Here's another recipe featuring one of the budget fall vegetables that I wrote about last week, celery. 


This isn't one of those "must follow this recipe exactly" sort of recipes. Play around with the seasonings. Add just a bit of what's recommended then adjust according to what you have on hand and what you prefer.

This recipe makes about 2 10.5-ounce cans worth of condensed cream of celery soup. This is so good in tuna casserole. In my household of 4 adults, it's double what I need for a single tuna casserole using 2 cans of tuna and about 1  1/4 cups of dried macaroni noodles plus a cup or two of vegetables. I freeze the leftover half of the batch to use in a future casserole. 


Condensed Cream of Celery Soup

Ingredients:

2 tablespoons vegetable oil
2 tablespoons butter
1 cup diced onion
2 1/2 cups diced celery and leaves (if you like a "whiter" soup, use only the ribs, no leaves)
1 clove garlic, minced
1/3 cup flour
1 1/2 cups rich milk or milk substitute
1/2 cup stock (vegetable or chicken) or water
1 to 1  1/4 teaspoons salt (add the lesser amount and adjust according to taste)
1/8 teaspoon black pepper
3-4 quick dashes nutmeg
a pinch sugar
1/2 teaspoon dried thyme
1/8 teaspoon celery seed
1 tablespoon butter, optional

Melt the butter in the oil in a heavy-bottomed saucepan. Saute the onion in the melted butter/oil until translucent. Add the diced celery and cook for 5 minutes, stirring occasionally. Add garlic.

Stir in 1/3 cup flour. While stirring, slowly pour in the liquids (milk and stock). Cook, while continuing to stir, until the sauce thickens. 

Stir in seasonings. Remove from heat. Allow to cool for a few minutes. Blend in a pitcher blender, or with an immersion blender, or in a food processor.

For additional richness, especially if using a dairy alternative milk, swirl in 1 additional tablespoon butter. Taste for seasonings and add more if desired.

If you don't have all of the herbs and spices, this will still turn out tasty for use in a casserole.

Yields 3 cups of condensed soup or the equivalent of two 10.5 ounce cans of cream of celery soup.


This soup can be frozen to use in casseroles in the future. Stir well upon thawing. 

As for cost . . .

If I were to buy all of the above ingredients, the cost for this recipe would be about $1.30 or less for two cans worth, or 65 cents per can! Walmart's Great Value brand Cream of Celery Soup sells for 92 cents per can. Campbell's Cream of Celery sells for a whopping $1.72 per can. That's $1.30 for 2 cans homemade vs $1.82 for 2 cans Great Value or $3.44 for 2 cans Campbells. 


What if you don't love or don't have celery? You can make a thick white sauce for binding casseroles, or make a cream of whatever-vegetable-you-have condensed soup following the above recipe using said vegetable in place of celery. For the most part, the flavor of the binding condensed soup is significantly muted by the other casserole ingredients.

So there's the recipe for the condensed soup to use in casseroles. Stay tuned for tomorrow's post as a continuation of this one.

Tuesday, October 1, 2024

Our neighborhood is doing something really fun right now


It started with one of my daughters baking brownies to share with a neighbor who spent a small fortune on fireworks for the 4th off July that they set off in the front of their house so everyone could watch. Next another neighbor gave a bunch of neighbors some fresh melons. This was followed by yet another neighbor with plum and fig trees that produced abundantly. She shared her bounty with several of the neighbors. Then my other daughter baked some blackberry pies and delivered slices of pie to several neighbors, including the melon neighbors and plum/fig neighbor. 

The plum and fig neighbor shared even more plums and figs. I baked a large batch of  mini pumpkin loaves and paired it with some nice tea for neighbors. Then this afternoon, someone left a box of fresh apples on our doorstep with a note that simply said "went apple picking, some to share" signed by her first name. We're racking our brains trying to figure out which neighbor this is. I think I'll be doing more baking this week to deliver to our neighbors.

Anyway, this has been a fun and spirited season in this neighborhood, which is saying a lot. We're not known for the "Seattle chill" for no reason. People generally keep to their own friend group in my area. But this has been fun. Maybe our neighborhood is turning over a new leaf.

Monday, September 30, 2024

What was in my grocery cart for September?

a north-facing window seat -- our produce staging area for the time being

If you'll recall, last month I spent a whopping amount grocery shopping. Part of that was a beef delivery, which about doubled my spending for the month. Another hefty part was stocking up for an extended repair of our car after my daughter's accident. (The car is still not repaired -- ugh -- they ordered the lamp kit and it went missing. Waiting on a reorder. . .) Anyway, I expected to spend a lot, lot less this month, due to all of the stock-up last month and not having a car for several weeks.

So, how much did I spend? How did my shopping differ from my norm?

Here we go . . .

Just before turning in the car -- on the way home from church, we stopped at Fred Meyer to pick up hot dog buns and applewood smoking chips for our cook-out and smoke-out the next day. I spent $7.19. 

The car went in for repairs Tuesday morning, September 3.

By September 13 (Friday the 13th), we were out of milk and had no car. One daughter needed a few things for herself, so she took a bike up to the highway, then caught a bus to Walmart. She had enough room in her backpack to add a gallon of milk and head of cabbage for the family. I reimbursed her $7.21 for those items.

We found out our car was totaled -- repairs exceeded the value -- so my husband and I took 2 buses to get to a car dealership. We thought we'd just be looking, but we came home with our new-to-us car. Directly across the street from the car lot is a Walmart. We swung by there just to get bananas, turkey snack sticks, and a couple of non-food necessities, spending $8.05.

Loving having a car again, I happily drove to pick up one daughter from a cat and house-sitting gig on September 21. We stopped by QFC to get some apple cider. They had half-gallons of cider for $1.99.

September 26. In the deal for our car, we asked to have the windshield replaced. Today was the day it was scheduled. Both Grocery Outlet and Walmart are a short walk from the dealership. I went to Grocery Outlet for a package of bacon ($2.50) and Walmart for a gallon of milk ($3.56) and a bag of frozen turkey sausage links ($6.98). I spent $13.04 this day. The brand of bacon at Grocery Outlet is Top Valu. It's uncured bacon from Canada. The quality of the bacon is good, although the slices are irregular. GO's regular price on this bacon is $2.50/12-oz package, much, much less than bacon at Walmart or WinCo. I seek out uncured deli products when I can.

Something weird that I noticed in Walmart today -- the freezer compartment where frozen sausage is located was practically empty, ditto on the milk case. I haven't seen bare shelves like this in a couple of years. And it wasn't overly crowded when I've been lately. It doesn't feel like they're just selling out of everything quickly due to crowds. The last time I saw a milk shortage in a store was during a winter storm period when trucks couldn't get through mountain passes, I think in 2019. Eggs were $22.00 per 5-dozen case, almost $4.50/dozen at Walmart. I did see at Grocery Outlet that they had medium eggs for around $2.60 or $2.70/dozen. I'll be picking up several dozen eggs at Grocery Outlet later this week or sometime next week.

September 29. So far this month I have spent $37.48 for the month of September.

I'll stop right here for a moment. Grocery shopping in person without a car is challenging, but not entirely impossible if you have physical mobility. I wouldn't want to go through a month without a major stock-up again. My last major stock-up was the last week of August. So it has been a month using primarily what we had. The good news is that with a garden, I could do this in the summer and early fall months again if I had to. We got so much produce out of our own little yard. The garden along with a big stock-up in August carried us through, nicely.

What I bought this month through September 29:

2 gallons milk

2 packages turkey snack sticks
12 oz package bacon
bag of turkey breakfast sausage

1 head cabbage
1 bunch bananas
1/2 gallon apple cider

1 package hot dog buns
1 bag smoking wood chips

Now on to the rest of September's grocery shopping.  I could have bought more at Walmart the day we bought the car. But I didn't think we'd actually buy a car that day, but just look. So I didn't have a shopping list made out for a big shopping trip, and I really, really don't do well shopping without a list. Without the car, we would've been carrying the groceries home on 2 buses then walking a mile at the end. My husband is disabled and uses crutches all of the time. He couldn't have helped with the carrying. So the plan had been one bag of groceries at Walmart that day. As for the rest of the month, I've been busy with getting the garden taken care of and canning. 

Today, Monday the 30th, is the first day I could dedicate to a big shopping trip. I went to WinCo, which is further from our house that any of my other stores. WinCo has a great bulk section, and I needed a few bulk items. The rest of their prices meet or beat Walmart's most of the time.

Here's what I bought at WinCo this morning:

Fruits and Vegetables (fresh and frozen)
head of cabbage
bananas
2 bags Gala apples (green tag--means marked down)
jalapeños for salsa
green pepper
red pepper for relish
acorn squash
whole pumpkin
frozen broccoli

Bulk Section
bulk sliced almonds (for almond coconut bars)
bulk baking powder
bulk kosher salt (for relish, pickles, and salsa)
bulk iodized salt
bulk peanuts
bulk corn starch
bulk natural peanut butter, freshly ground
bulk orange slices candies

Meat
family pack boneless skinless chicken breast

Pantry
bag of dates
vegetable oil
5 jars of applesauce (green tag)
6 cans tuna (also green tag)
mayonnaise

Dairy
gallon milk
4 lbs butter (green tag)

I spent $109.07 today at WinCo, bringing up my monthly spend to $146.55.


This shouldn't be at the tail end of my post, but to all of those impacted by the hurricane and storm damage, my prayers are with you. We have friends here on this blog in NC, SC, Georgia, Tennessee, Virginia, and Florida. If you're okay, could you let us know? Take care, friends.

Thursday, September 26, 2024

Bacon-Pumpkin Quiche

just out of the oven and still puffed up

I have a recipe to share with you that uses 1 of the budget fall vegetables from yesterday's post, pumpkin (plus onions, which are also a budget fall vegetable.) I've been looking for more savory ways to use pumpkin, as it's such an affordable vegetable for me (especially when they grow well in our garden or when buying Jack o Lantern pumpkins for cooking in October). 


So this savory pumpkin pie sounded like just the right thing. The flavors of pumpkin, sage, onions, and Parmesan cheese complement each other really well. I make a pasta sauce with those ingredients (plus Italian sausage) that my family enjoys.

just before going into the oven

If using home-cooked pumpkin, drain off as much liquid in a mesh strainer before measuring as possible. I know one of us has a family member who doesn't do onions. This recipe could be made without the onions. Increase the bacon/ham and Parmesan cheese to compensate for flavor and bulk.

I loosely used the following recipe from Food Network: here. I decreased the fat, eggs and milk/cream, increased the onions and pumpkin, added the Parmesan cheese to the quiche and baked it longer. I also left off the arugula salad topping, as I didn't think my family would enjoy that. 


I served this with a tossed salad and a rice-millet combo. My family thought it was very good. It has a very mild pumpkin flavor and a rich and dense texture. The next time I make this (and it was good enough to qualify for a next time), I'll increase the sage and Parmesan just a bit, and add a dash of nutmeg.

Below is how I made mine.

Bacon, Caramelized Onion and Pumpkin Quiche

Ingredients:

6 to 8 strips of bacon, reserve about 1 tablespoon bacon fat --or 1 cup of ham diced plus 1 tablespoon fat
1 large yellow onion, sliced thin
1 cup pureed pumpkin (or butternut squash)
1 tablespoon thinly sliced fresh sage leaves or 1 tsp dried sage
1/2 teaspoon salt
1/8 teaspoon black pepper
6 large eggs
1/3 cup rich milk, heavy cream, or milk/cream substitute 
1/2 cup shaved Parmesan cheese or 1/3 cup of shelf stable grated Parmesan (shaved Parmesan lends a nutty and sweet flavor which compliments the caramelized onions) 
1 9-inch pie shell, chilled. Prick with fork, press foil into shell, covering edges. Bake at 400 degrees F for 10 minutes, allow to cool

Pre-bake the pie shell, covered. Set aside.

Pan-fry the bacon. Remove from pan. Pour off all but 1 tablespoon of the rendered fat. (If using a leaner smoked meat, such as turkey bacon, or lean ham, lightly brown the meat in about 1 tablespoon cooking fat, then set aside.)

Sauté the sliced onions in the pan from the bacon, stirring, until caramelized. Crumble the cooked bacon into the cooked onions. Stir in salt, pepper, and mince sage leaves or dried sage. 

Whisk eggs, pumpkin puree, milk/cream/substitute. Gently fold in the bacon-onion mixture and Parmesan cheese. Pour into baked pie shell.

Bake at 350 degrees F for about 45-50 minutes, until knife inserted comes out clean. Allow to stand for 10-15 minutes before cutting into servings. Yields 4 to 5 servings.

Bon Appetit!

~~~~~~~~~~~~~~~~~~~~~~~~~~~~~~~~~~~~~~~~~~
Be a voice that helps someone else on their frugal living journey

Are you interested in writing for creative savv?
What's your frugal story?

Do you have a favorite frugal recipe, special insight, DIY project, or tips that could make frugal living more do-able for someone else?

Creative savv is seeking new voices.


~~~~~~~~~~~~~~~~~~~~~~~~~~~~~~~~~~~~~~~~~~~~~~

share this post